After watching all Mr. Robot episodes, I somehow felt the need to buy an Amazon Echo and get introduced to Alexa. Luckily Amazon sent me an invite to buy Echo just a couple of days before Christmas and so I got the perfect gift for myself and an awesome reason to spend some time coding during the Christmas holidays.
Echo? Alexa? Why?
Alexa is Amazon’s awesome attempt to introduce a personal voice-controlled assistant to our living rooms, most comparable with Apple’s Siri or the services from Google. Voice controlled devices are all about the interface, and therefore I clearly prefer to call a service by a name like Alexa instead of saying OK Google all day.
The supported features in Alexa are called Skills and must be activated using Amazon’s companion app for Alexa and the Echo. Under the hood, they are just a list of configured voice commands with placeholders for variables and HTTPS request or direct invocations of AWS Lambda functions.
Let’s get started
As nobody wants to maintain infrastructure, let’s go for using AWS Lambda instead of hosting an HTTPS endpoint. I prefer to use the apex toolkit to get started with projects using AWS Lambda. Apex takes care of all the basic AWS setup and offers a nice and easy command line interface. Start with creating a project folder and initialize an apex project:
$ > mkdir alexa-example && cd alexa-example
$ > apex init .

Project name: alexa-example
Project description: Example skill for Amazon Echo and Alexa
Apex creates an example AWS Lambda function named hello by default. Remove the folder and create a new one to store our Alexa Skill which will answer a question, so let’s call it answer and place an index.js file inside the folder.
$ > rm -rf functions/hello
$ > mkdir functions/answer
$ > touch functions/answer/index.js
Invoke AWS Lambda function
To test the basic setup just add a simple structure for an AWS Lambda function to the index.js and trigger the callback function with a data object and without any error:
(() => {
  "use strict";

  exports.handle = (event, context, callback) => {
    callback(null, { done: true });
  };
})();
When using apex, it’s now dead simple to deploy that function to Amazon Web Services and invoke the deployed code from your command line.
$ > apex deploy

• creating function         env= function=answer
• created alias current     env= function=answer version=1
• function created          env= function=answer name=alexa-example_answer version=1

$ > apex invoke answer

{"done":true}
Basically, that’s all you need as the foundation of handling a request for a custom Alexa Skill.
Alexa’s response
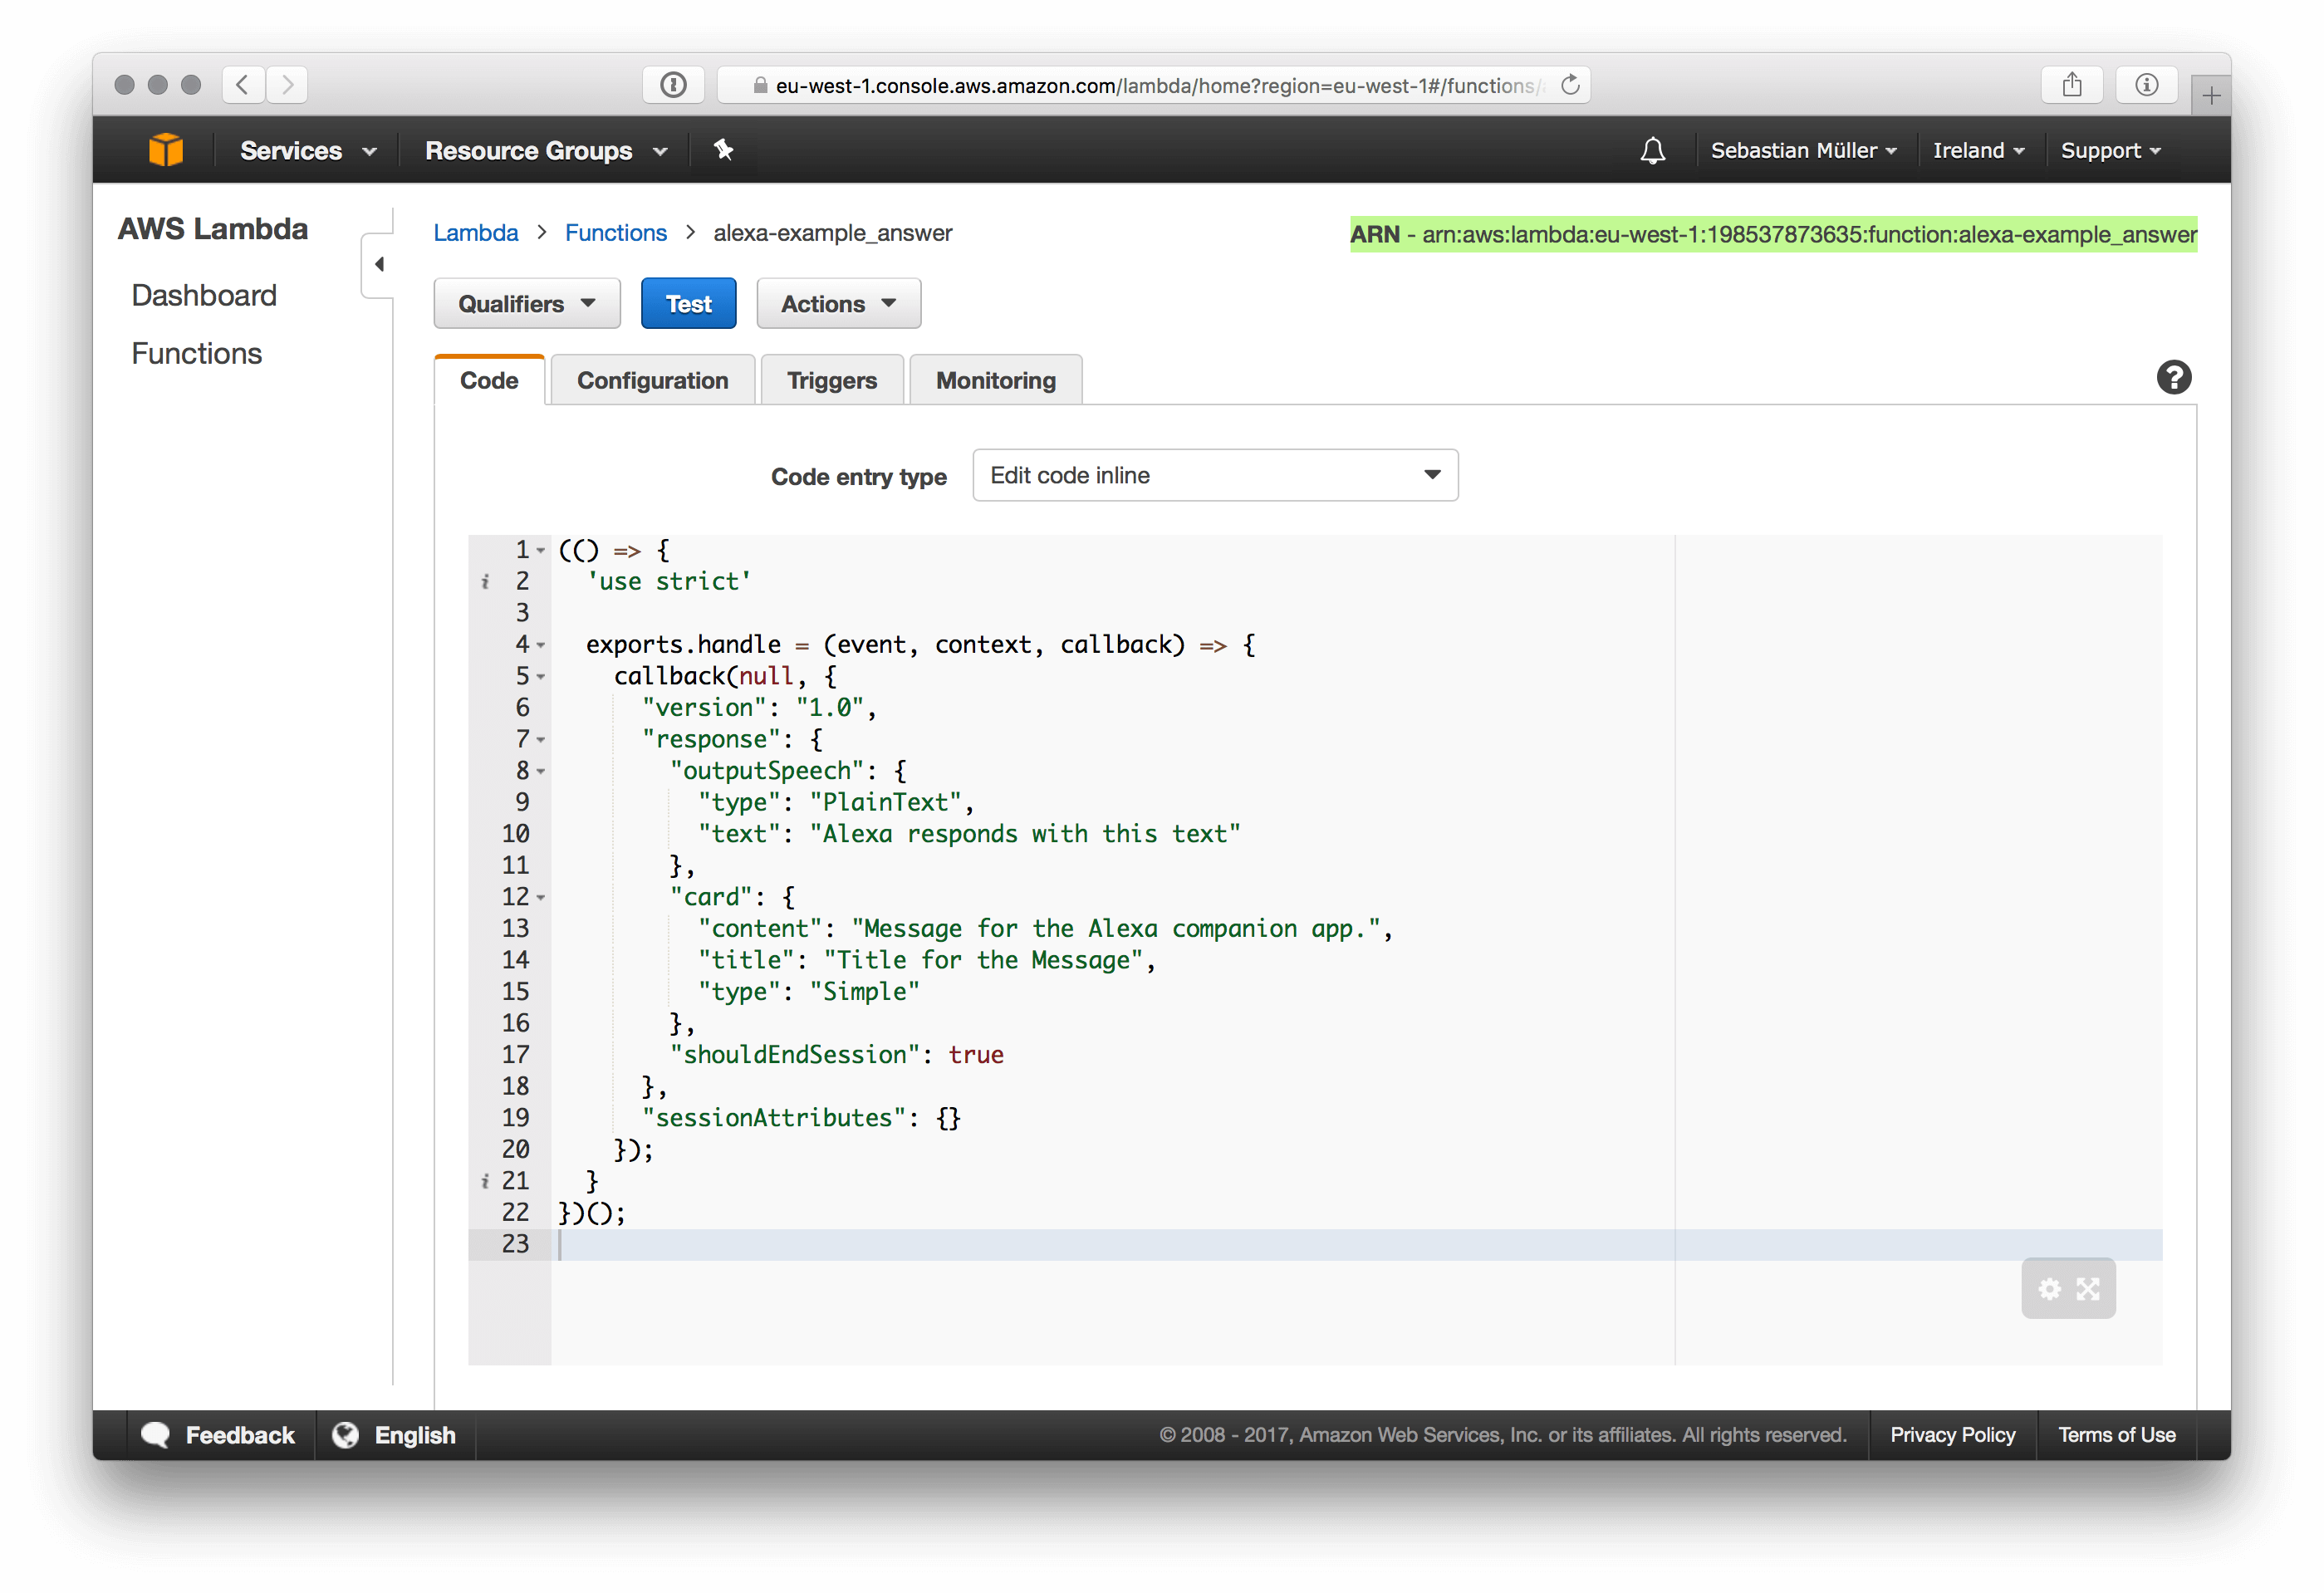
Amazon requires your Lambda function to return JSON data in order to process the information for Alexa. The minimal structure for a response comes down to – of course – the sentence Alexa will say and some information about the answer to the request to display and rate in the Alexa companion application on your mobile phone.
(() => {
  "use strict";

  exports.handle = (event, context, callback) => {
    callback(null, {
      version: "1.0",
      response: {
        outputSpeech: {
          type: "PlainText",
          text: "Alexa responds with this text",
        },
        card: {
          content: "Message for the Alexa companion app.",
          title: "Title for the Message",
          type: "Simple",
        },
        shouldEndSession: true,
      },
      sessionAttributes: {},
    });
  };
})();
You will see how the final function looks like after the next steps, or you can take a sneak peek at the GitHub repository of course …
Amazon Developer Console
In order to test and use the Alexa Skill, you need to sign up for a free Amazon Developer Account. After you are logged in to your account, you can access the Alexa section and get started with using the Alexa Skills kit to create your Skill.
Right now all custom Alexa skills need be invoked by a command – for example, their name. As long as you do not write a Skill for a known company you are required to configure a name and invocation command with two words, for example, Example App:
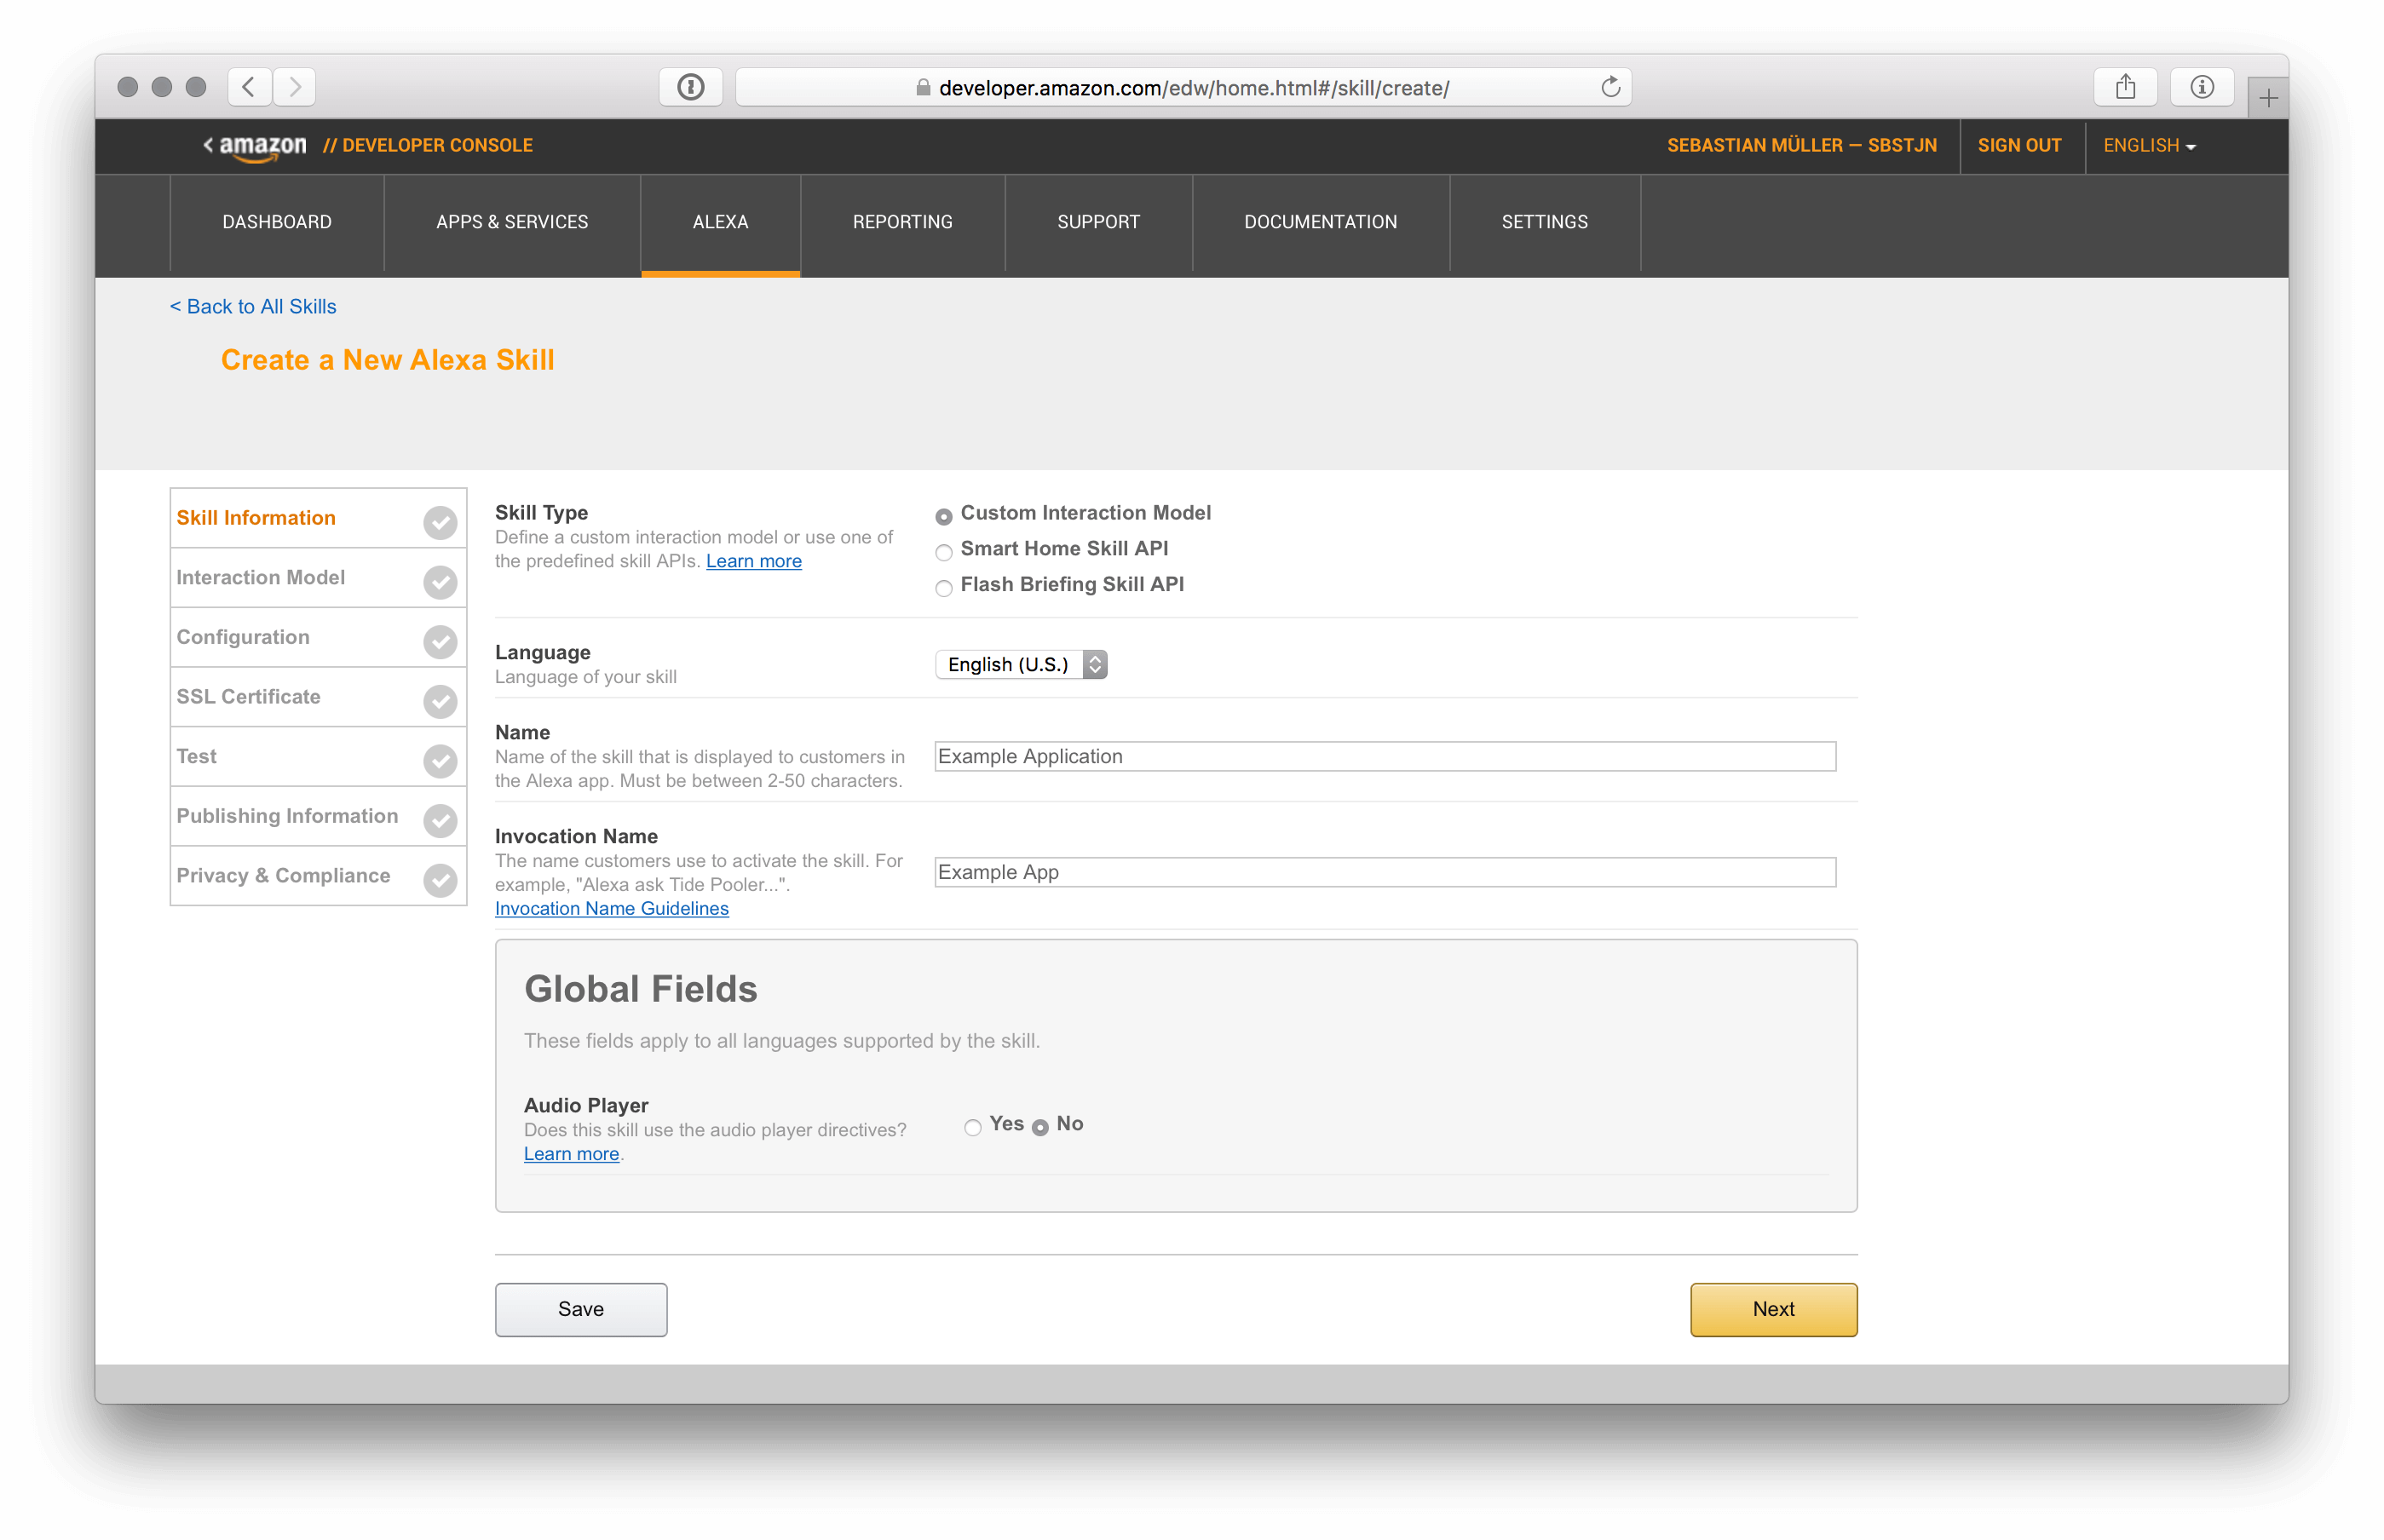
Using this configuration your Echo will respond to voice commands like Alexa, open Example App and Alexa, ask Example App XYZ .
Interaction Model
All Alexa skills have a so-called Interaction Modell which lists all supported commands and the type definition of their arguments. To get started with a simple skill just configure an intent and copy and paste the default intents for a typical skill.
The following configuration registers a function identifier answer with one argument called item and AMAZON.NUMBER as its type.
{
  "intents": [
    {
      "intent": "answer",
      "slots": [
        {
          "name": "item",
          "type": "AMAZON.NUMBER"
        }
      ]
    },
    {
      "intent": "AMAZON.HelpIntent"
    },
    {
      "intent": "AMAZON.StopIntent"
    },
    {
      "intent": "AMAZON.CancelIntent"
    }
  ]
}
Amazon supports a lot of types for a slot in your command. For this first example application, it’s fine to use AMAZON.NUMBER, but there are much more available!
Sample Utterances
The list of sample utterances define all requests your Skill will respond to. Every line starts with the intent identifier – in this case, it’s answer – and is followed by the sentence you plan to say to Alexa.
answer  what is {item}
answer  what's {item}
Together with the initial configuration of your Skill Alexa will recognize a command whenever you say something matching the pattern Alexa, ask Example App what is XYZ .
Configure AWS Lambda endpoint
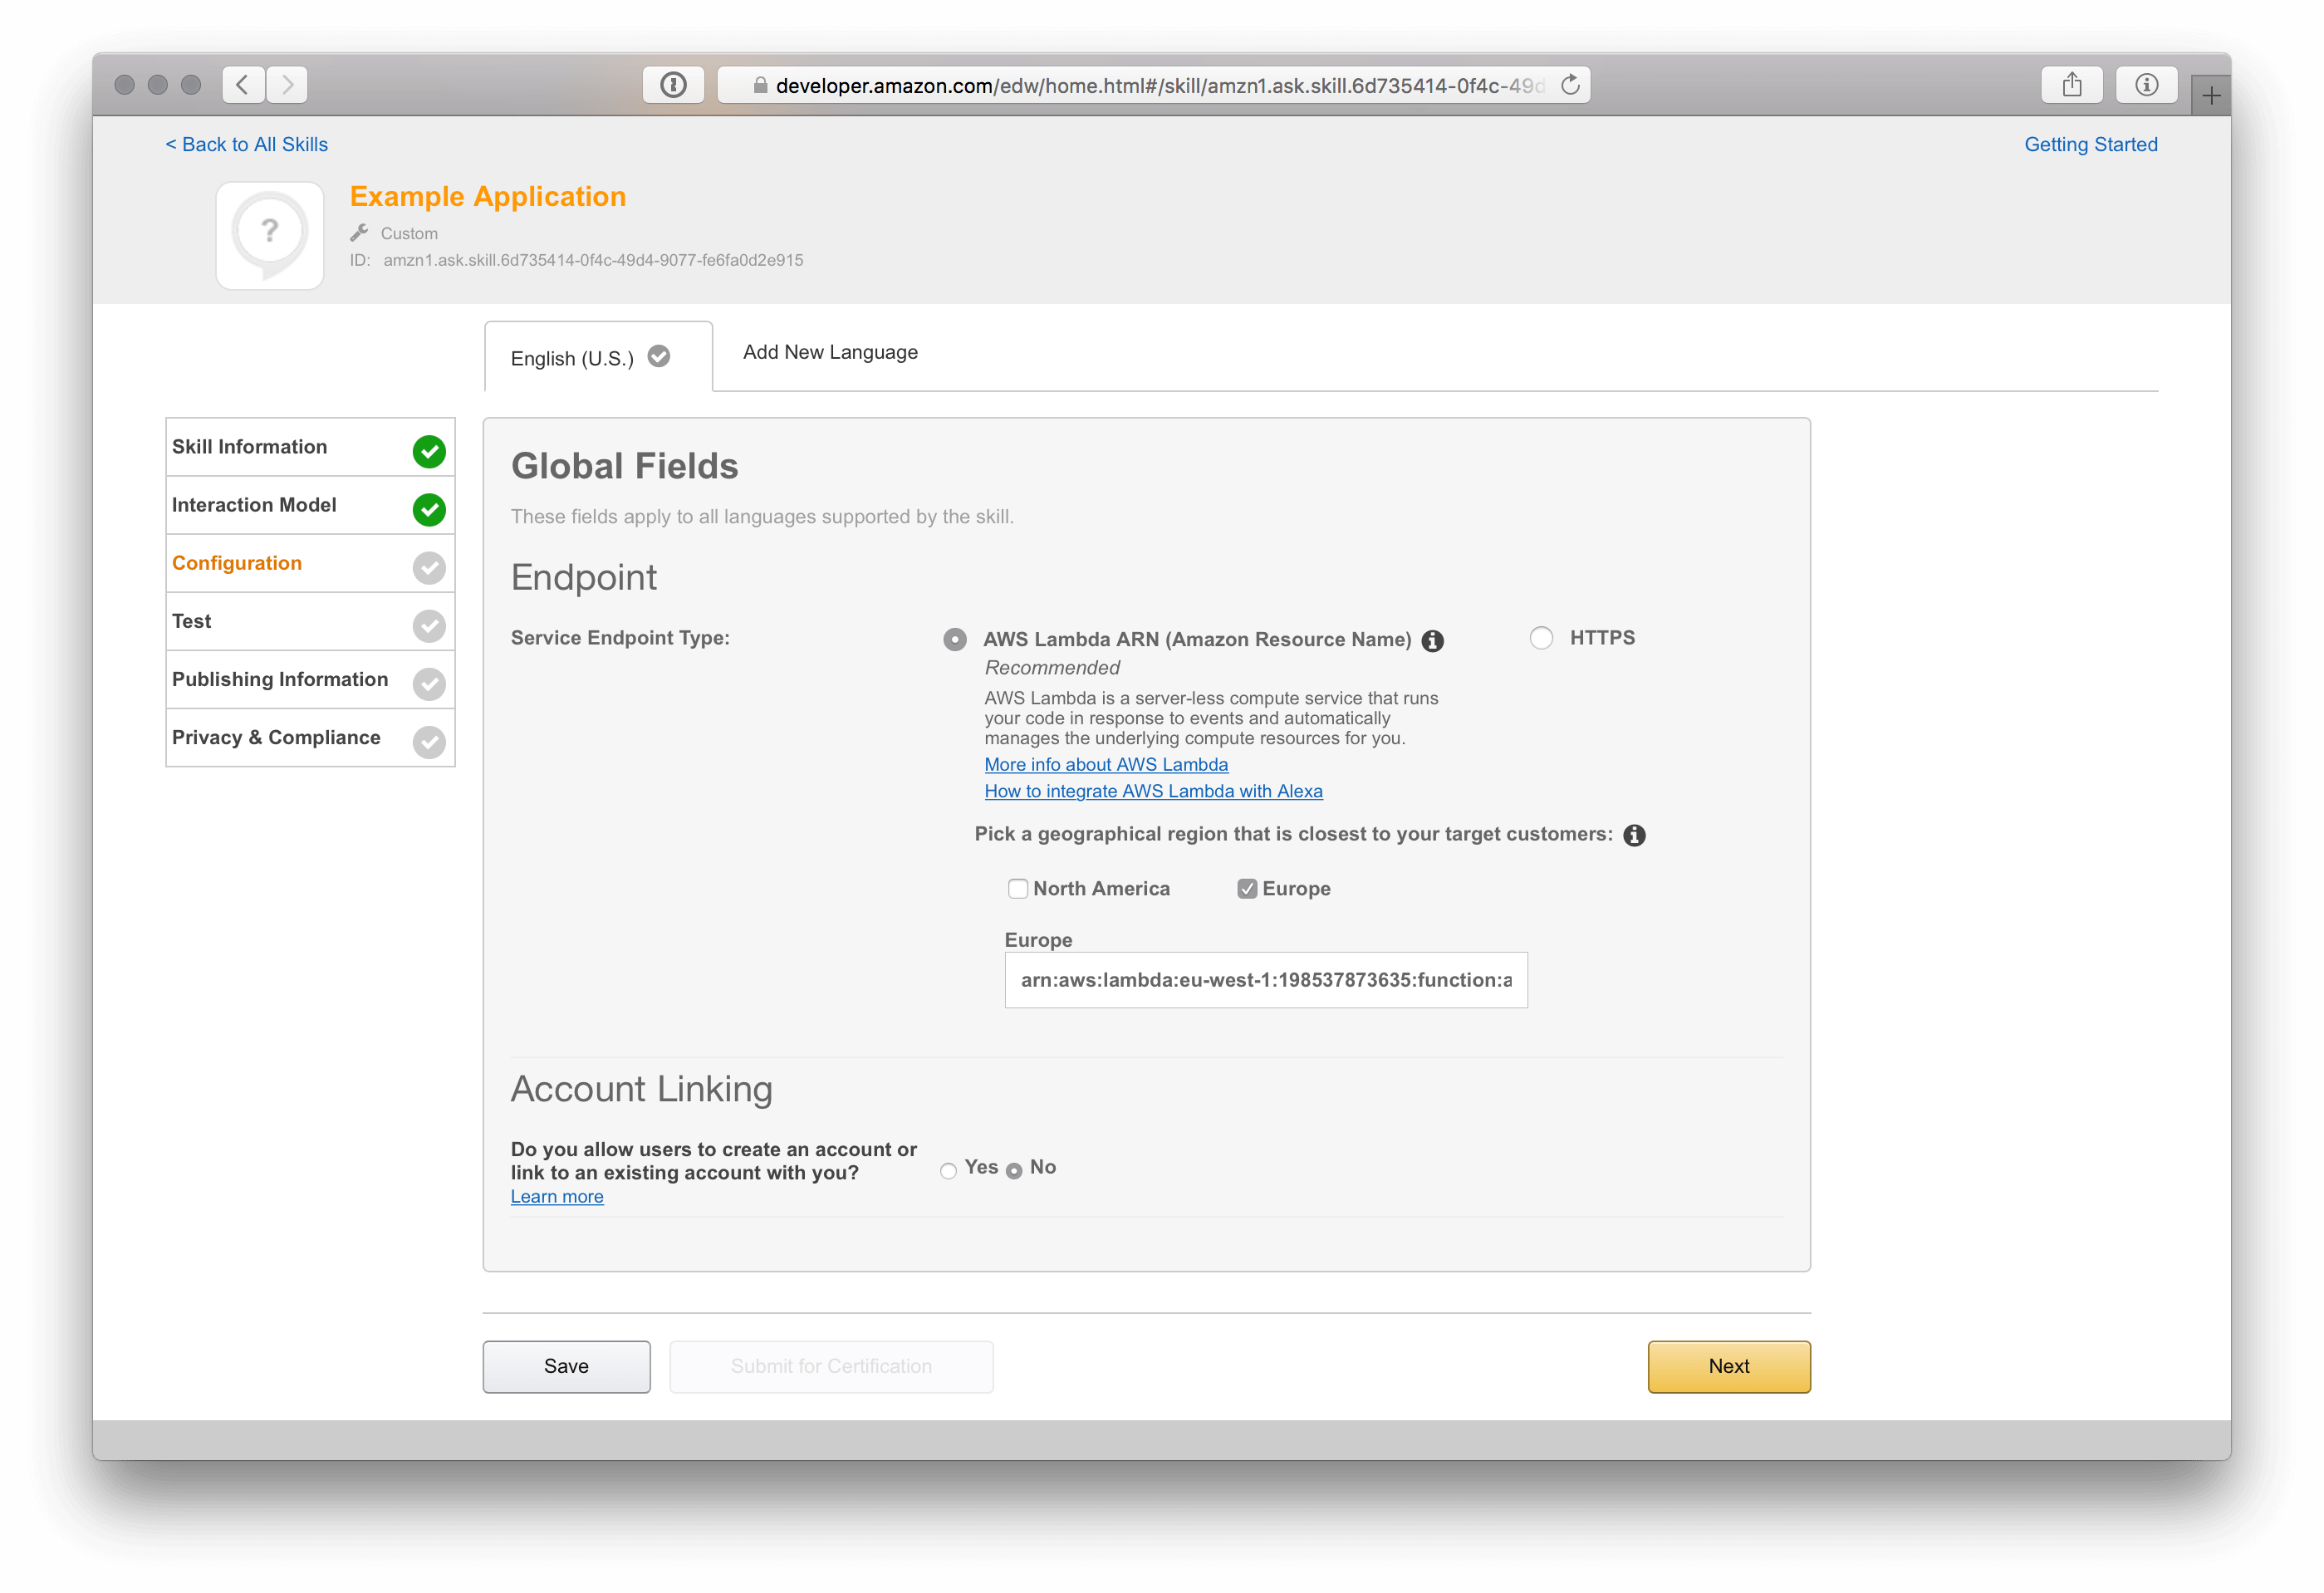
On the next screen of Amazon’s configuration wizard, you are prompted for your AWS Lambda ARN of the deployed function which responds to a request by Alexa.
You can obtain the needed ARN information after logging into your AWS account and selecting your deployed AWS Lambda function. The ARN is located in the top right corner, just copy it into the wizard and make sure you have selected to correct AWS region.
The wizard won’t let you save the ARN information unless you configure the AWS Lambda function to be triggered by and Alexa Skill Request. AWS Lambda functions can be triggered by a wide variety of things, like requests from an API Gateway or events from CloudWatch, but in this case, make sure to select Alexa Skill Kit:
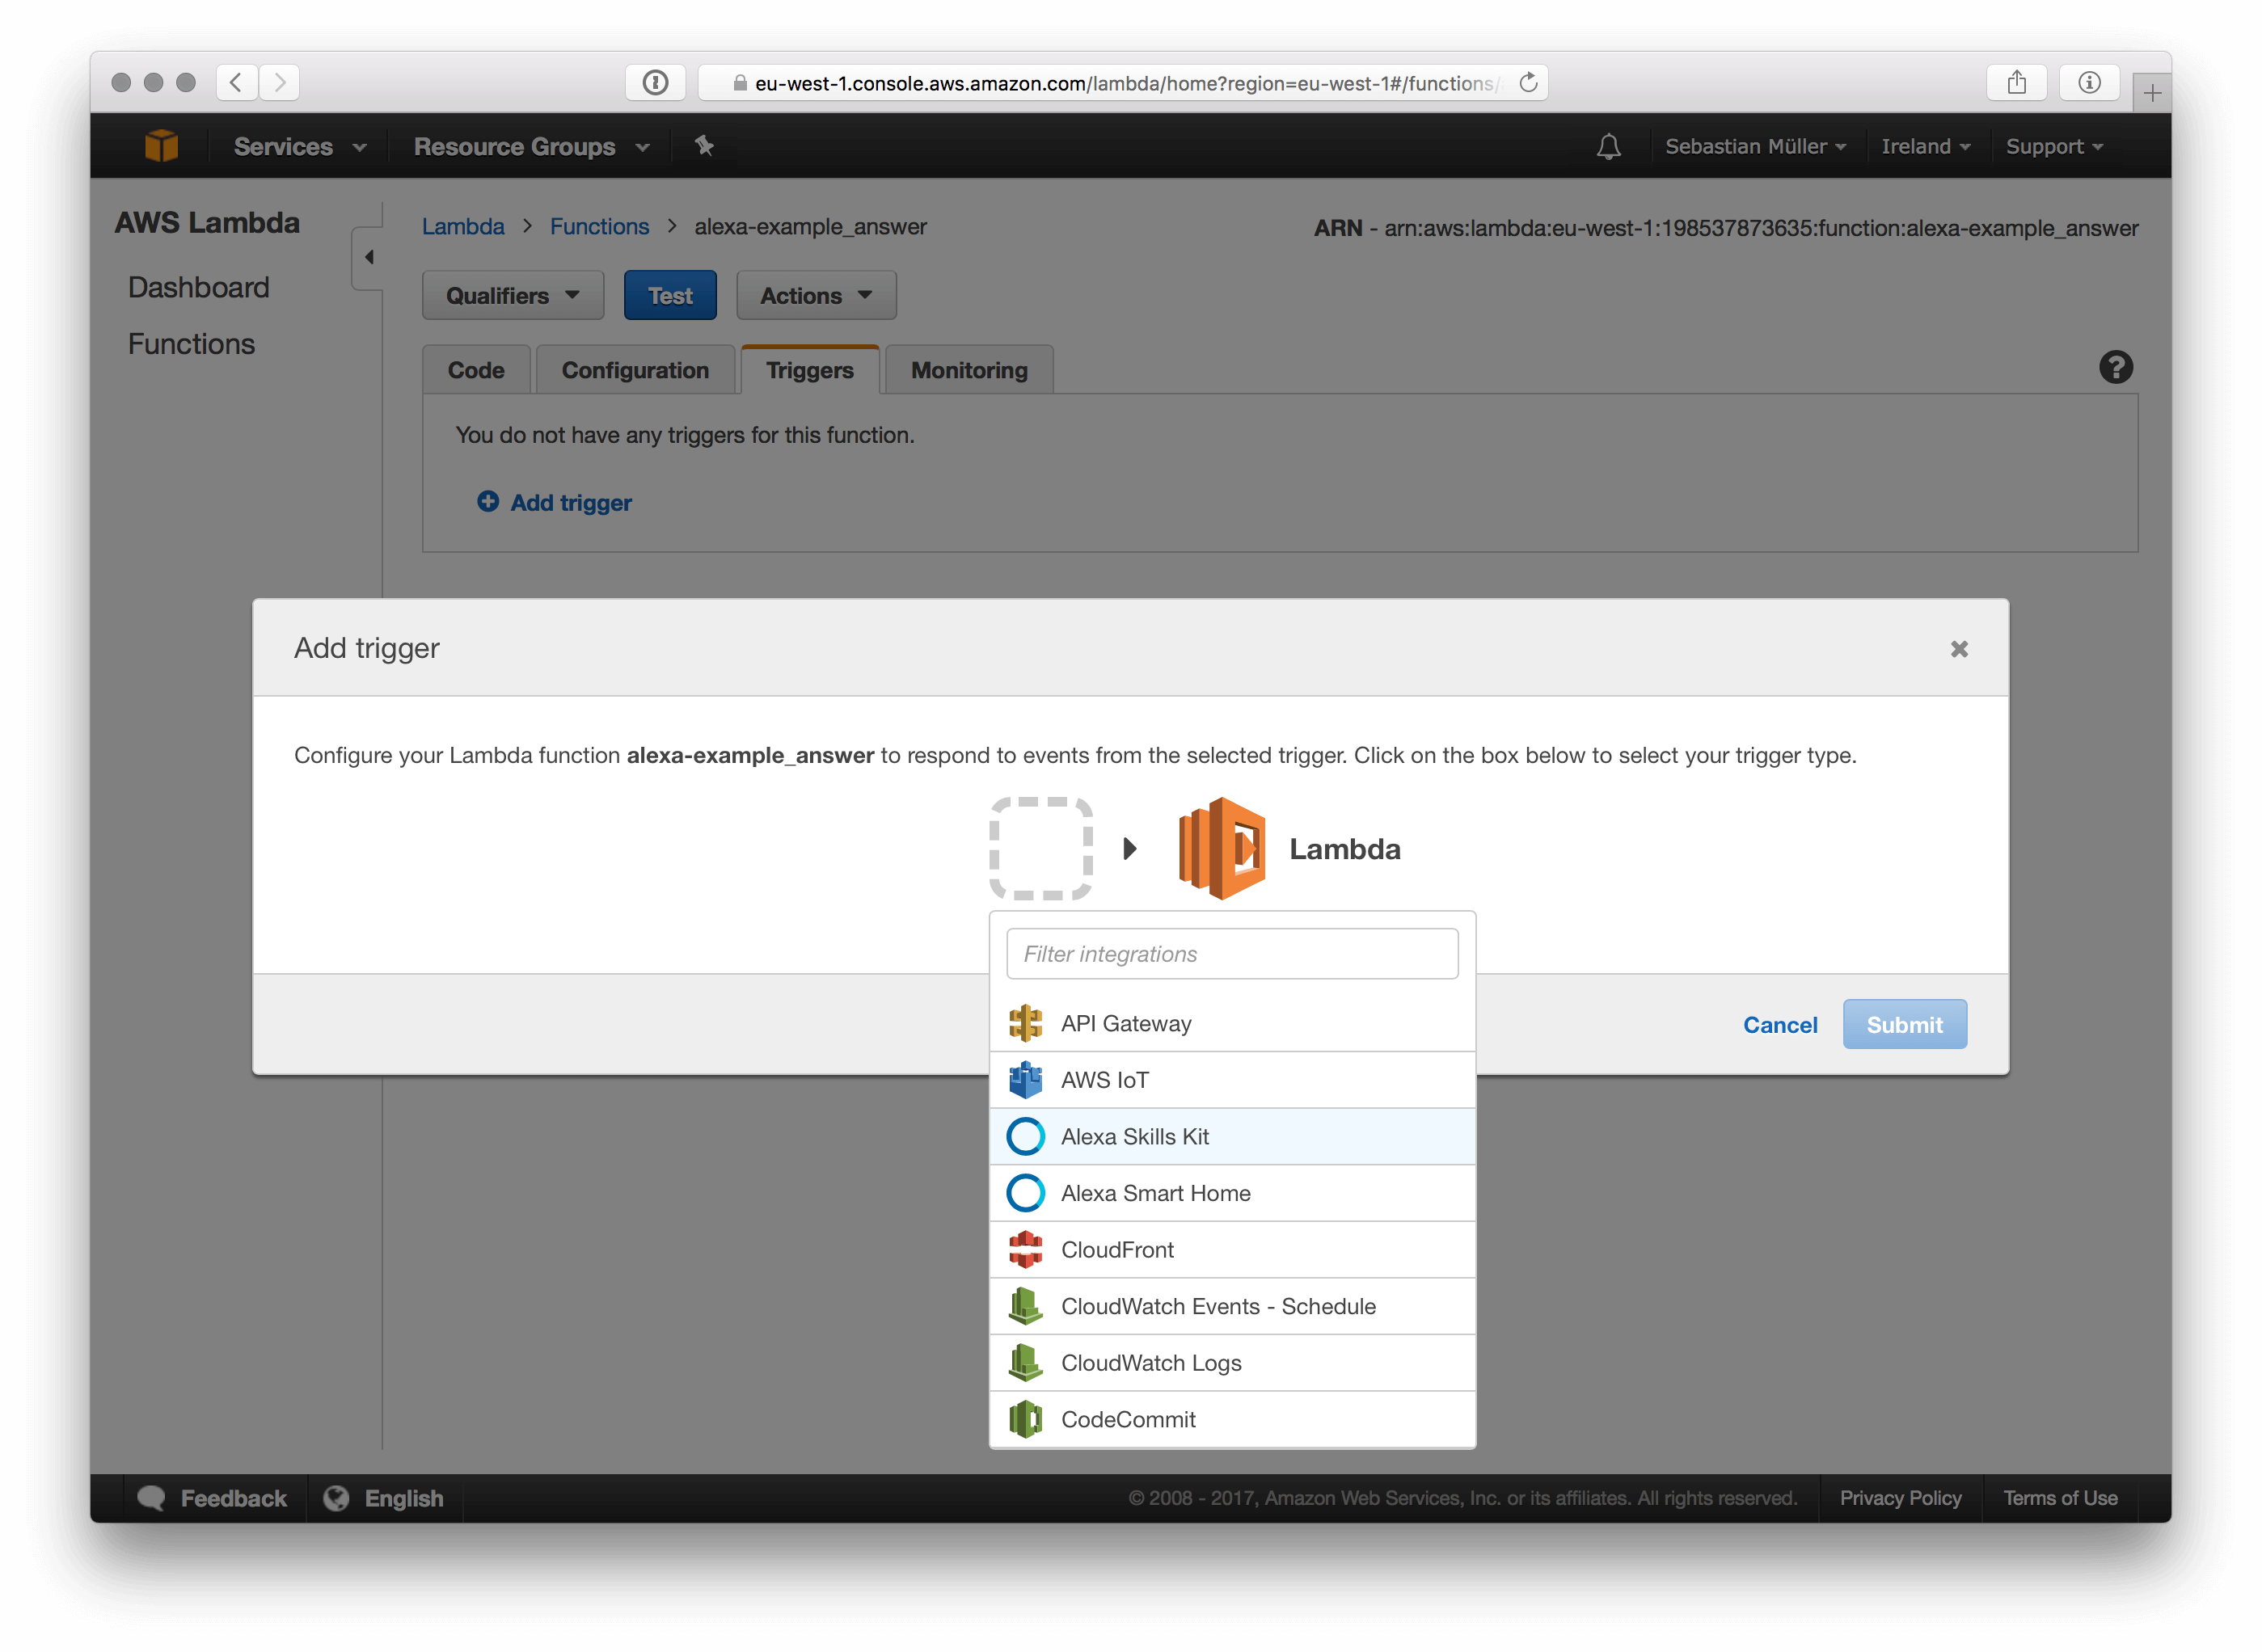
After you enabled the Alex Skill Kit as the trigger for your AWS Lambda function, the Amazon wizard will allow you to proceed to the next step of configuring your new Alex Skill.
Alexa Simulator
Luckily Amazon has something called Service Simulator for Alexa, so you don’t have to wake up everybody in your house if you plan to debug and enhance your Alex Skill in the middle of the night.
If you set up everything correct, you should be able to enter an Utterance like What is 5? and be shown the static response of the deployed function. In this case, Alexa responds with this text from the JSON structure a few step before.
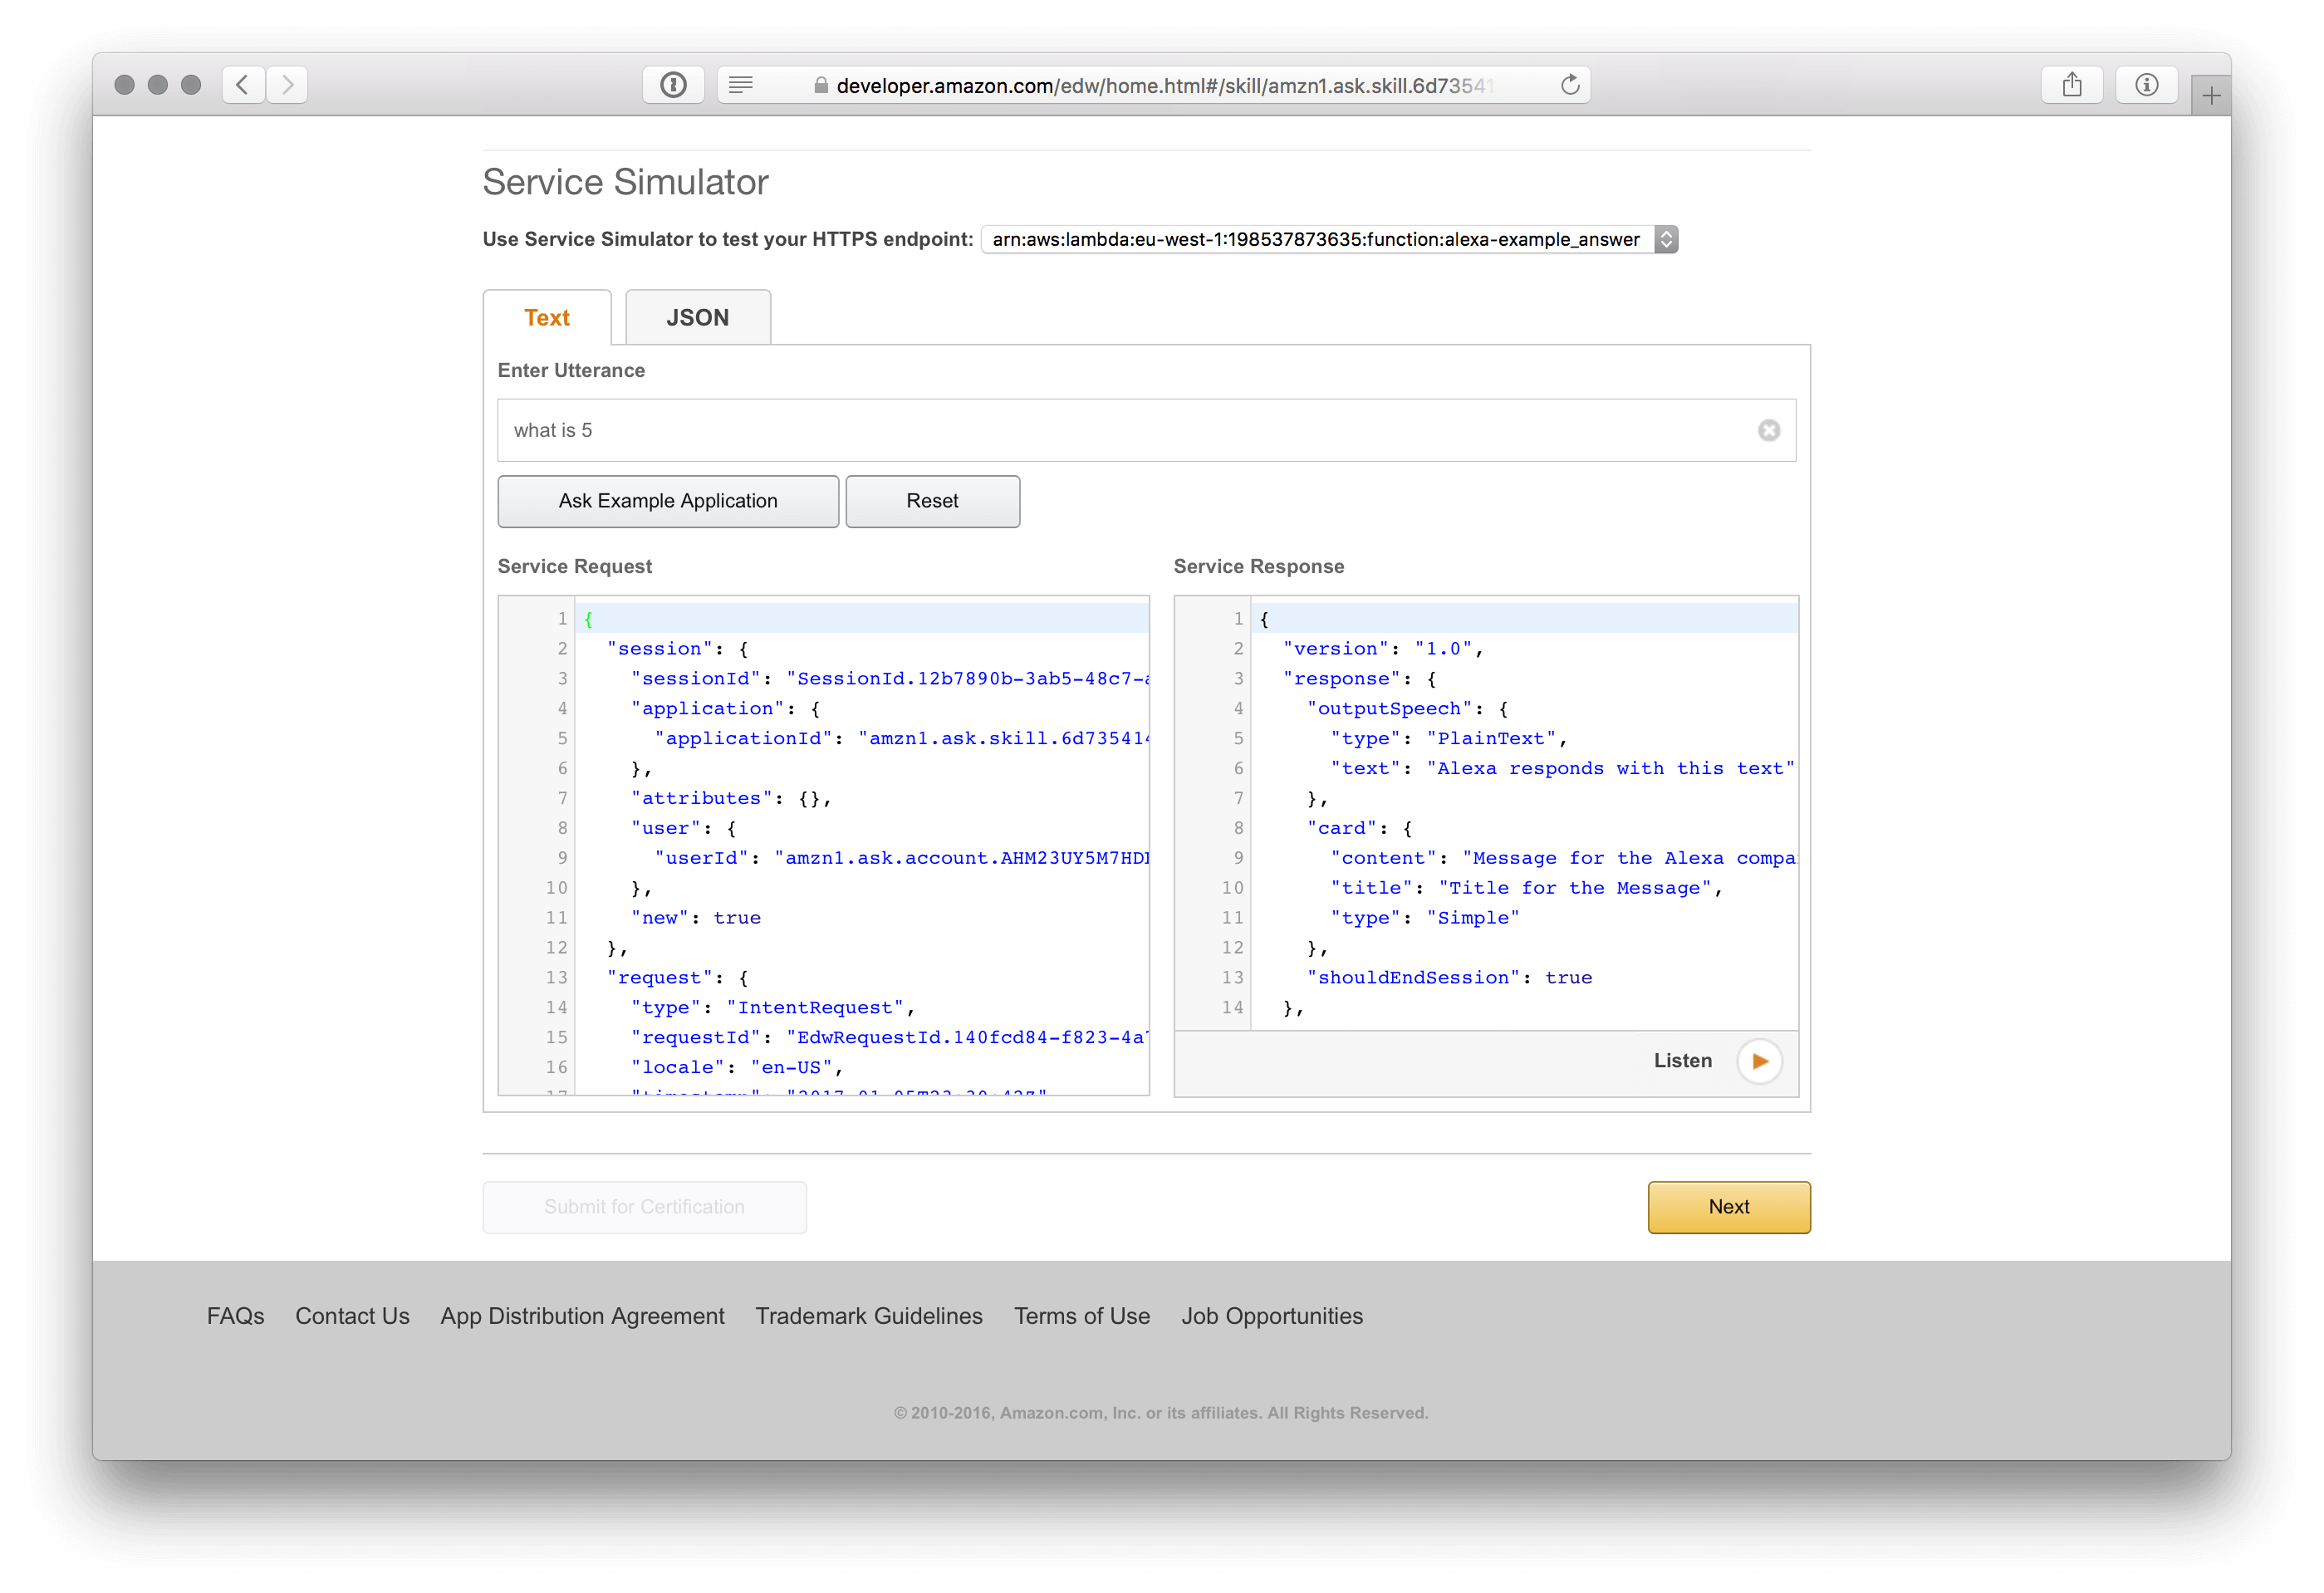
Whenever you encounter some strange behavior use apex logs -f to see all logging output of your AWS Lambda function!
Update and deploy Lambda function
Of course, there is nothing great about having a custom Alex Skill which will always respond with the same answer to your question. So spice up your index.js code with a little logic and let Alexa check the input you provide and respond with a different sentence on special arguments. Besides the check for input parameters this is a good time to add some basic checks for the event structure to make sure your function will not throw an Exception:
(() => {
  "use strict";

  const assert = require("assert");

  const answer = (title, message) => {
    return {
      version: "1.0",
      response: {
        outputSpeech: {
          type: "PlainText",
          text: message,
        },
        card: {
          content: message,
          title: title,
          type: "Simple",
        },
        shouldEndSession: true,
      },
      sessionAttributes: {},
    };
  };

  exports.handle = (event, context, callback) => {
    try {
      assert(event.session);
      assert(event.session.application);

      assert(event.request);
      assert(event.request.intent);

      assert(event.request.intent.name.toLowerCase() === "answer");
      assert(event.request.intent.slots.item.value);
    } catch (e) {
      callback(
        null,
        answer("Invalid request", "Sorry, but I cannot handle your request")
      );
    }

    var item = event.request.intent.slots.item.value;

    if (item * 1 === 42) {
      callback(
        null,
        answer(
          "42",
          "42 is the answer to the Ultimate Question of Life, the Universe, and Everything!"
        )
      );
    } else {
      callback(
        null,
        answer("Asked for " + item, "I don't know anything about " + item)
      );
    }
  };
})();
After you deploy the code above Alexa will respond with different answers to the questions Alexa, ask Example App what is 5 and Alexa, ask Example App what is 42 . Isn’t that awesome?!
Testing Alexa Skill
Beside the Alexa Service Simulator, you can easily enable testing with your device and start talking to Alexa while deploying a new version of your Lambda function.
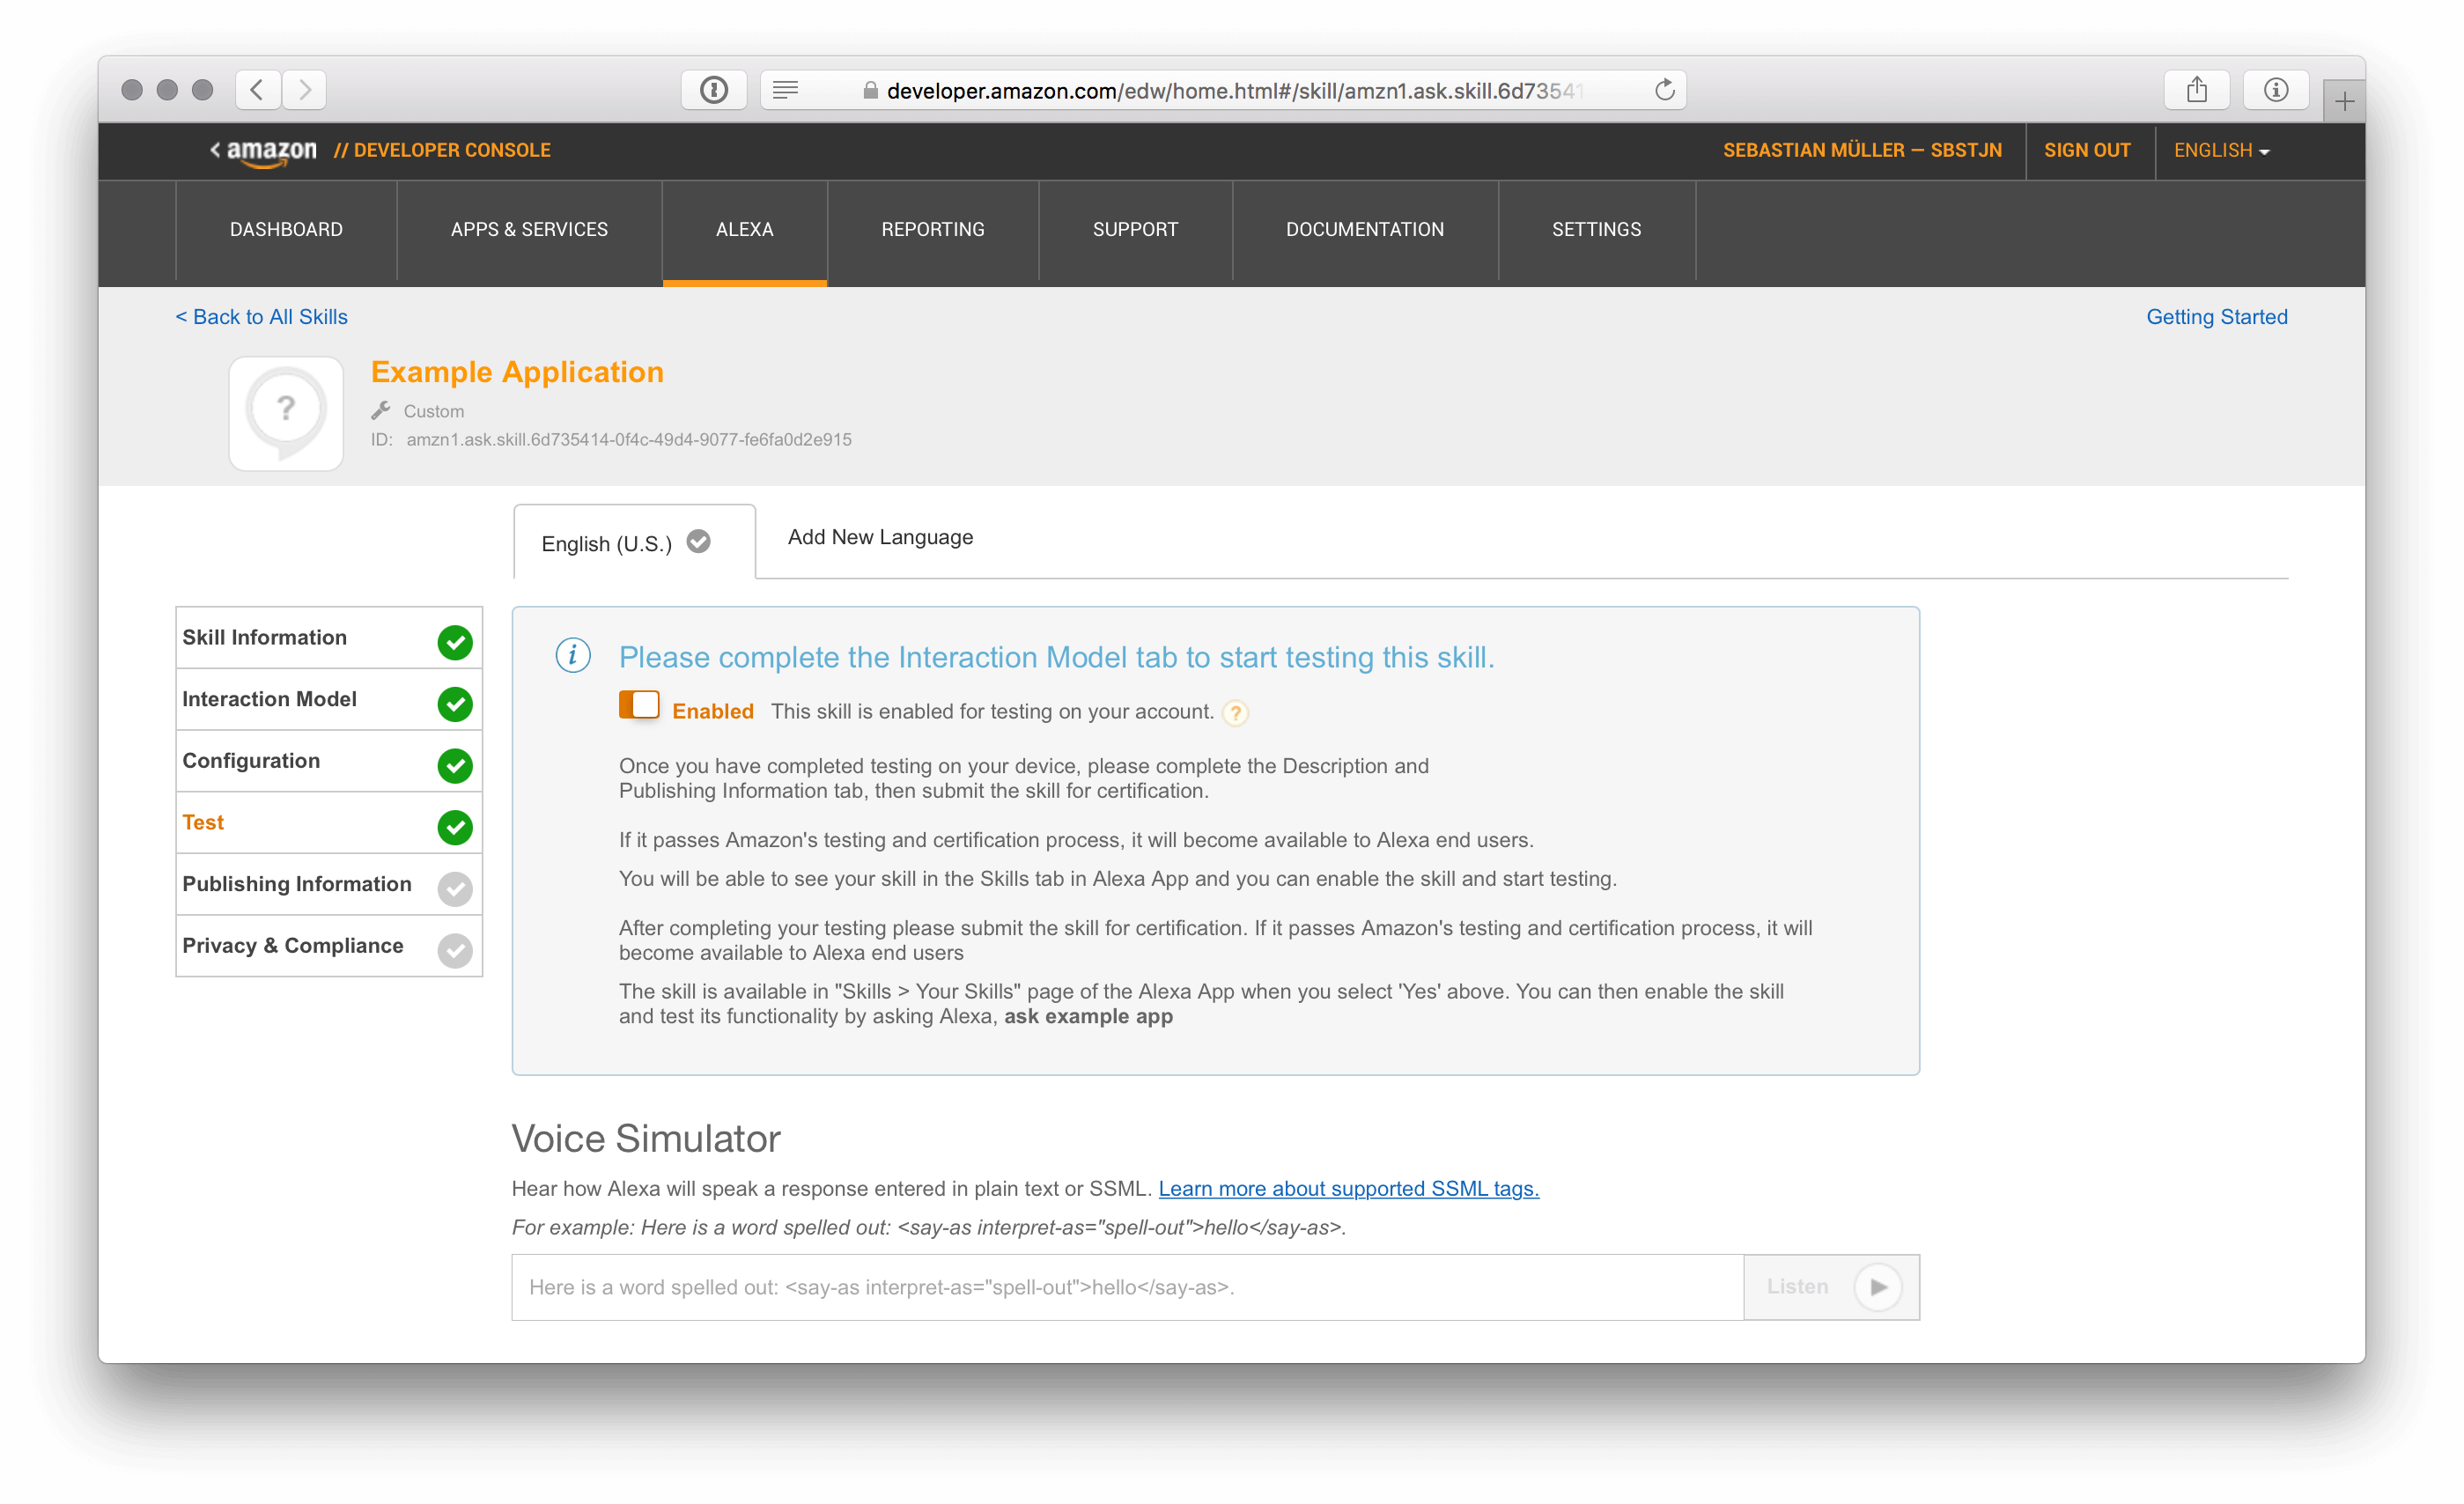
The last two steps in the Amazon wizard will cover Publishing Information about your skill if you plan to release it to the Alexa Skill Store. As long as you are just testing a Skill, this is not needed and you are all setup with the basics for developing your own Alexa Skill. Have fun!
All code needed for this example is available on GitHub of course! Check out my alexa-example-skill repository! There are a couple of frameworks and toolkits which offer a good starting point for your Skill development as you are now familiar with all the basic setup.