If you read my first article about Amazon Alexa and AWS Lambda, you already know how to deploy a custom Alexa skill using Apex. With this article, you will learn how to use the Serverless framework to deploy a function to AWS Lambda and invoke it with your Amazon Echo using voice commands.
Echo? Alexa? Why?
Alexa is Amazon’s awesome attempt to introduce a personal voice-controlled assistant to our living rooms, most comparable with Apple’s Siri or the services from Google. Voice controlled devices are all about the interface, and therefore I clearly prefer to call a service by a name like Alexa instead of saying OK Google all day.
The supported features in Alexa are called Skills and must be activated using Amazon’s companion app for Alexa and the Echo. Under the hood, they are just a list of configured voice commands with placeholders for variables and HTTPS request or direct invocations of AWS Lambda functions.
Let’s get started
Amazon supports two backend types for an Alexa Skill: AWS Lambda or a custom endpoint using HTTPS. As nobody likes to maintain infrastructure, let’s go with using AWS Lambda. Of course, you do not want to use the AWS console to configure your setup manually; you should use tooling to setup all resources.
I already described how to use Apex to deploy your function to AWS, but Serverless will make some steps of the old tutorial obsolete, and you can start developing your custom skill way faster.
First start with creating a new project:
$ > npm install -g serverless
$ > mkdir serverless-alexa-skill && cd serverless-alexa-skill
$ > serverless create --template aws-nodejs

Serverless: Generating boilerplate...

 _______                             __
|   _   .-----.----.--.--.-----.----|  .-----.-----.-----.
|   |___|  -__|   _|  |  |  -__|   _|  |  -__|__ --|__ --|
|____   |_____|__|  \___/|_____|__| |__|_____|_____|_____|
|   |   |             The Serverless Application Framework
|       |                           serverless.com, v1.8.0
 -------'

Serverless: Successfully generated boilerplate for template: "aws-nodejs"
Serverless: NOTE: Please update the "service" property in serverless.yml with your service name
Serverless will now create a serverless.yml configuration file and an example function in handler.js. The default function works fine when using the Amazon API Gateway, but has mostly useless configuration when you intent to use Amazon Alexa. Just open the file with your favorite editor and replace the content with the following lines:
"use strict";

module.exports.answer = (event, context, callback) => {
  callback(null, { done: true });
};
To setup serverless to deploy and use the answer function, you need to update the serverless.yml configuration file as well. Just replace the content with this configuration for serverless:
service: serverless-alexa-skill

provider:
  name: aws
  runtime: nodejs6.10
  stage: dev
  region: eu-west-1

functions:
  answer:
    handler: handler.answer
    events:
      - alexaSkill

package:
  exclude:
    - node_modules/**
When you run sls deploy now, serverless will create an Amazon CloudFormation stack and deploy your function to AWS Lambda.
$ > sls deploy

Serverless: Packaging service...
Serverless: Uploading CloudFormation file to S3...
Serverless: Uploading service .zip file to S3 (7.76 MB)...
Serverless: Updating Stack...
Serverless: Checking Stack update progress...
.........
Serverless: Stack update finished...
Service Information
service: serverless-alexa-skill
stage: dev
region: eu-west-1
api keys:
  None
endpoints:
  None
functions:
  answer: serverless-alexa-skill-dev-answer
After the deployment is done, you can invoke the function using the sls command from your command line:
$ > sls invoke -f answer

{
    "done": true
}
Basically, that’s all you need as the foundation to handle requests from a custom Alexa Skill.
Alexa’s response
Amazon requires your Lambda function to return JSON data to process the information for Alexa. The minimal structure for a response comes down to – of course – the sentence Alexa will say and some information about the answer to display and rate in the Alexa companion application on your mobile phone.
"use strict";

module.exports.answer = (event, context, callback) => {
  callback(null, {
    version: "1.0",
    response: {
      outputSpeech: {
        type: "PlainText",
        text: "Alexa responds with this text",
      },
      card: {
        content: "Message for the Alexa companion app.",
        title: "Title for the Message",
        type: "Simple",
      },
      shouldEndSession: true,
    },
    sessionAttributes: {},
  });
};
You will see how the final function looks like after the next steps, or you can take a sneak peek at the GitHub repository of course …
Amazon Developer Console
To test and use the Alexa Skill, you need to sign up for a free Amazon Developer Account. After you are logged in to your account, you can access the Alexa section and get started with using the Alexa Skills kit to create your Skill.
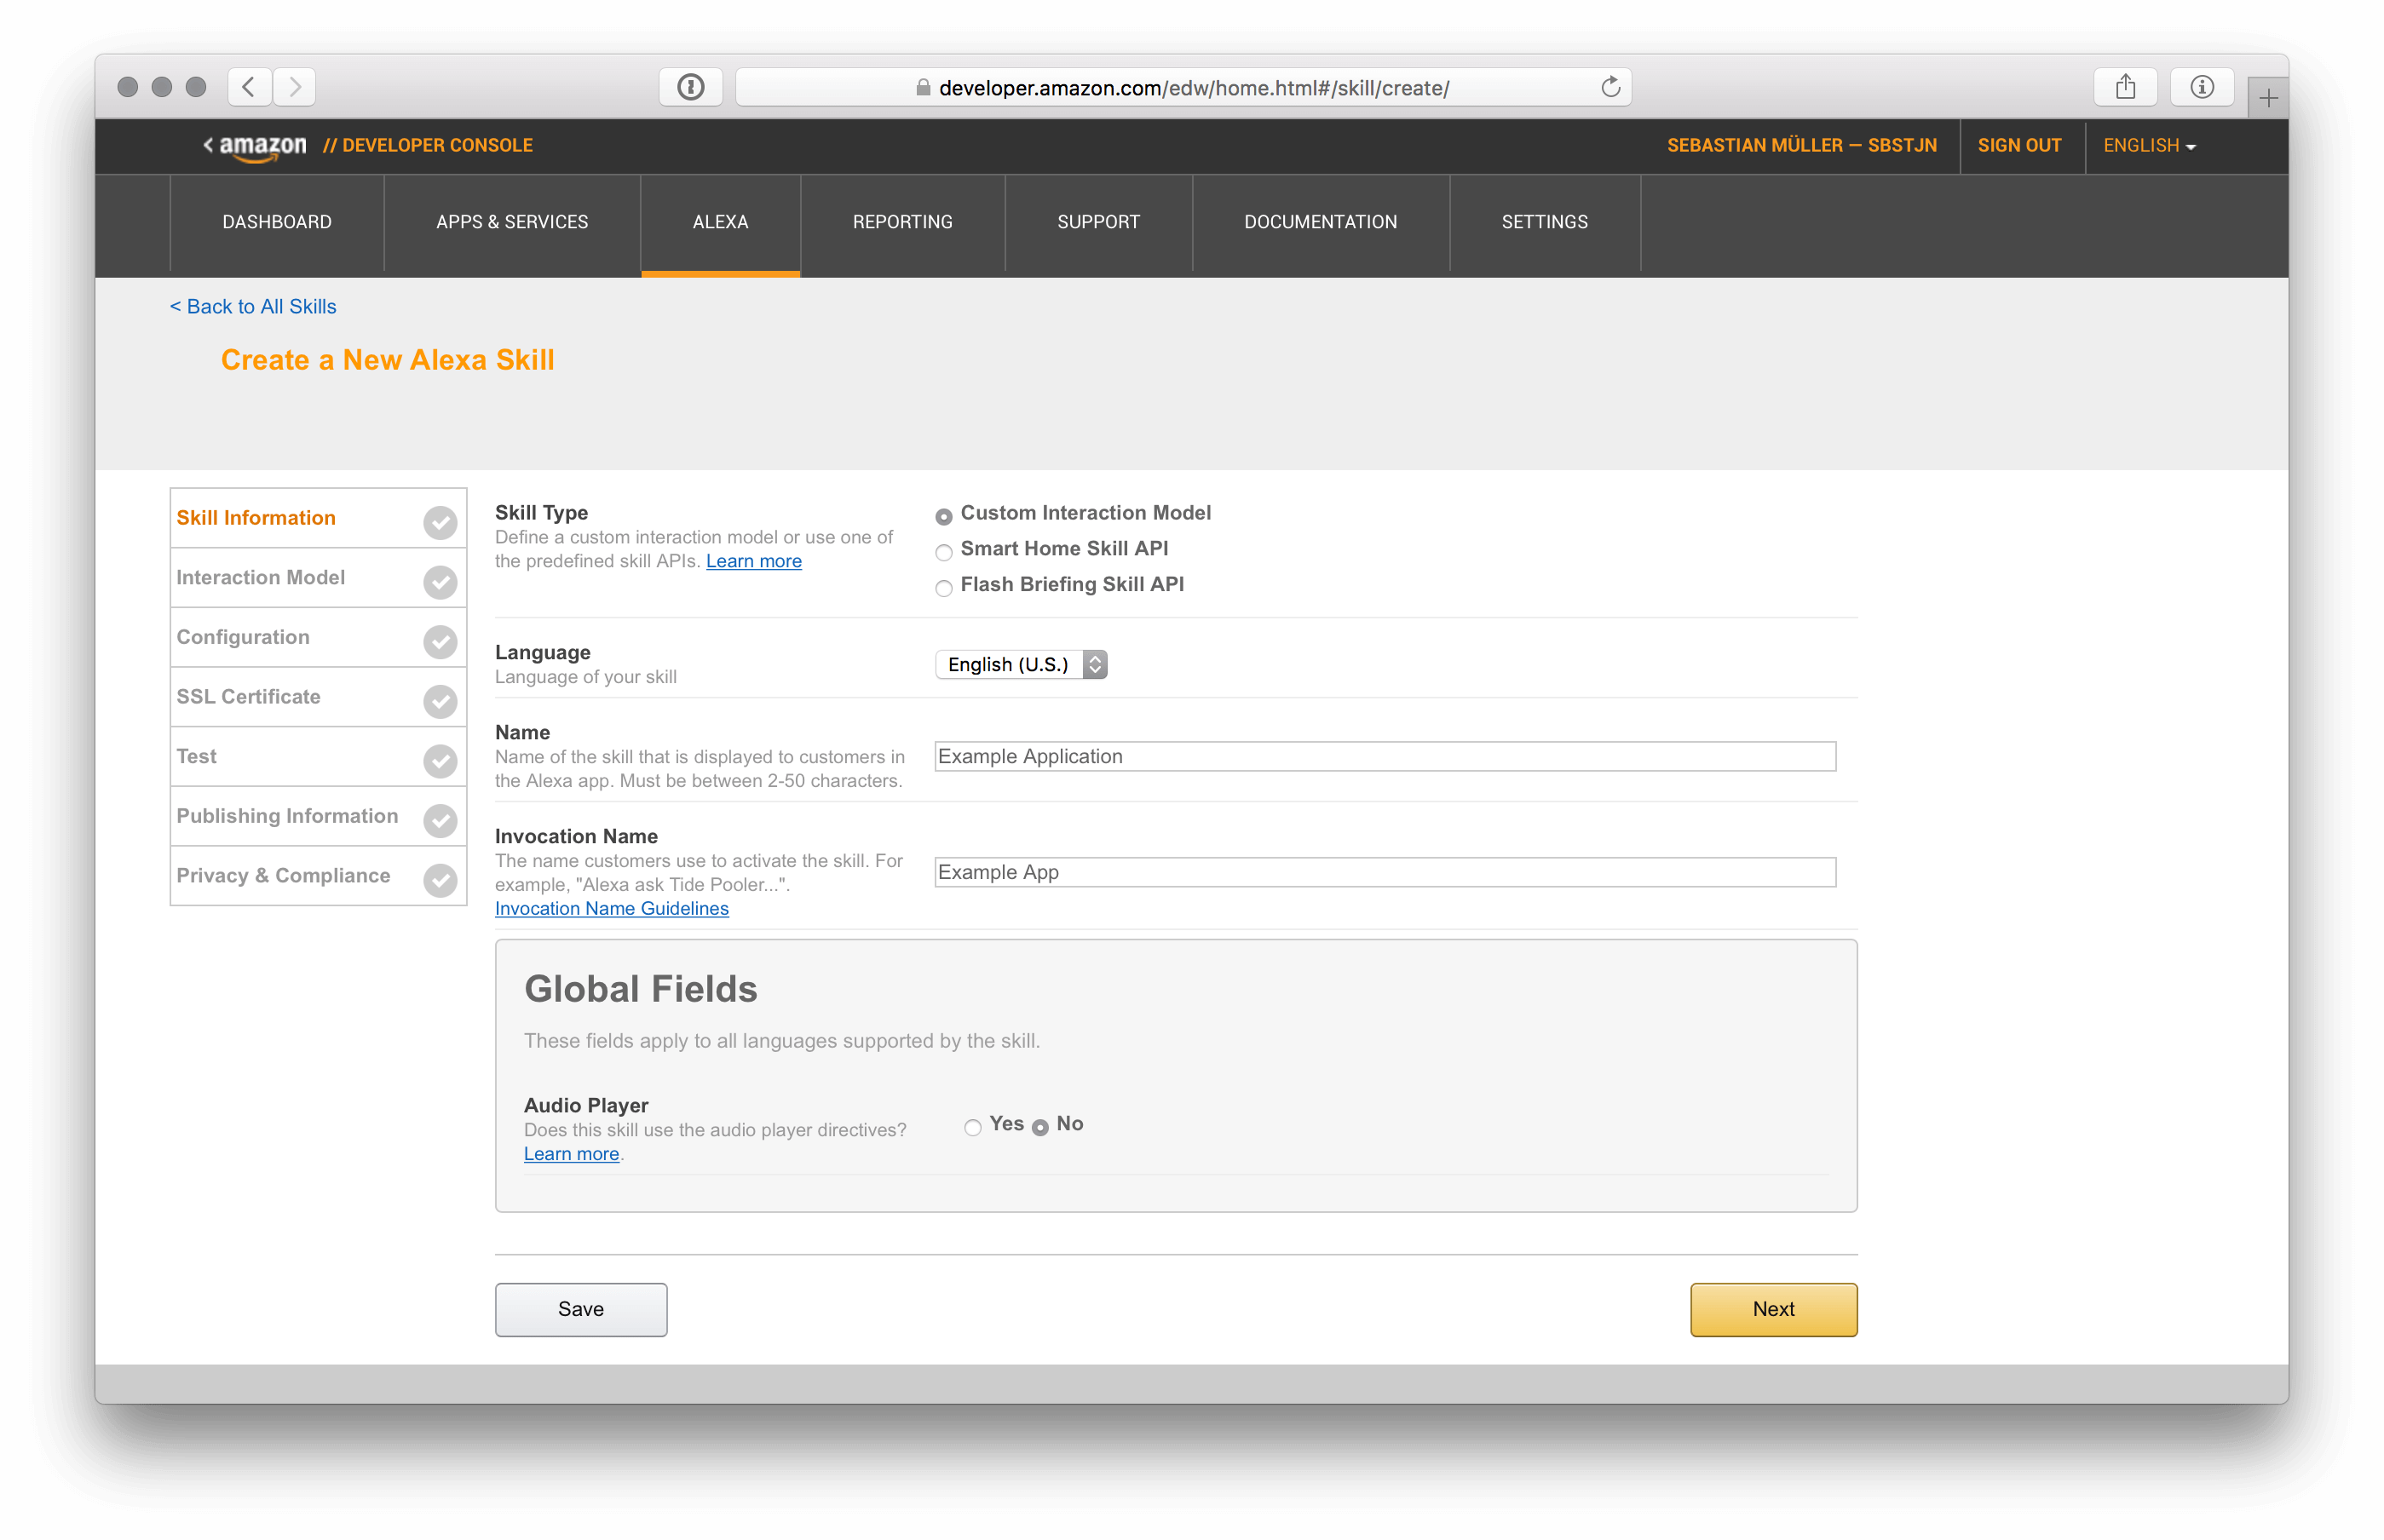
Right now all custom Alexa skills need be invoked by a command – for example, their name. As long as you do not write a Skill for a trademark you are required to configure a name and invocation command with two words, for example, Example App:

Using this configuration, your Echo will respond to voice commands like Alexa, open Example App and Alexa, ask Example App .
Interaction Model
All Alexa skills have a so-called Interaction Model which lists all supported commands and the type definition of their arguments. To get started with a simple skill just configure an intent and copy and paste the default intents for a typical skill.
The following configuration registers a function identifier answer with one argument named item and AMAZON.NUMBER as its type.
{
  "intents": [
    {
      "intent": "answer",
      "slots": [
        {
          "name": "item",
          "type": "AMAZON.NUMBER"
        }
      ]
    },
    {
      "intent": "AMAZON.HelpIntent"
    },
    {
      "intent": "AMAZON.StopIntent"
    },
    {
      "intent": "AMAZON.CancelIntent"
    }
  ]
}
Amazon supports a lot of types for a slot in commands. For this first example application, it’s fine to use AMAZON.NUMBER, but there are much more available.
Sample Utterances
The list of sample utterances defines all requests your Skill will respond to. Every line starts with the intent identifier – in this case, it’s answer – and is followed by the sentence you plan to say to Alexa.
answer  what is {item}
answer  what's {item}
Together with the initial configuration of your Skill, Alexa will recognize a command whenever you say something matching the pattern Alexa, ask Example App what is {XYZ} .
Configure AWS Lambda endpoint
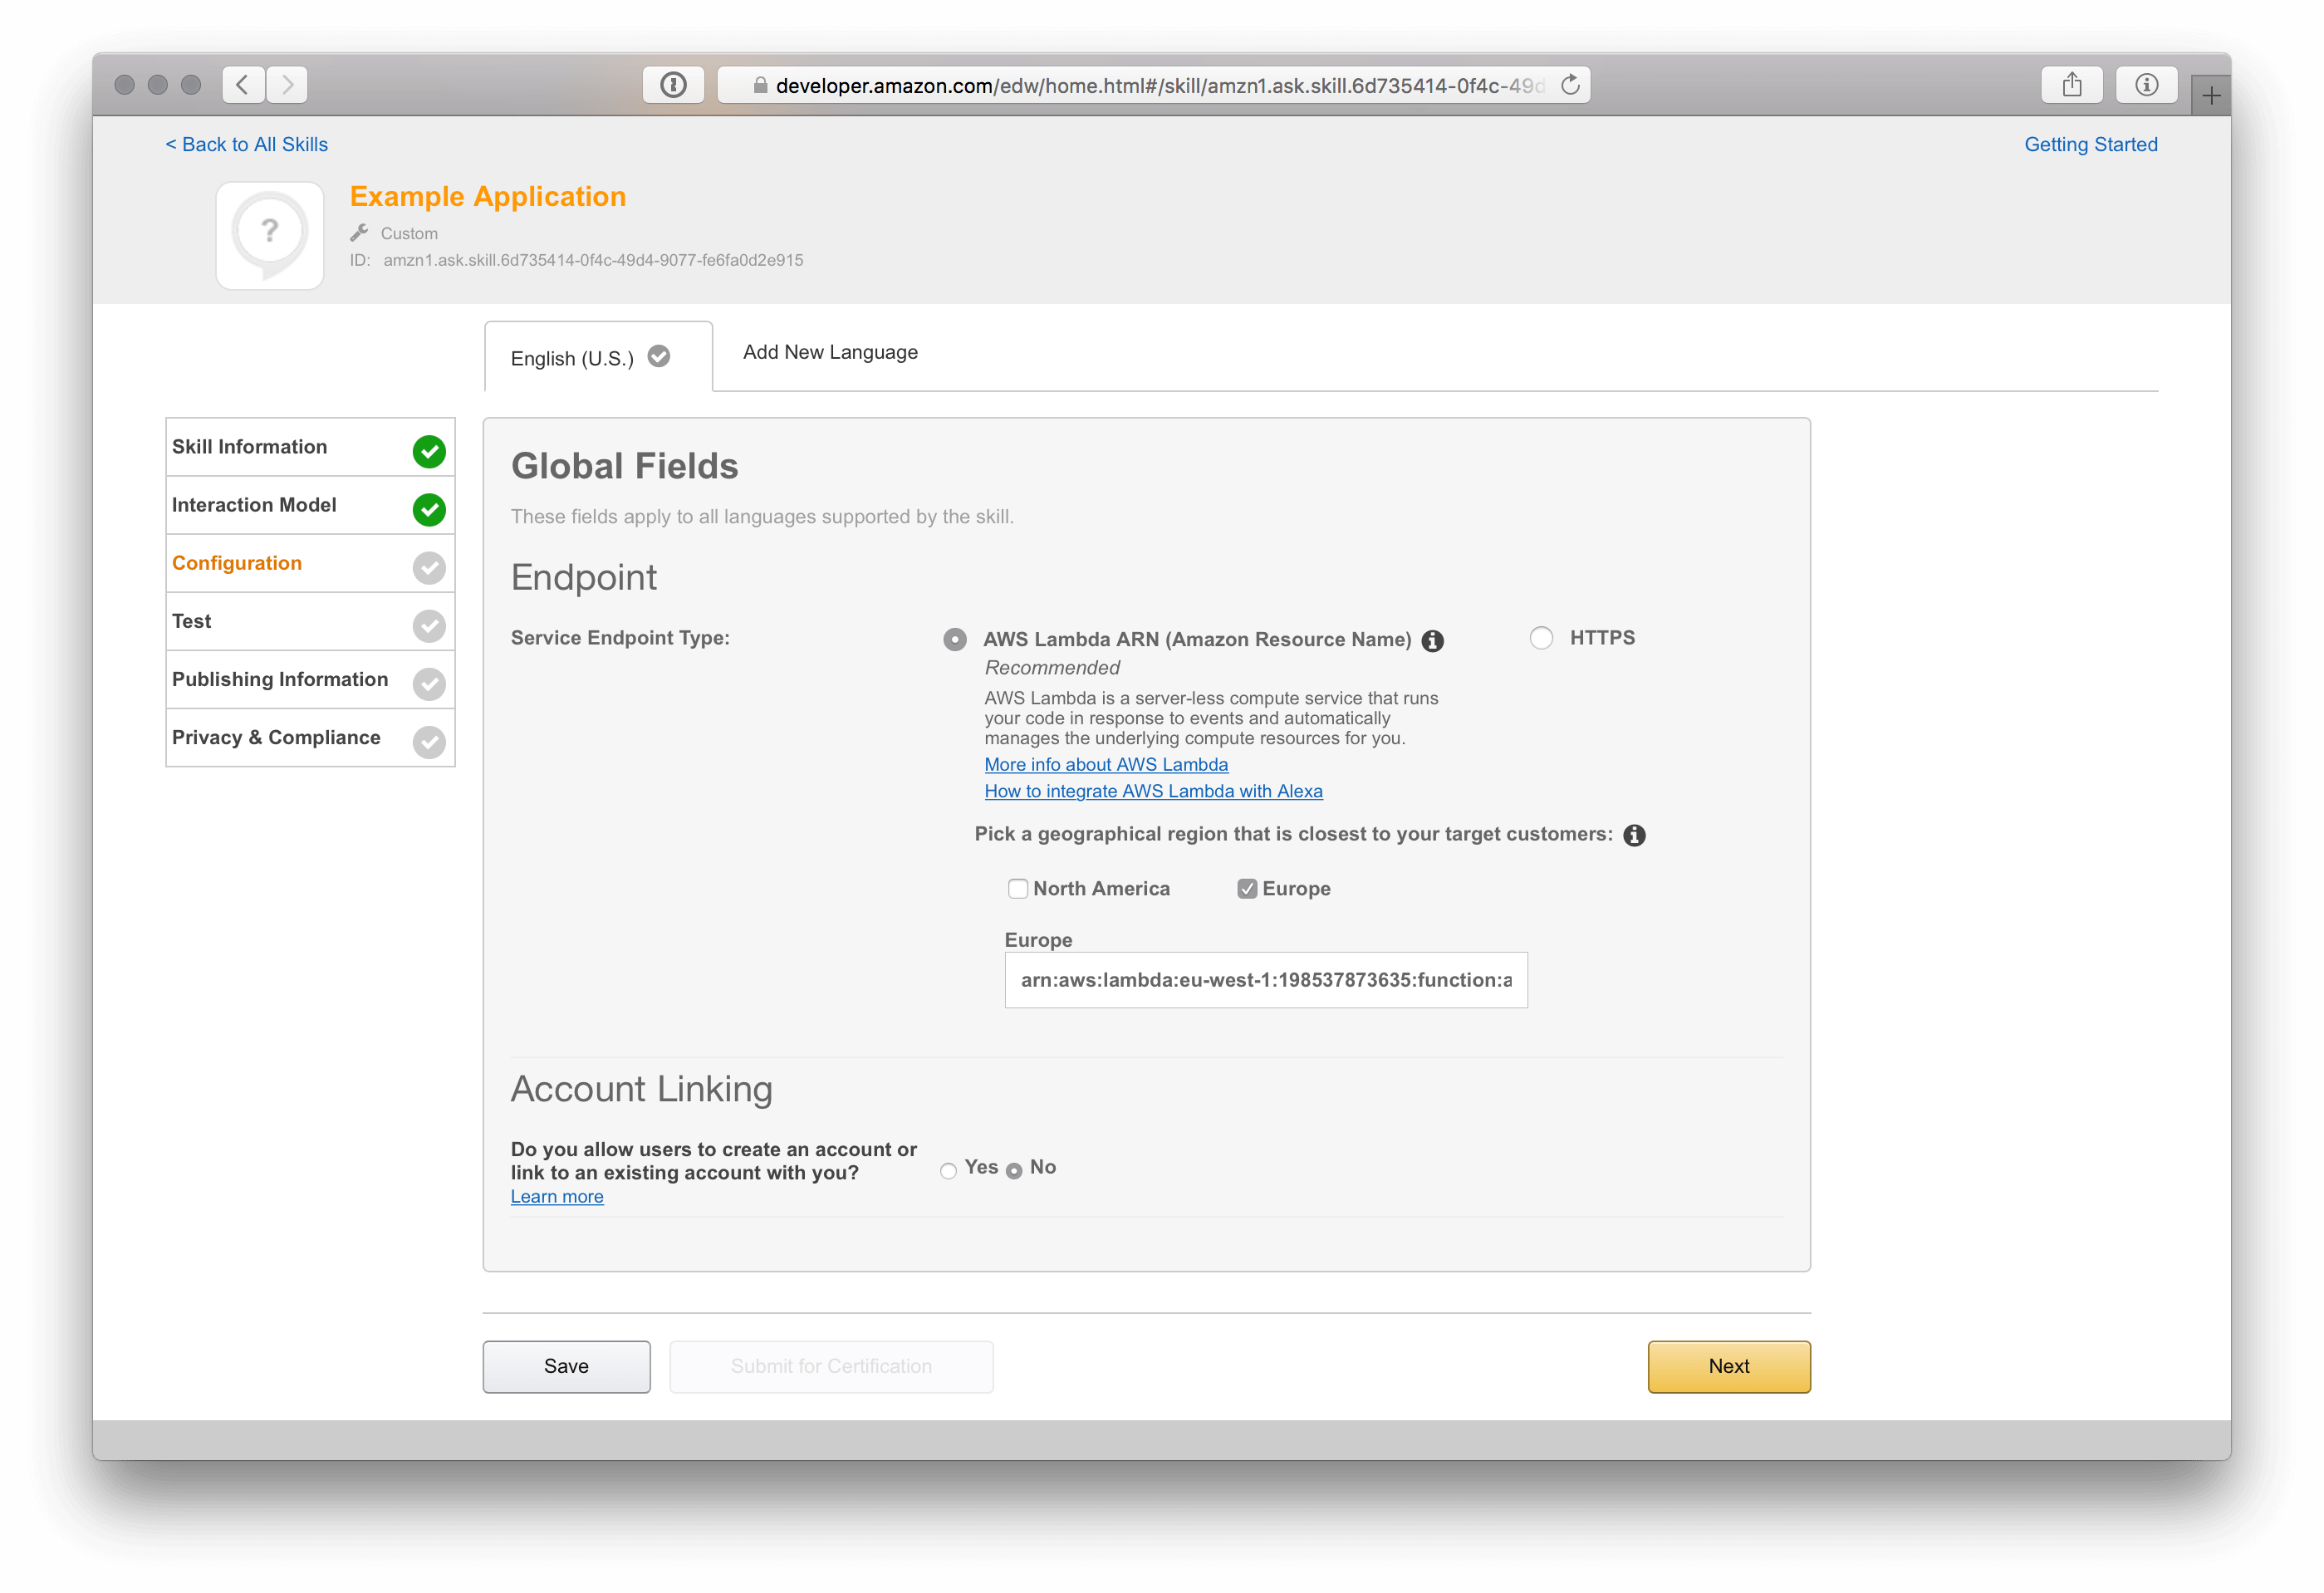
On the next screen of Amazon’s configuration wizard, you are prompted for the AWS Lambda ARN of your deployed function that will respond to requests by Alexa.
The function ARN consists of your Amazon Account ID and the name of your AWS Lambda function. You can retrieve the name of the function using the sls command from your command line:
$ > sls info

...

functions:
  answer: serverless-alexa-skill-dev-answer
To get the Amazon Account ID, just use the aws command line tool and run:
$ > aws sts get-caller-identity --output text --query 'Account'

1234567890
As you now have the Account ID and the name of the function, you can easily concatenate both values to get the ARN identifier.
arn:aws:lambda:eu-west-1:1234567890:function:serverless-alexa-skill-dev-answer
Now just enter the ARN in your application configuration and continue to use the setup wizard for your new Alexa skill.

Alexa Simulator
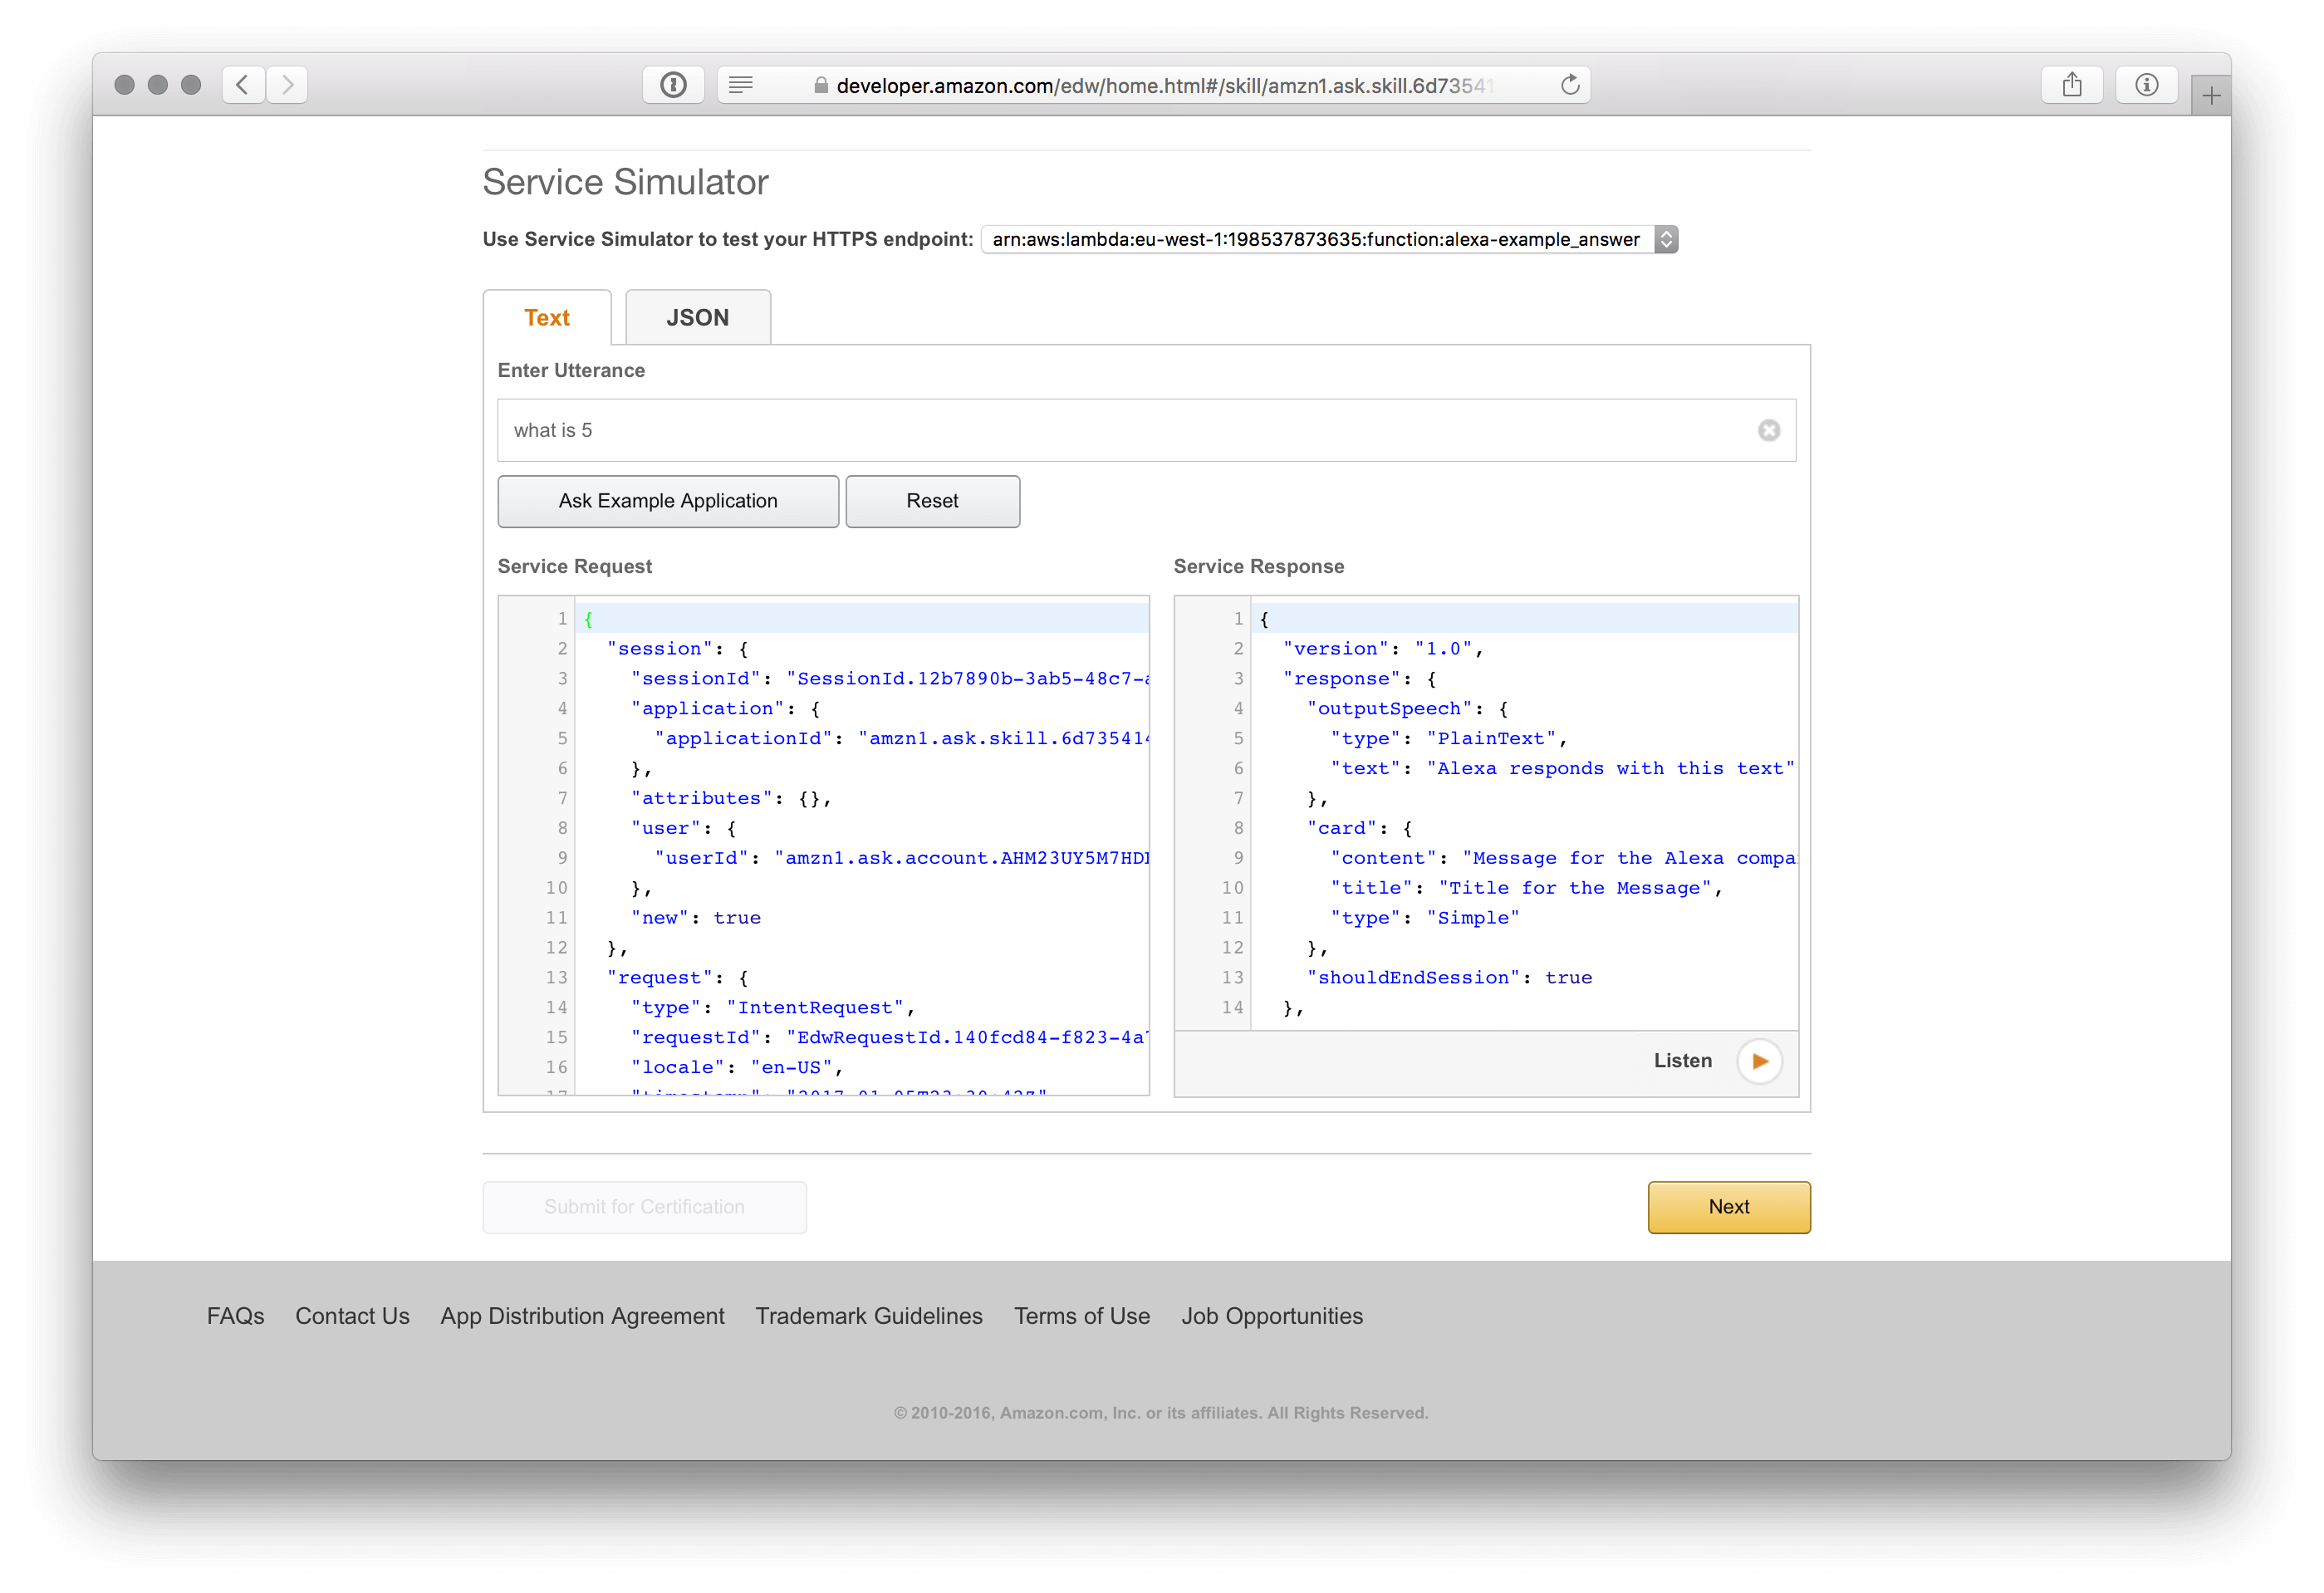
Luckily Amazon has something called Service Simulator for Alexa, so you don’t have to wake up everybody in your house if you plan to debug and enhance your Alex Skill in the middle of the night.
If you set up everything correct, you should be able to enter an Utterance like What is 5? and be shown the static response of the deployed function. In this case, Alexa responds with this text from the JSON structure a few step before.

Whenever you encounter some strange behavior use sls logs -f answer to see all logs of your AWS Lambda function.
Update and deploy Lambda function
Of course, there is nothing great about having a custom Alex Skill which will always respond with the same answer to your question.
Spice up your handler.js code with a little logic and let Alexa check the provided input and respond with a different sentence on special items. Besides the check for input parameters this is a good time to add some basic checks for the event structure to make sure your function will not throw an Exception:
"use strict";

const assert = require("assert");

const answer = (title, message) => {
  return {
    version: "1.0",
    response: {
      outputSpeech: {
        type: "PlainText",
        text: message,
      },
      card: {
        content: message,
        title: title,
        type: "Simple",
      },
      shouldEndSession: true,
    },
    sessionAttributes: {},
  };
};

module.exports.answer = (event, context, callback) => {
  try {
    assert(event.session);
    assert(event.session.application);

    assert(event.request);
    assert(event.request.intent);

    assert(event.request.intent.name.toLowerCase() === "answer");
    assert(event.request.intent.slots.item.value);
  } catch (e) {
    callback(
      null,
      answer("Invalid request", "Sorry, but I cannot handle your request")
    );
  }

  var item = event.request.intent.slots.item.value;

  if (item * 1 === 42) {
    callback(
      null,
      answer(
        "42",
        "42 is the answer to the Ultimate Question of Life, the Universe, and Everything!"
      )
    );
  } else {
    callback(
      null,
      answer("Asked for " + item, "I don't know anything about " + item)
    );
  }
};
After you deployed the code above Alexa can respond with different answers to the questions Alexa, ask Example App what is 5 and Alexa, ask Example App what is 42 . Isn’t that awesome?!
Did you noticed that no additional update in Amazon’s Developer Console was needed for the update? As soon as your function is configured, or even released, you can update the AWS Lambda function anytime and enhance your API without going through configuration or the review process over and over again.
Testing Alexa Skill
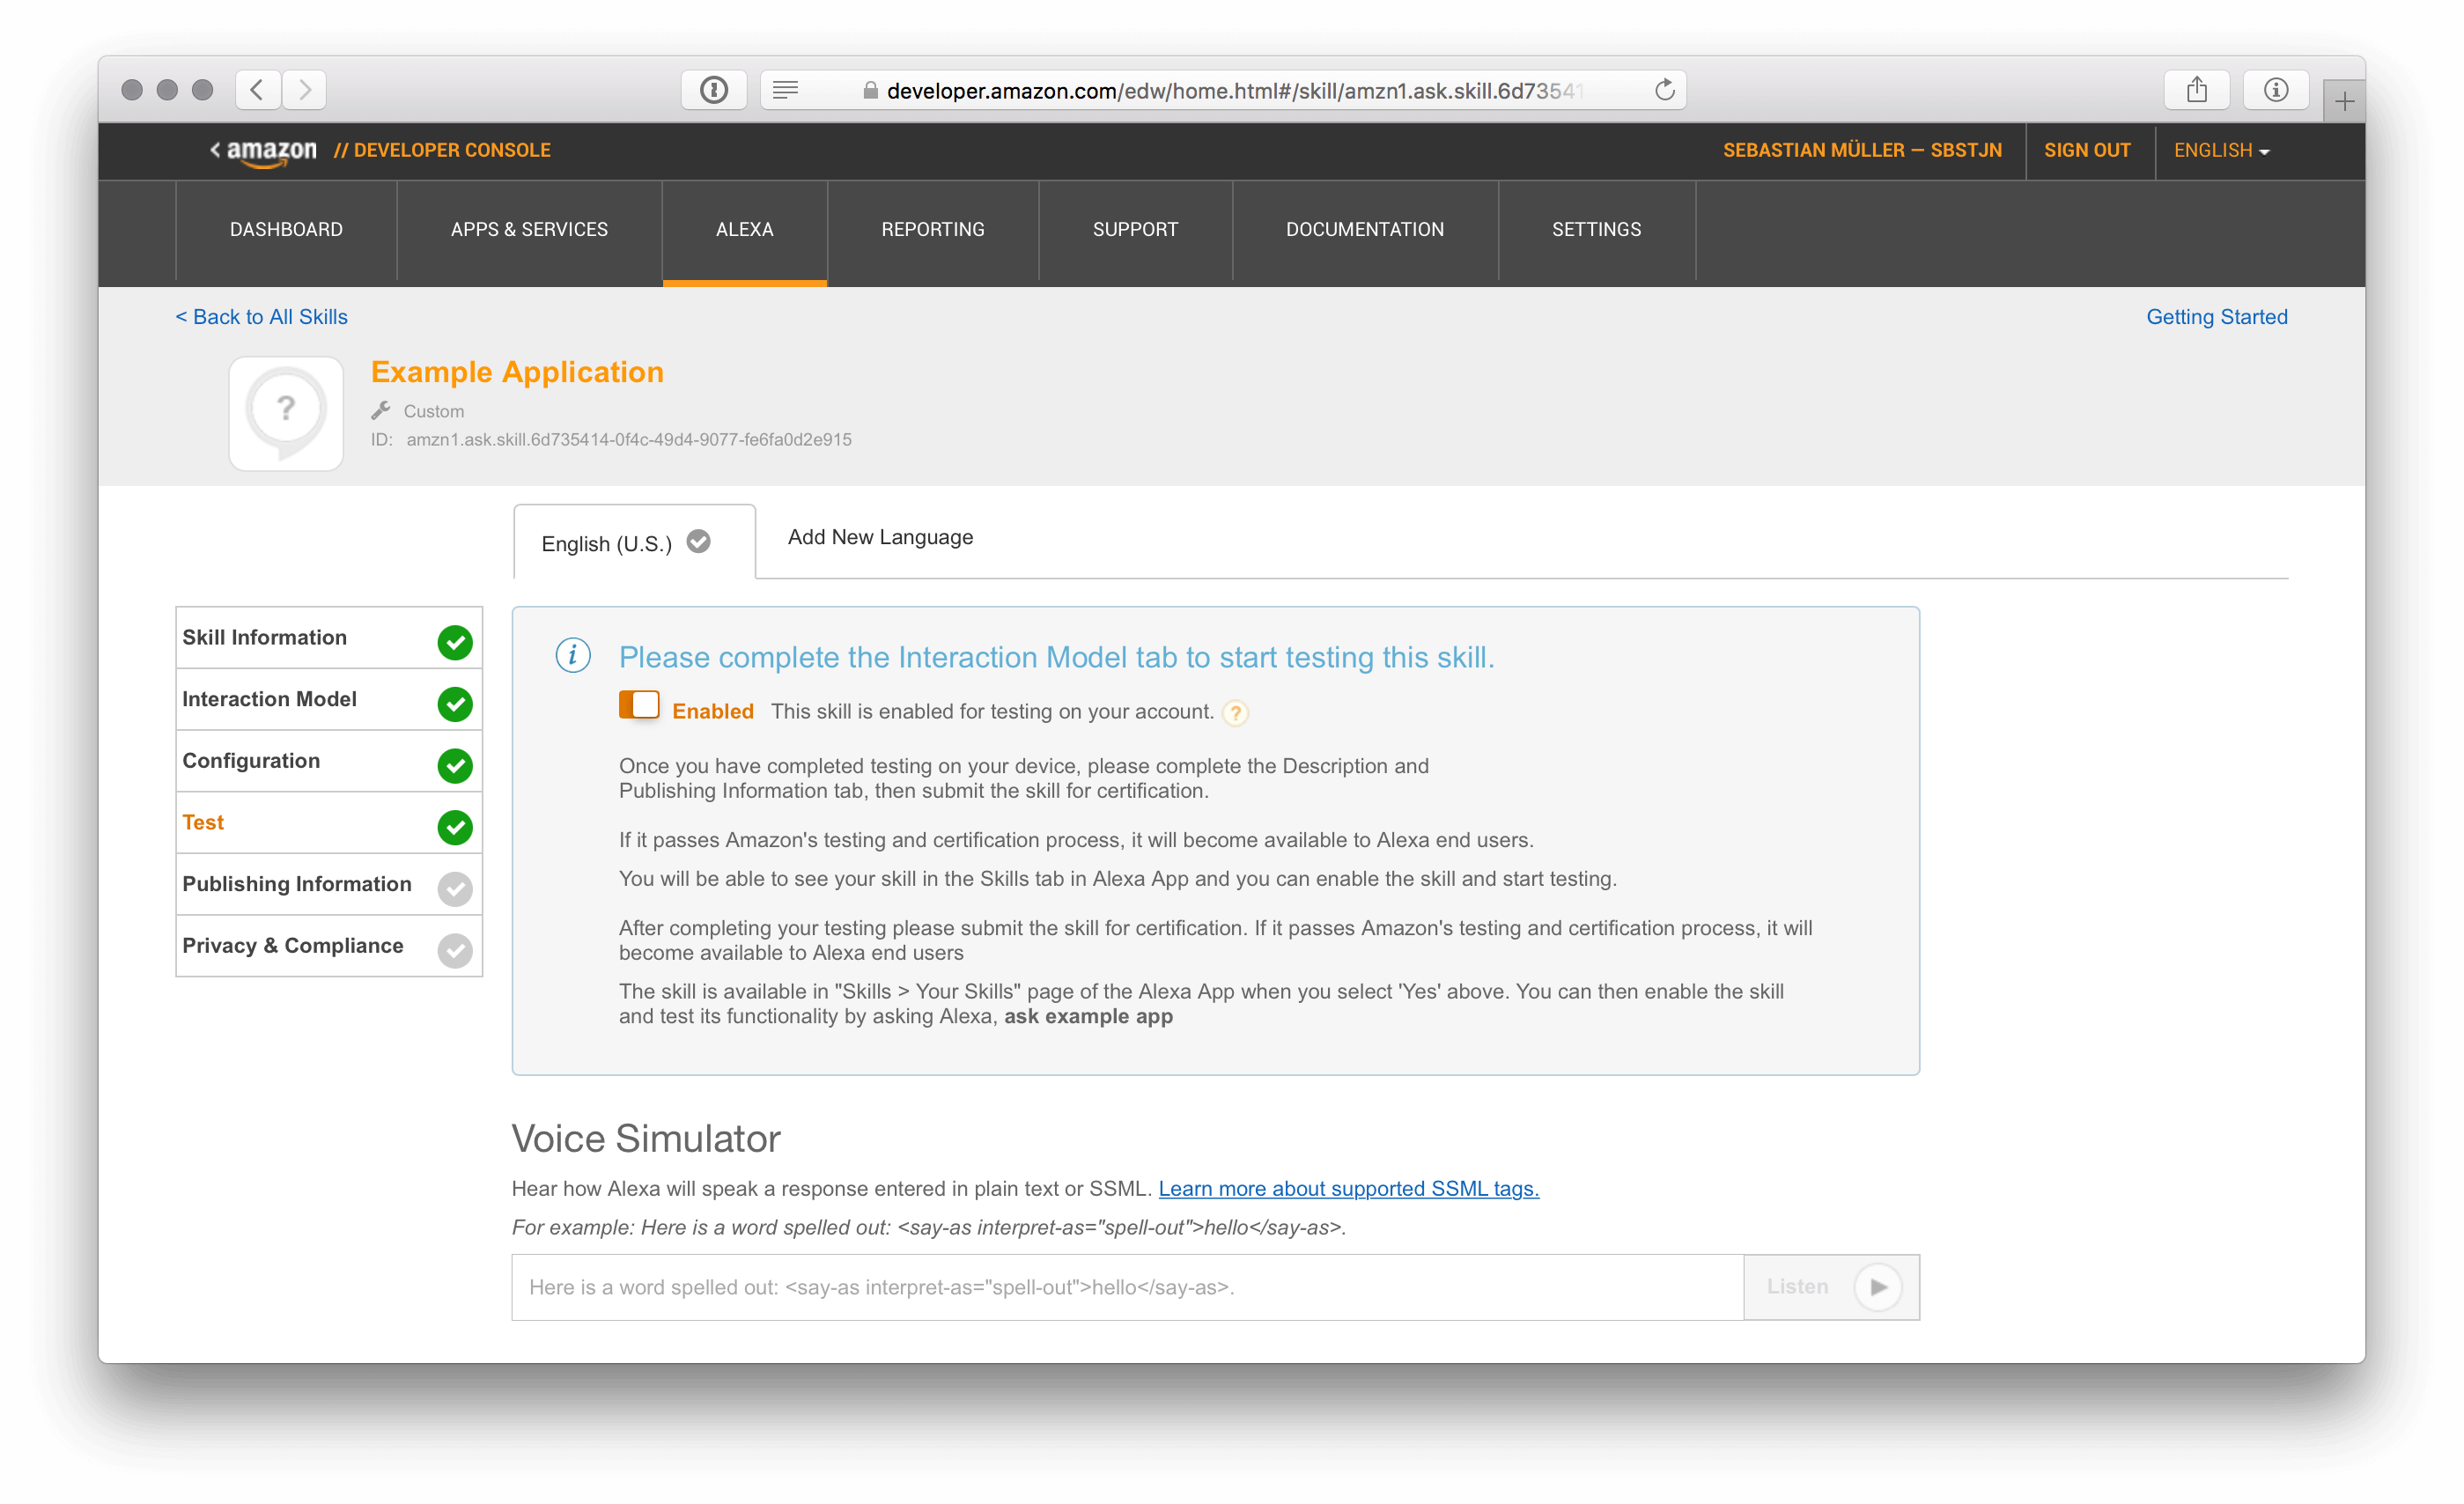
Besides the Alexa Service Simulator, you can enable testing with your device and start talking to Alexa while deploying a new version of your Lambda function.

The last two steps in the Amazon wizard will cover Publishing Information about your skill if you plan to release it to the Alexa Skill Store. As long as you are just testing a skill, this is not needed, and you are all setup with the basics for developing your own Alexa Skill. Have fun!
All code used for this example is available on GitHub of course! Check out my serverless-alexa-skill repository! There are a couple of frameworks and toolkits which offer a good starting point for your Node.js Skill development as well.