Following the first guide on how to use AWS Amplify Studio and Figma to create React components, this guide covers theme management with Figma and the Amplify UI. Based on Design Tokens and System UI Theme Specification.
AWS Amplify Theme Editor
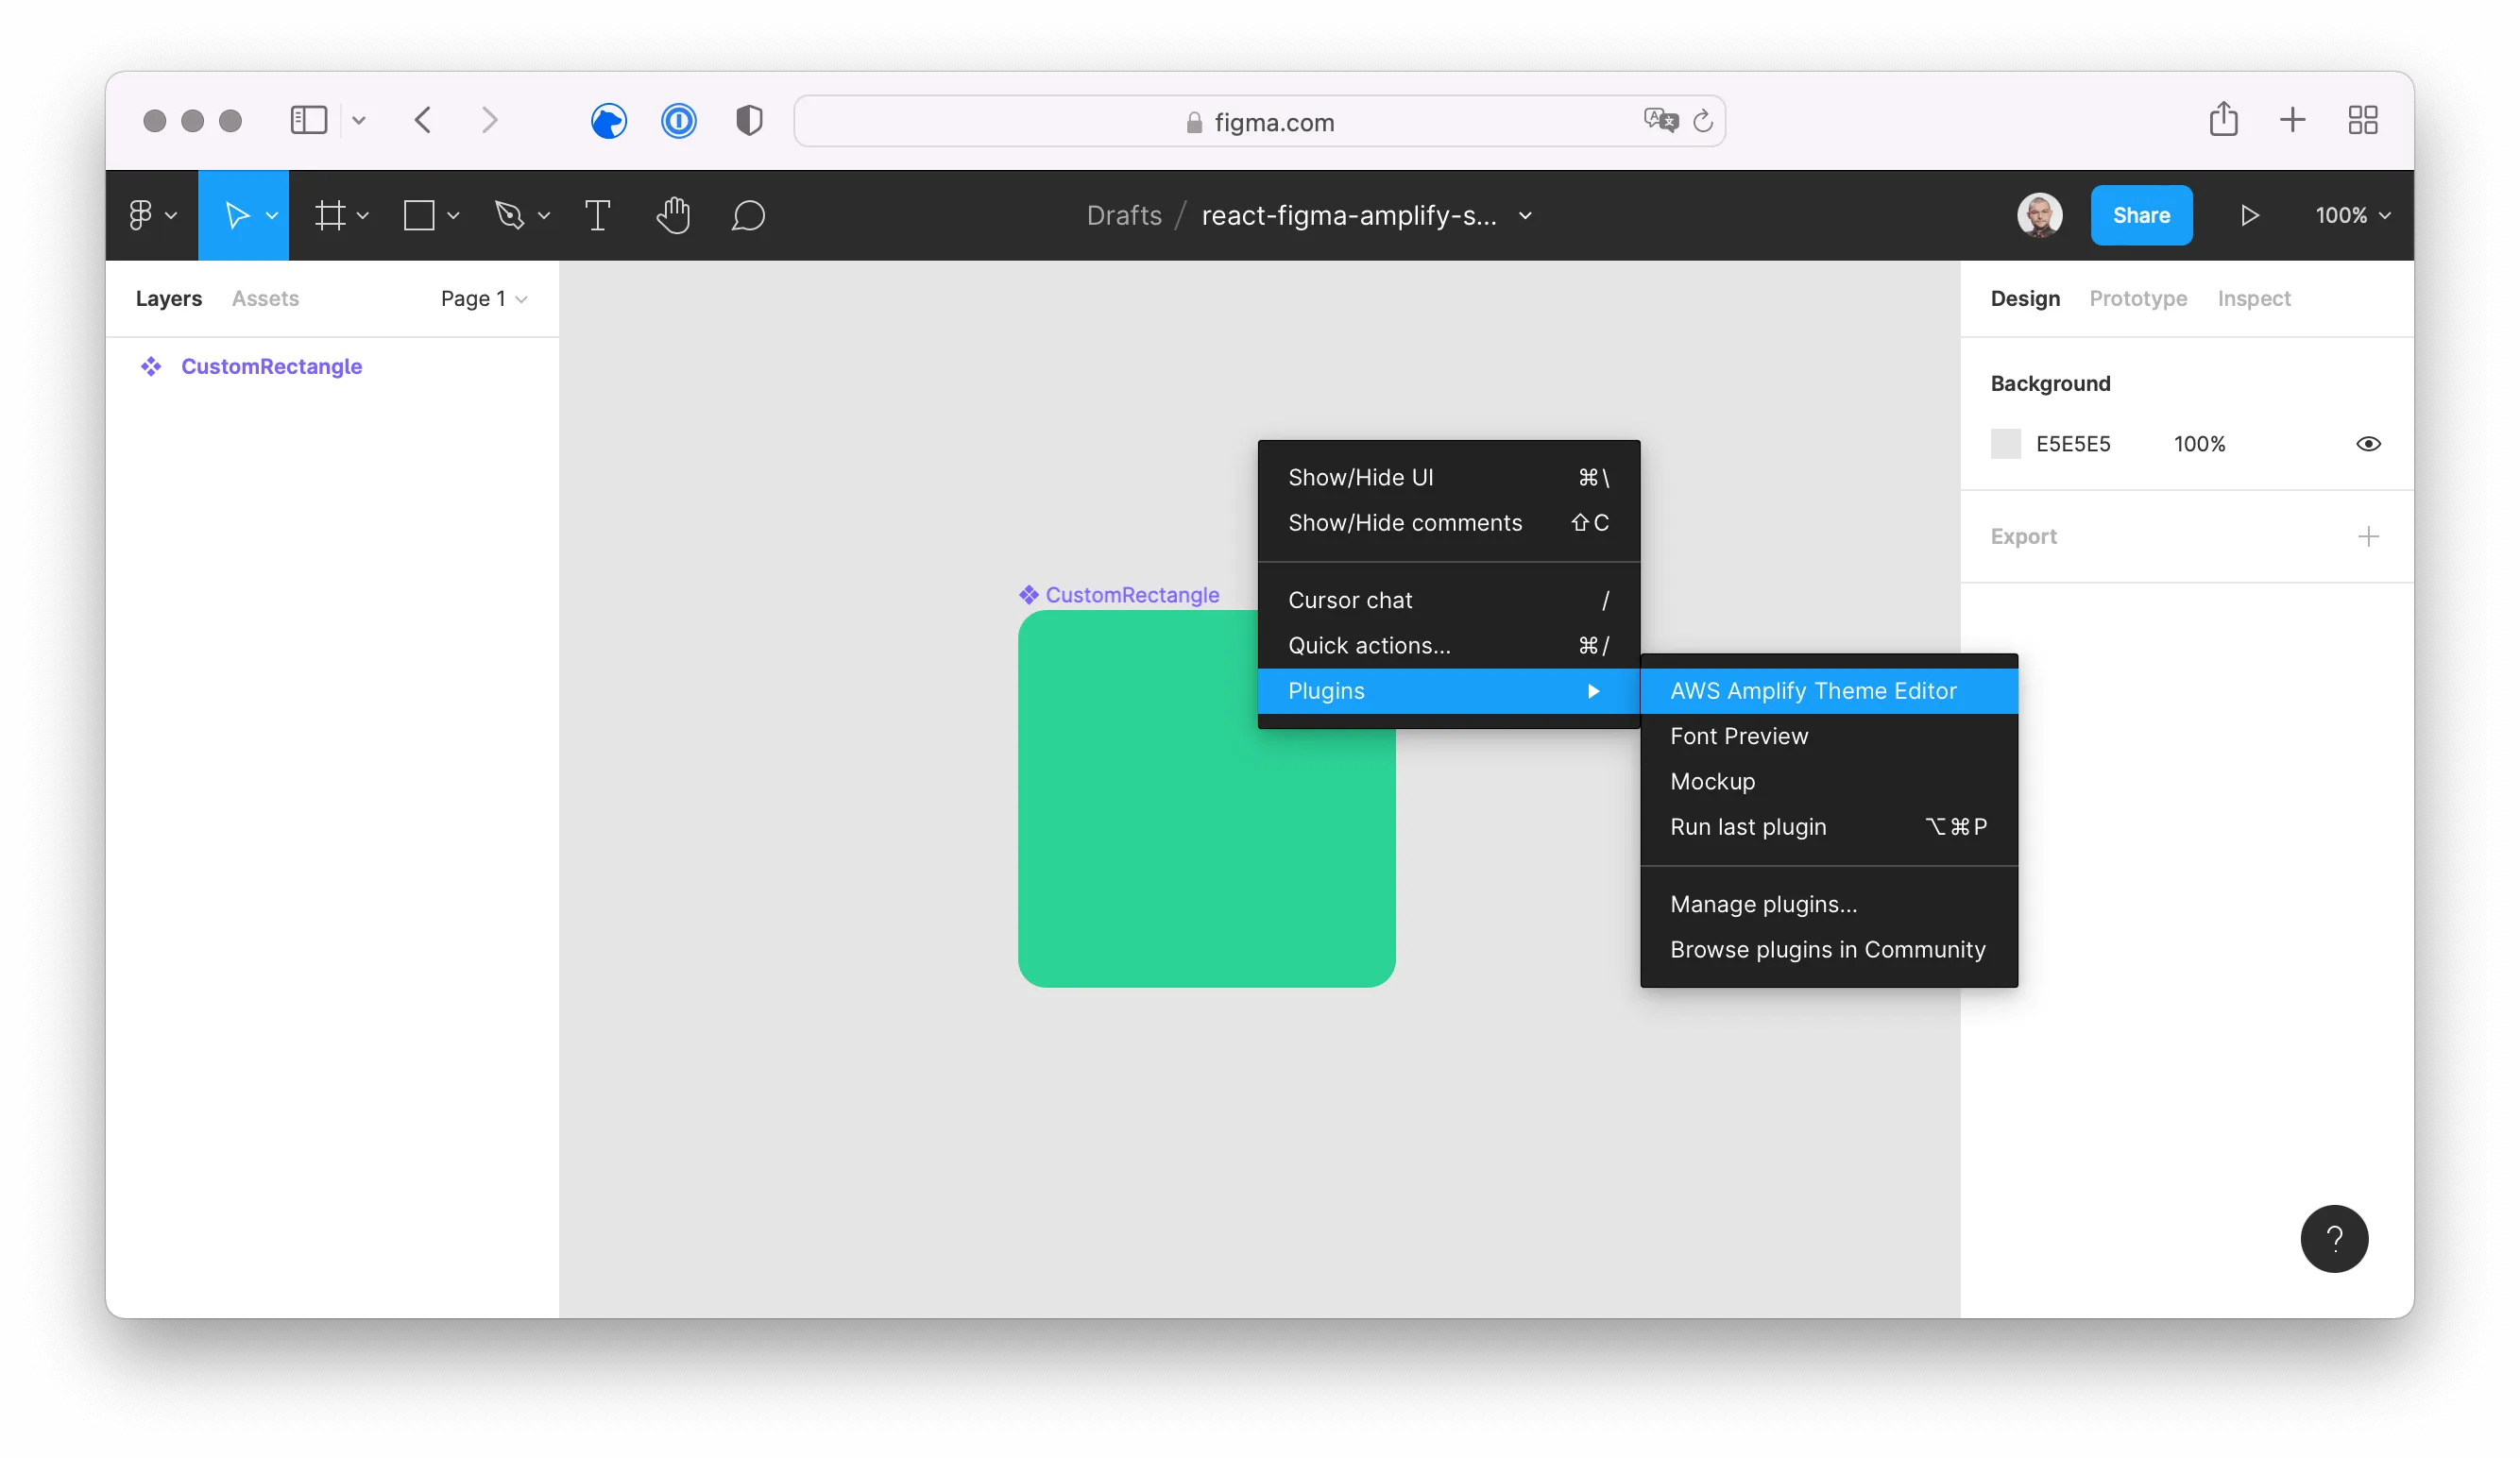
First, install the free AWS Amplify Theme Editor plugin for Figma. The plugin adds a new option to the context menu to publish your theming configuration from Figma to your project in AWS Amplify Studio.
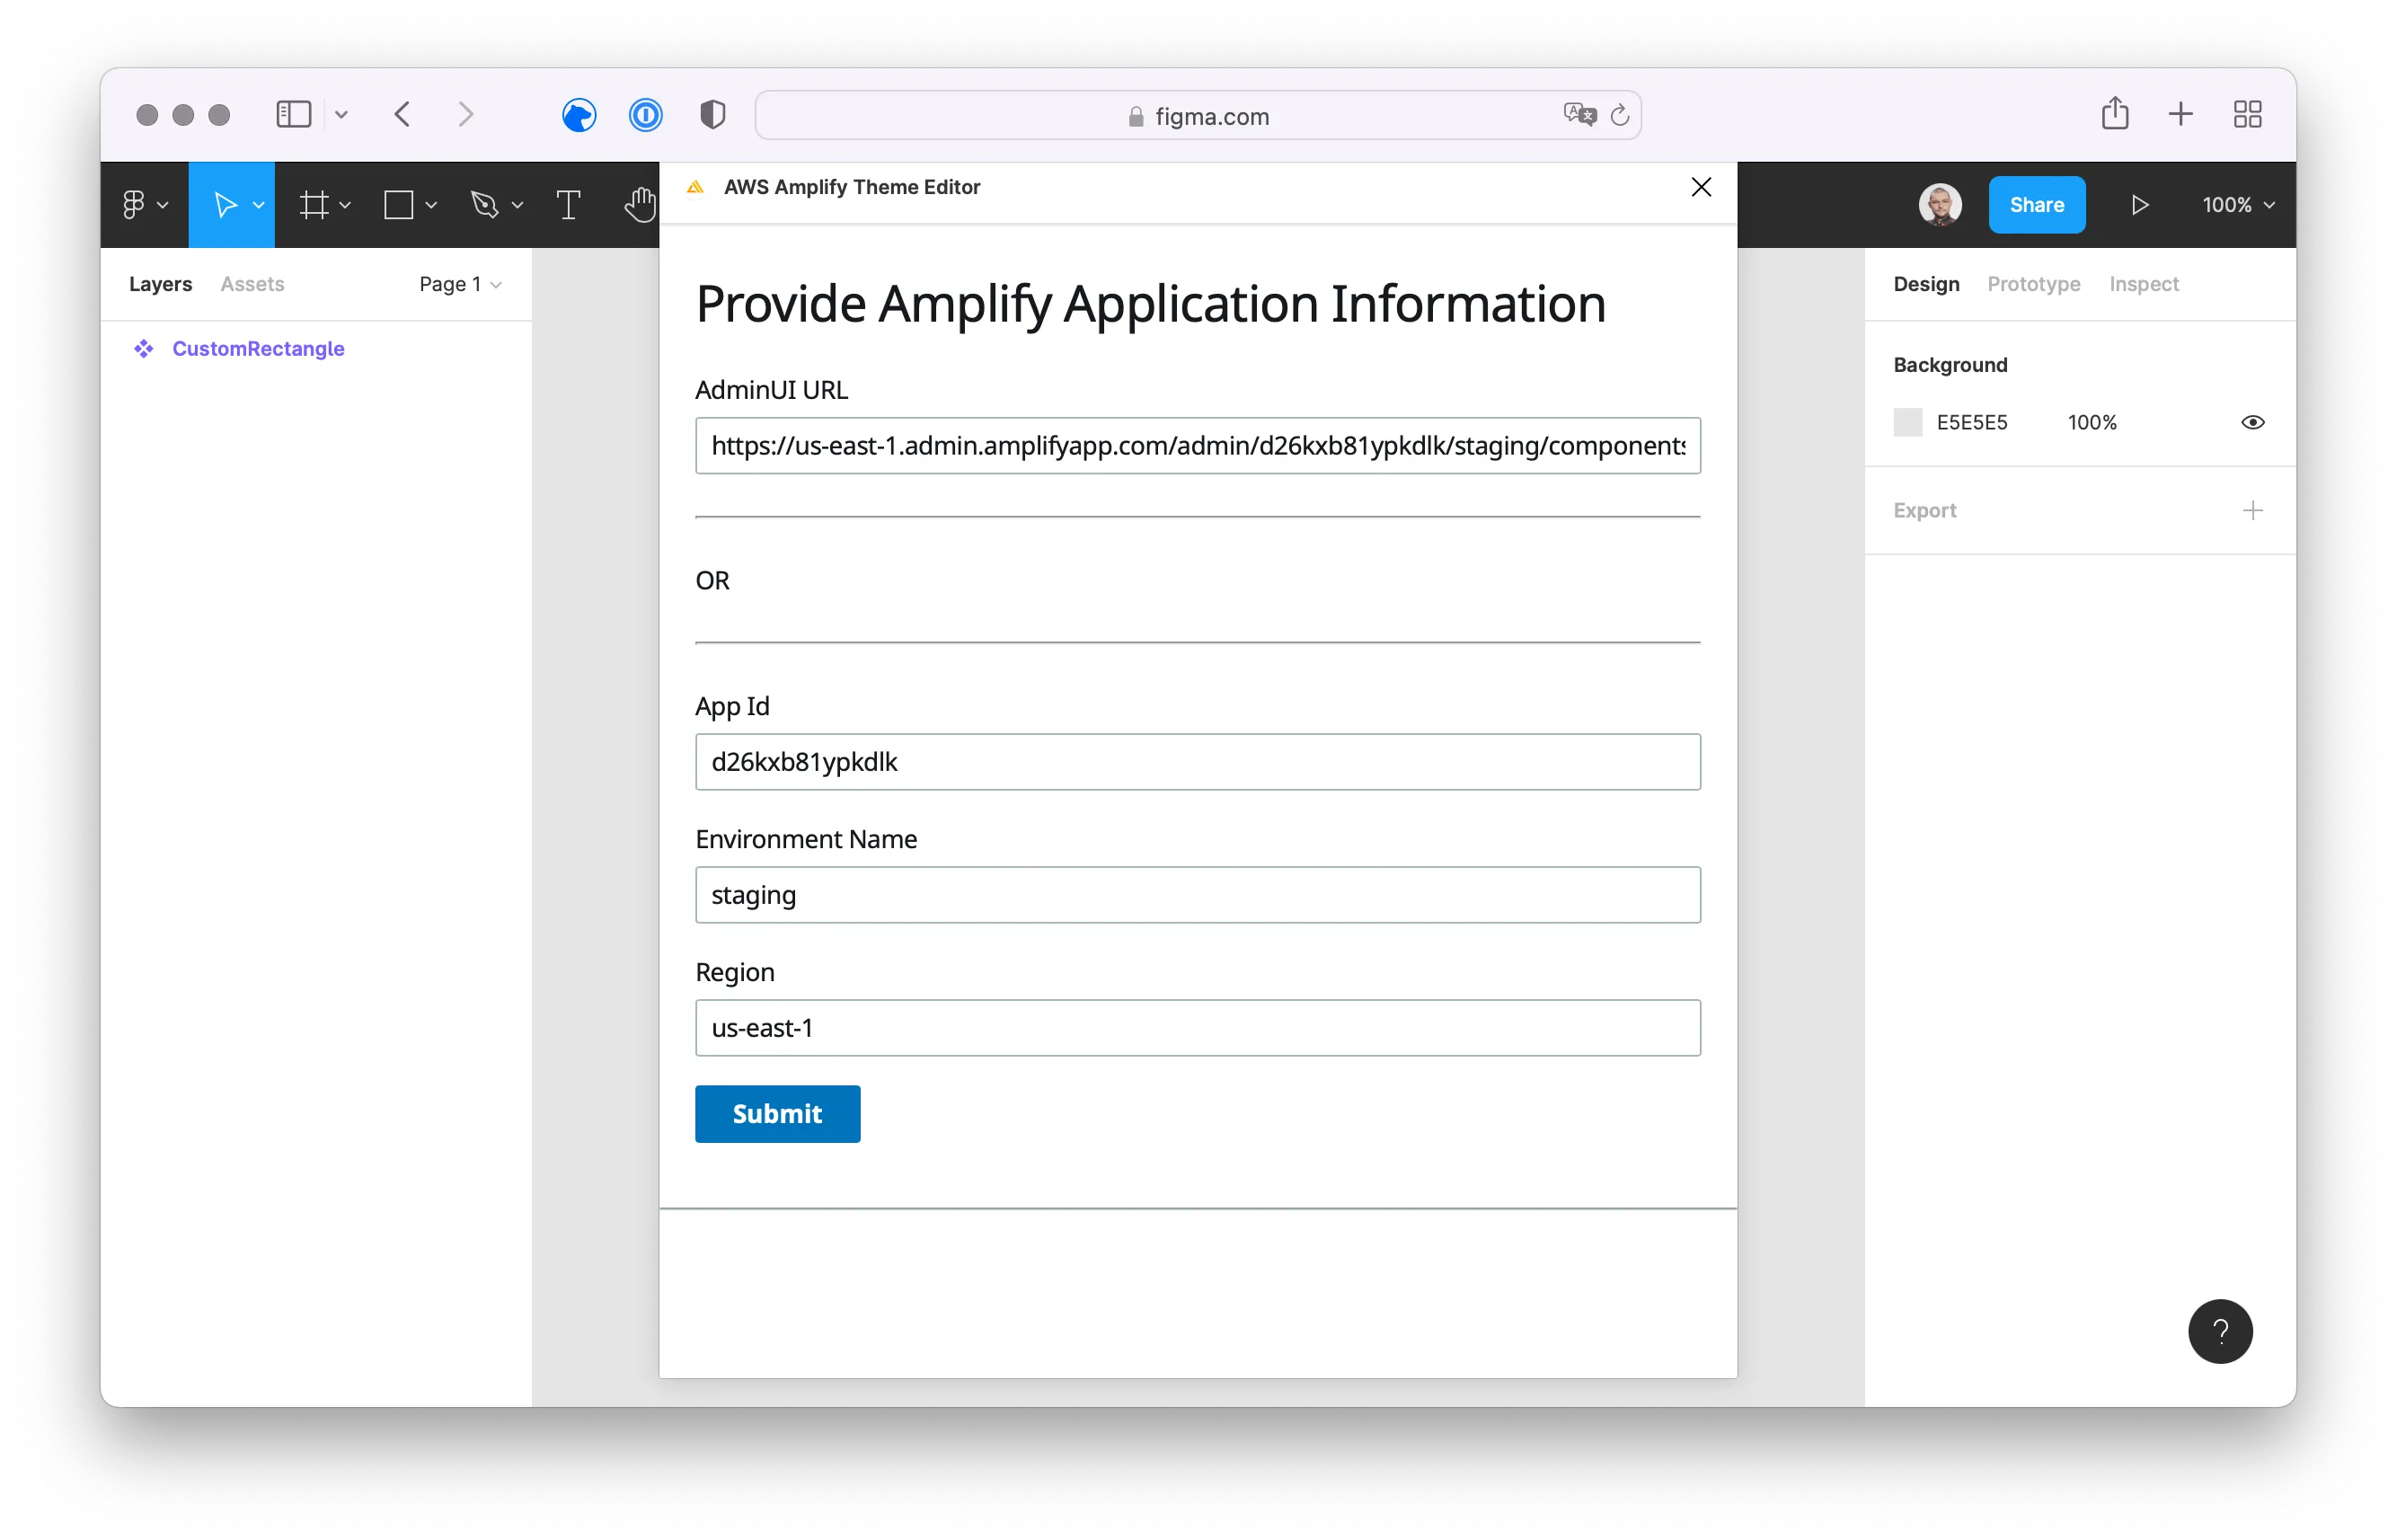
When you click to open the plugin, the AWS Amplify Theme Editor asks for some basic information about your Amplify project. You can just paste the URL for your AWS Amplify Studio instance and all other text fields get filled with the needed data. After submitting the form, you need to provide a username and password.

Access to AWS Amplify Studio
To configure a username and password for AWS Amplify Studio, open the AWS Management Console and navigate to the details of your application in AWS Amplify. Using the Actions button, you can access the project’s settings.
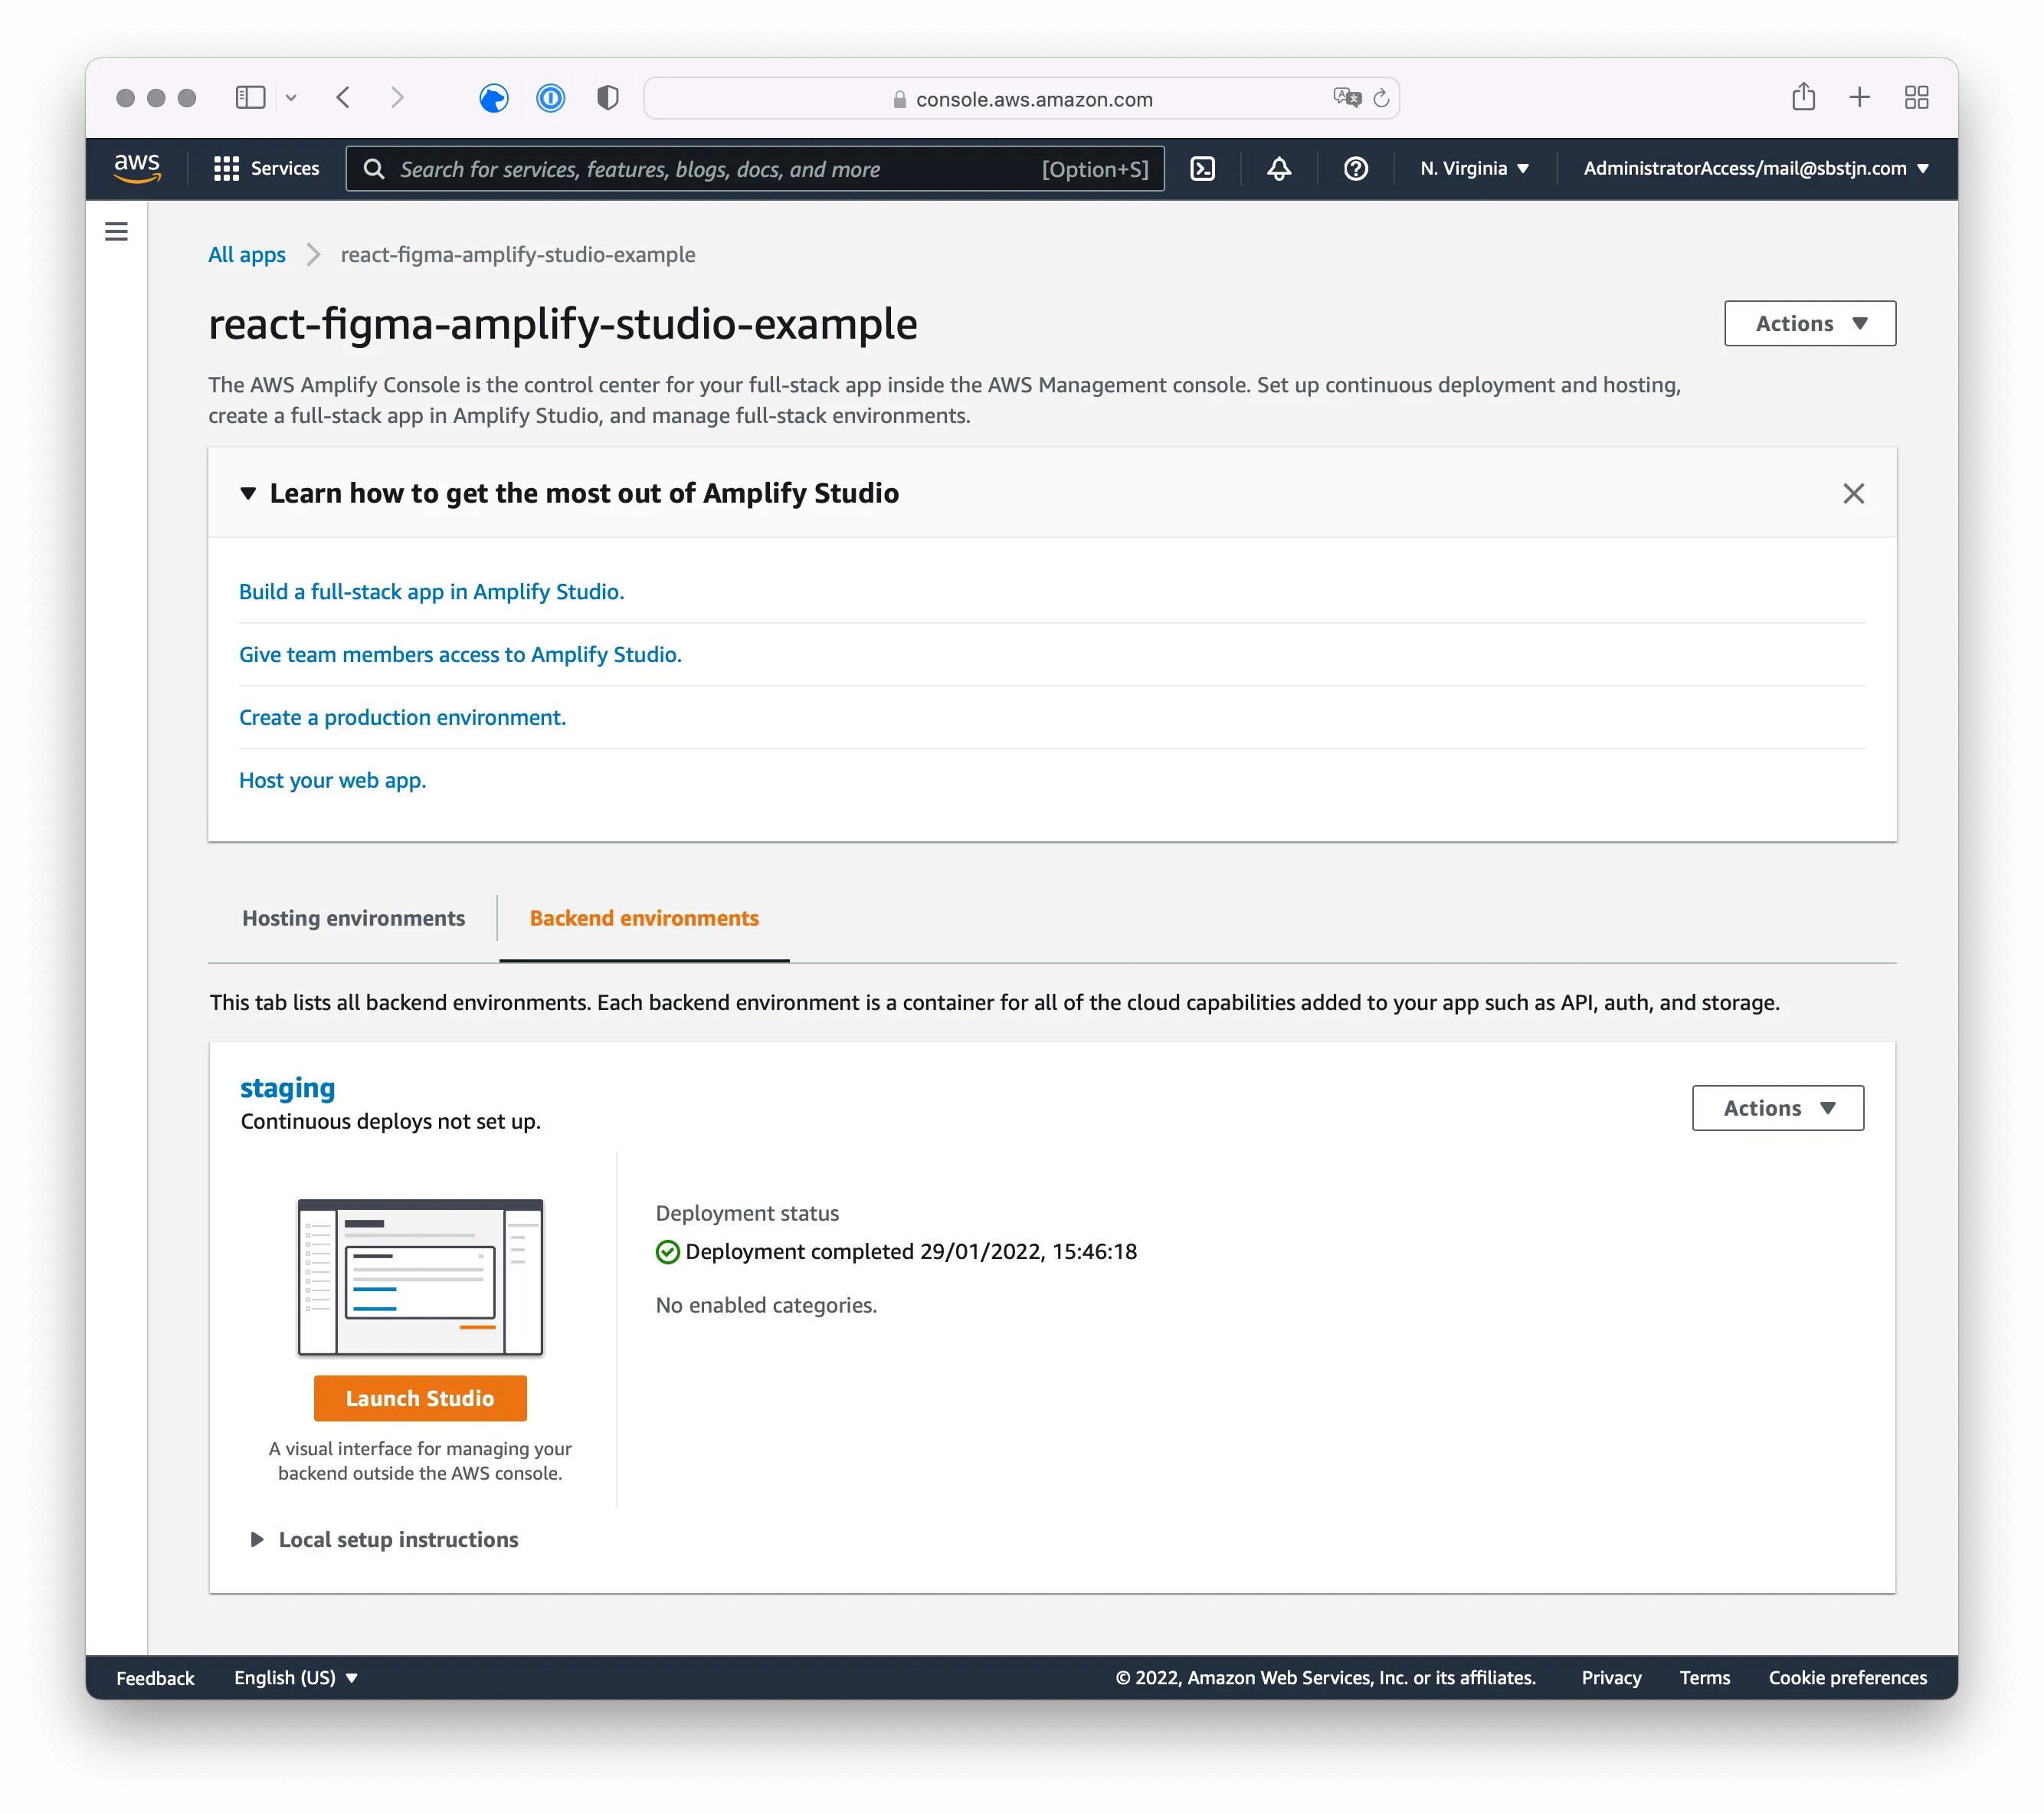
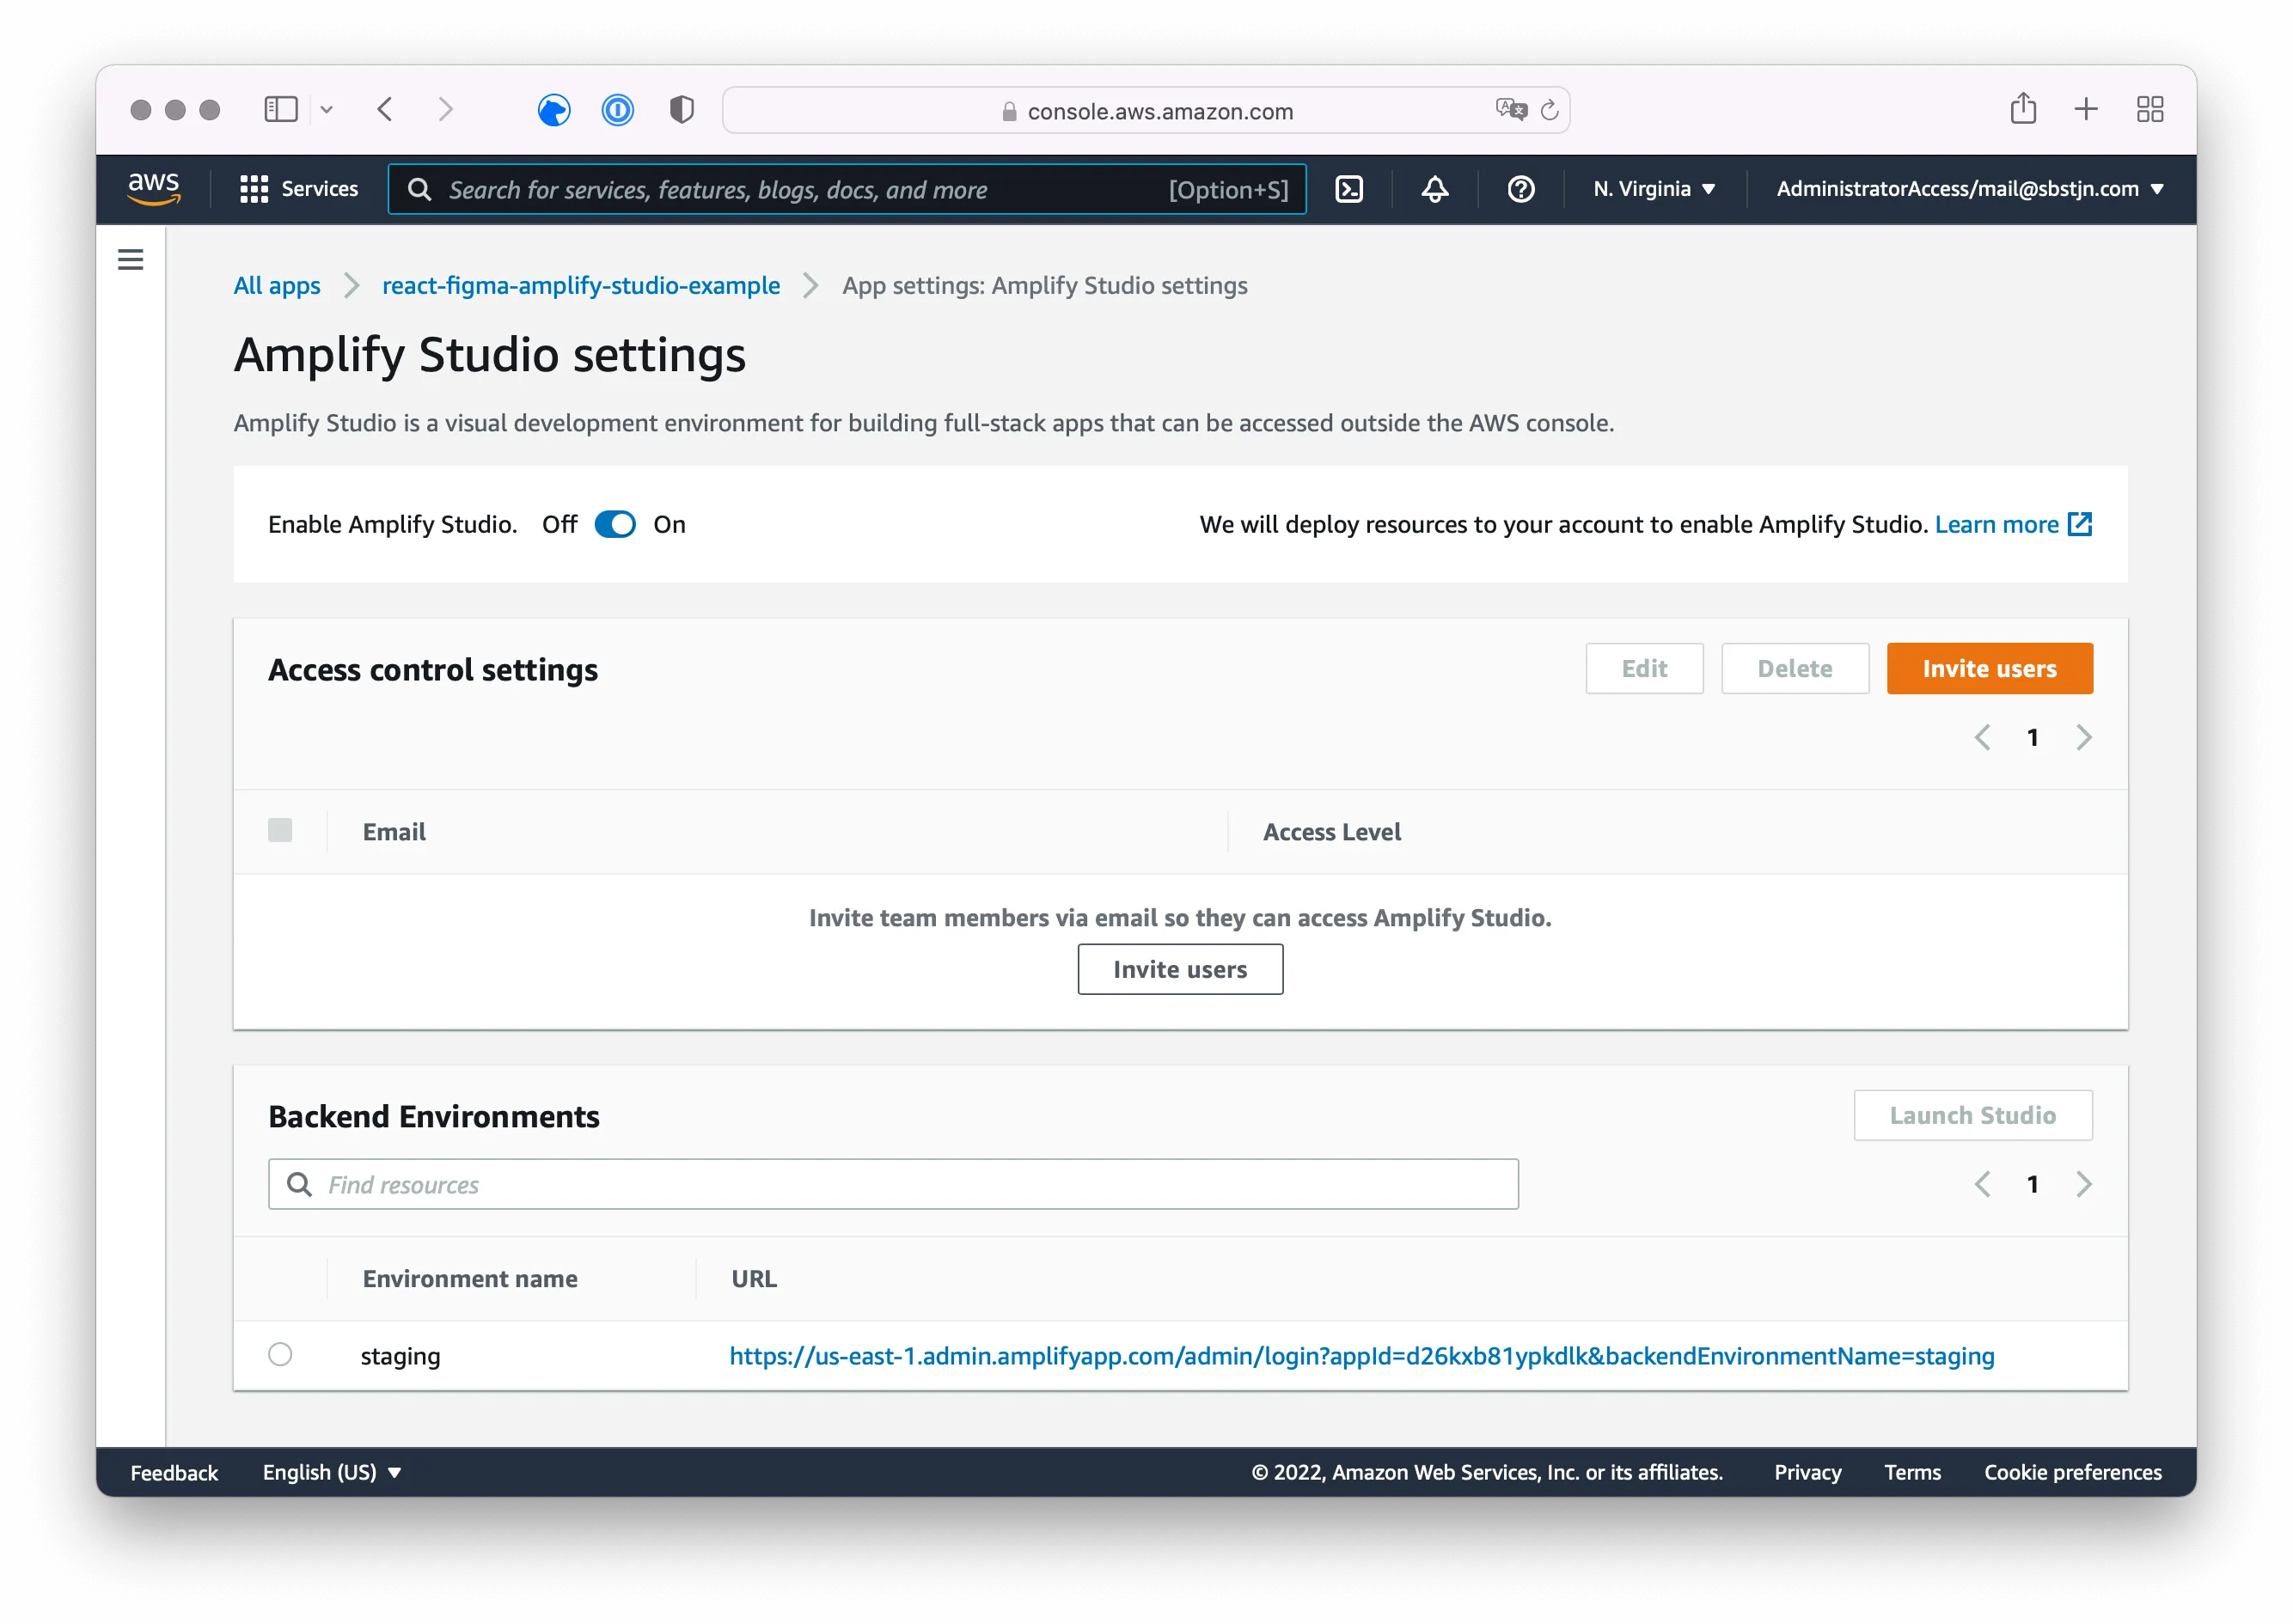
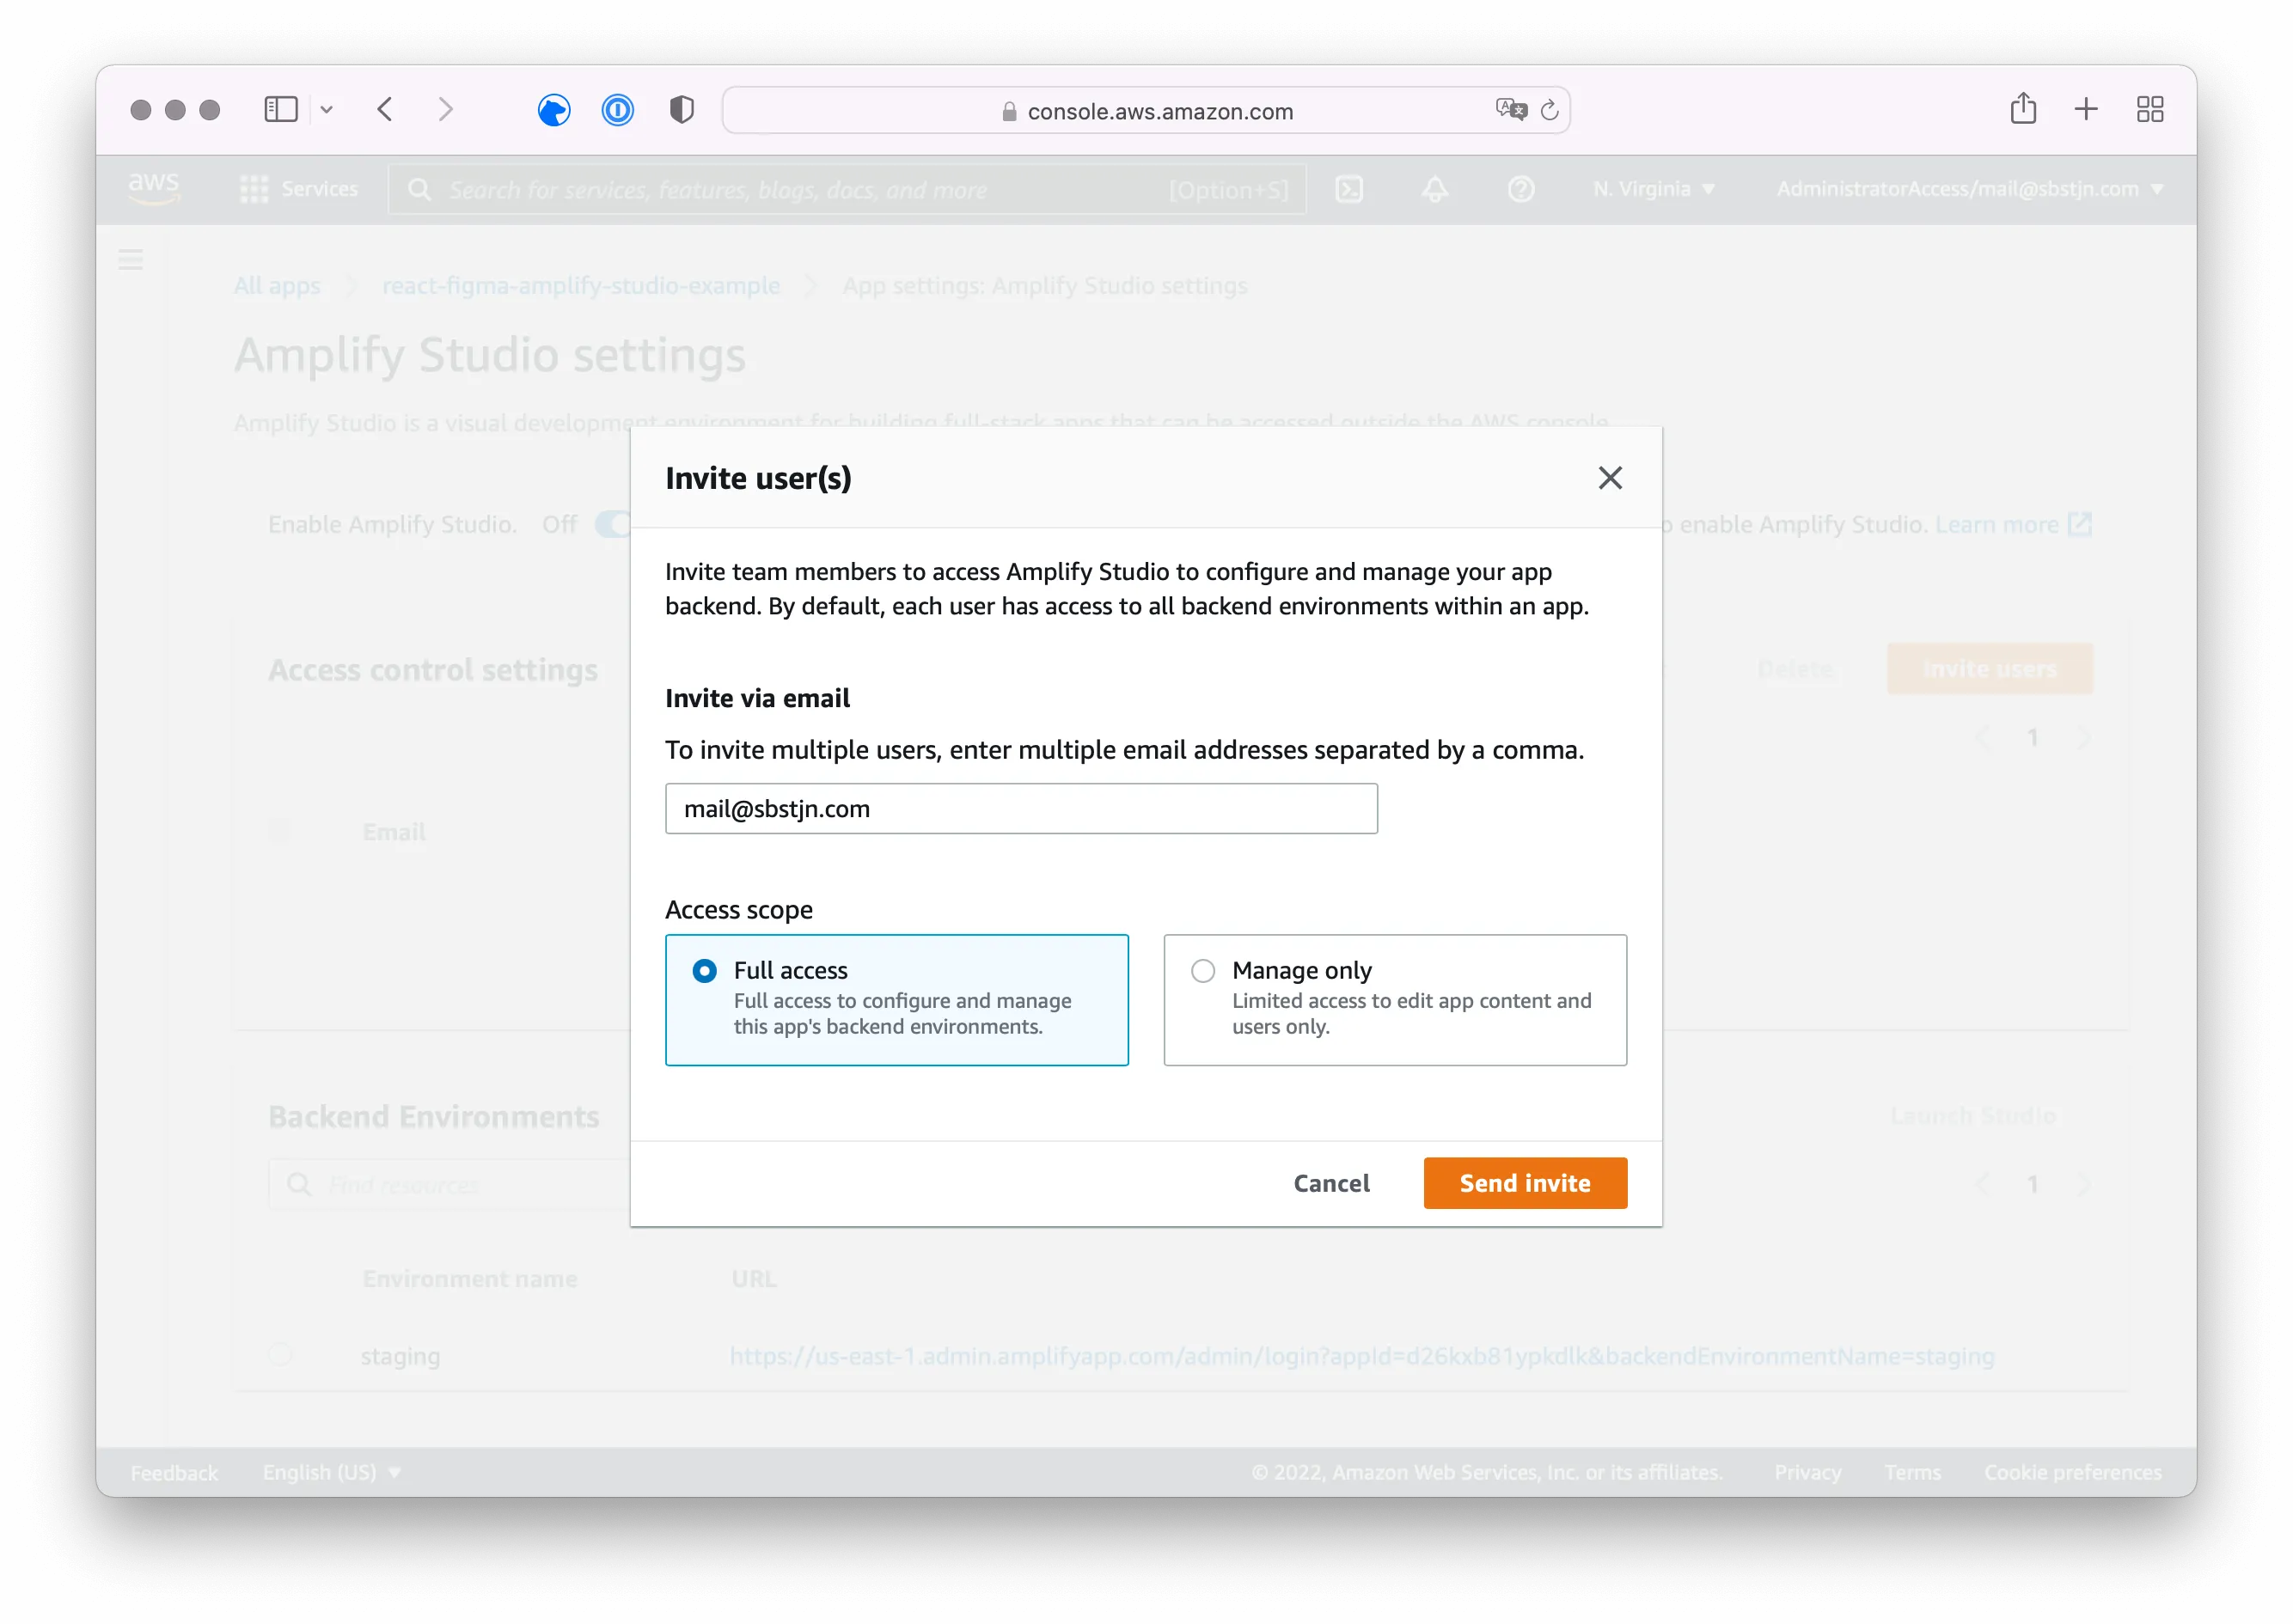
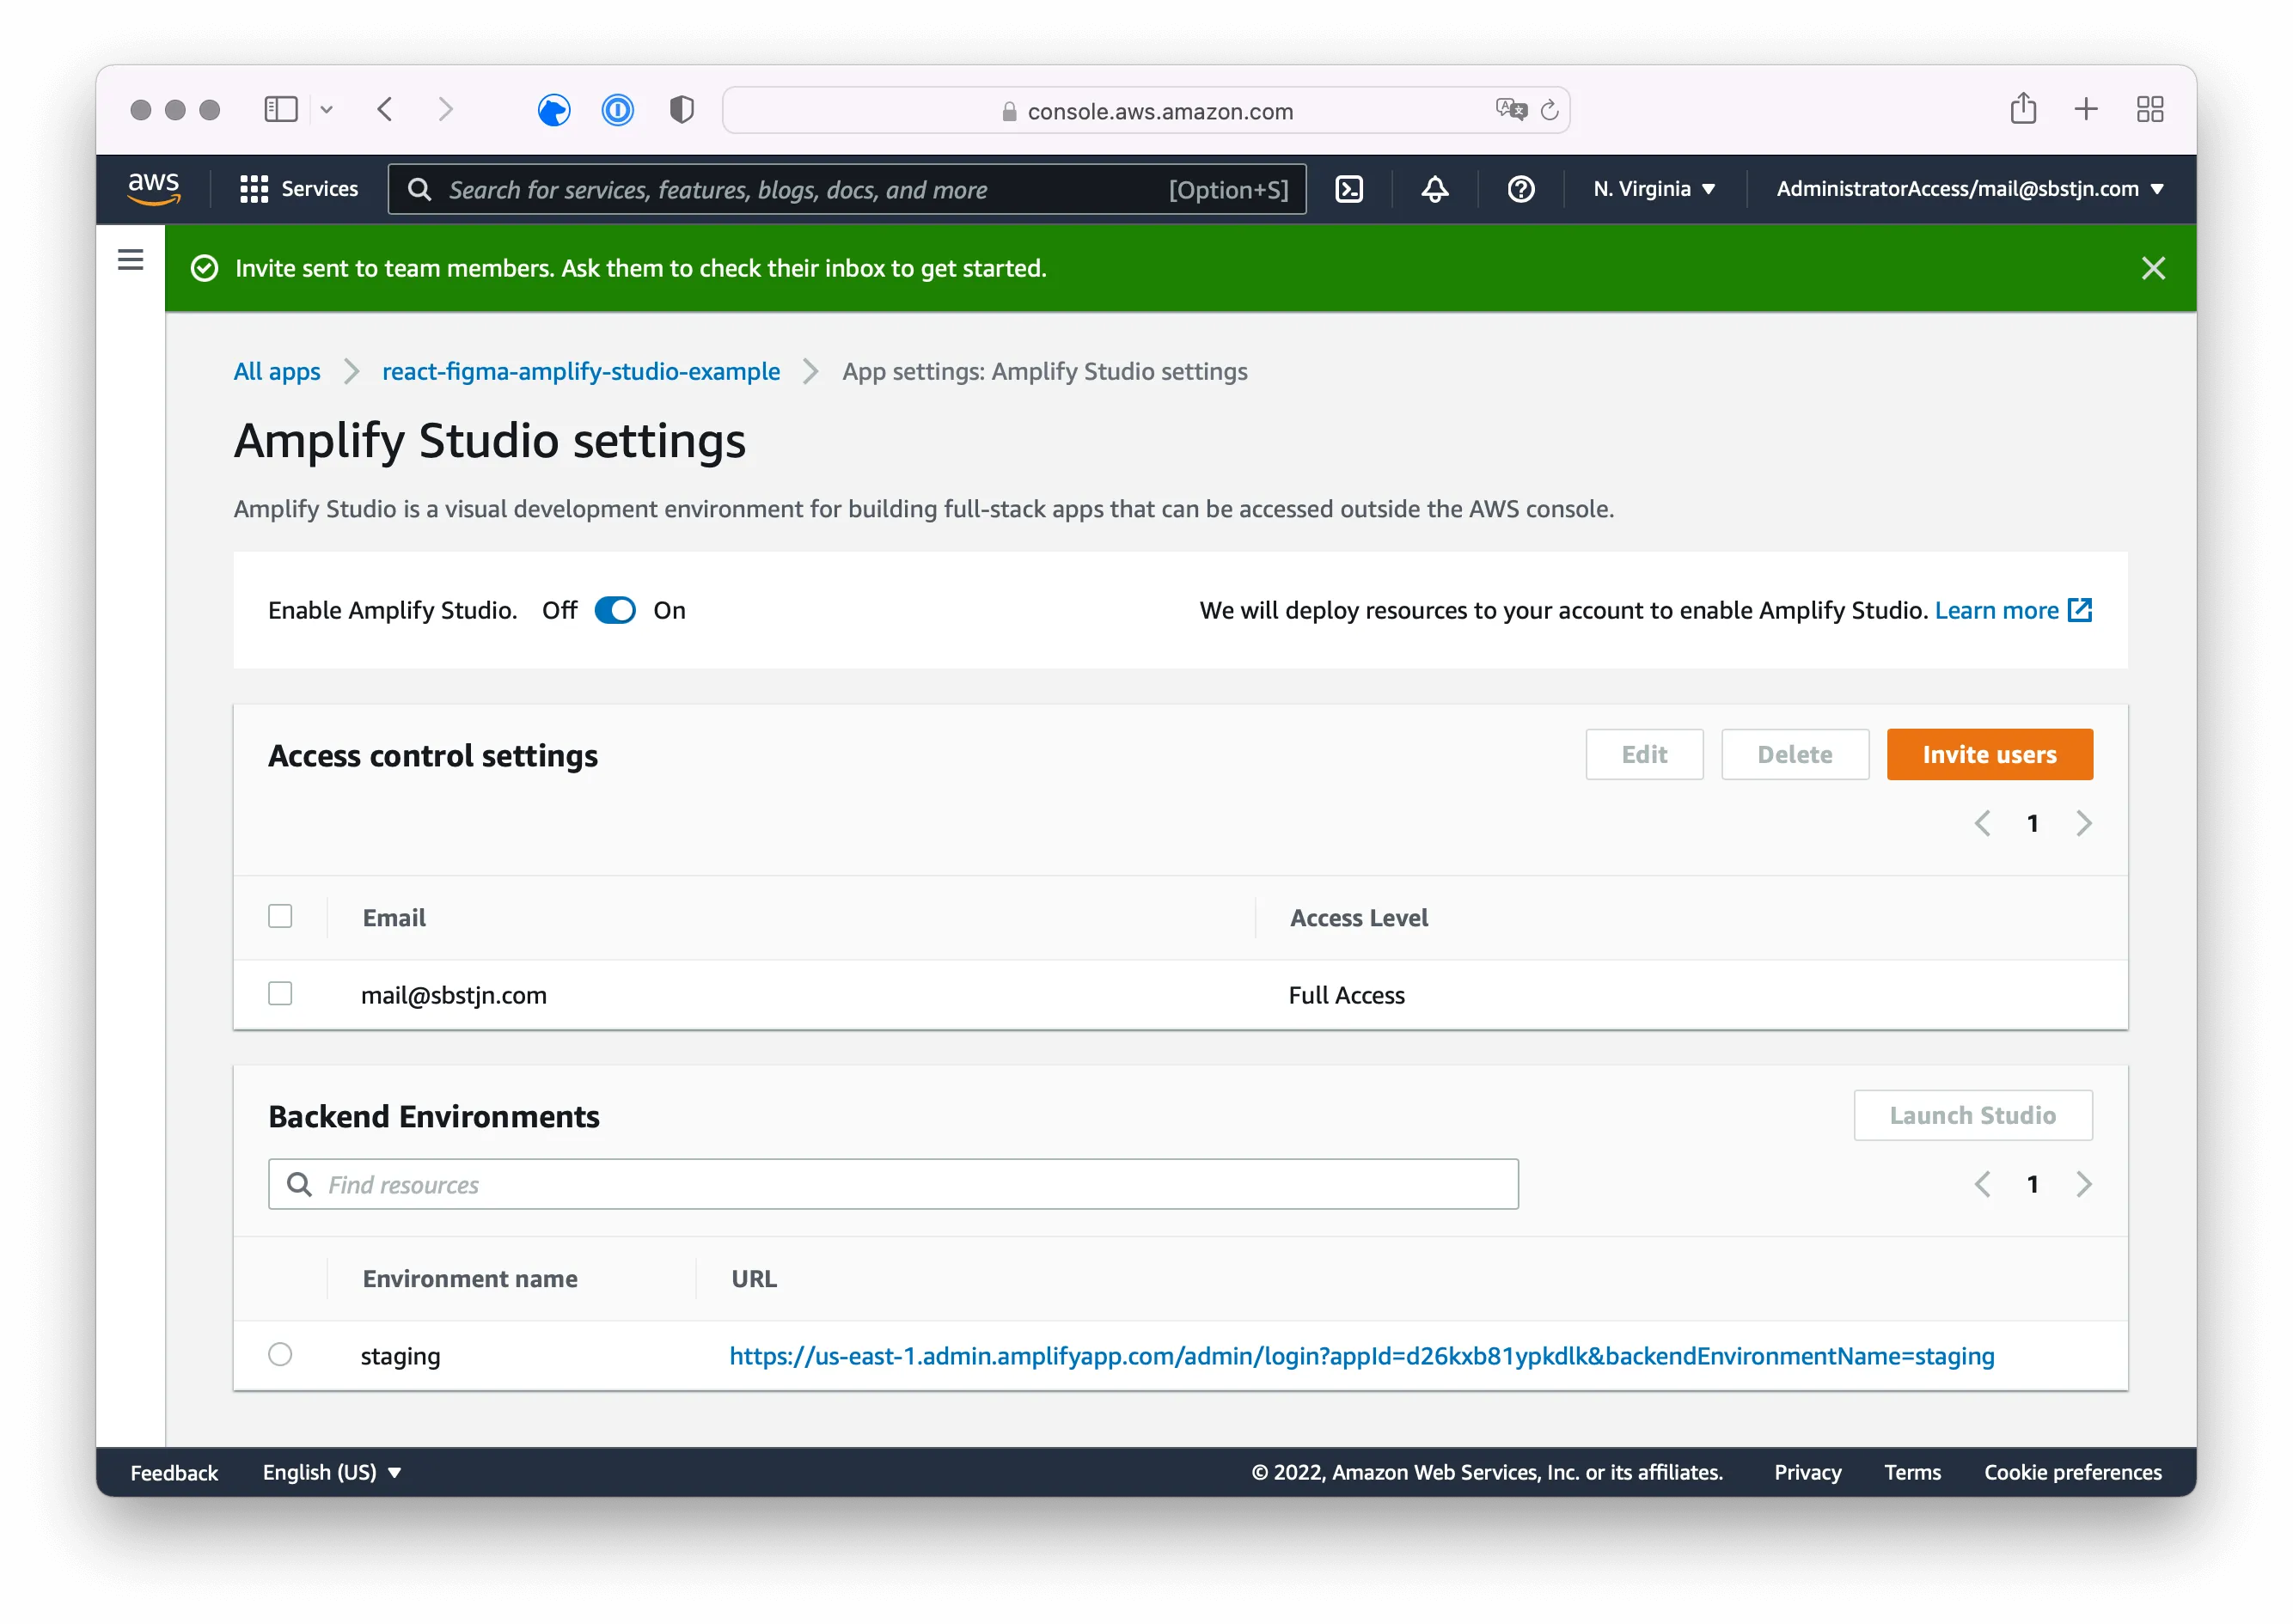
The default settings for an AWS Amplify project contain the default staging backend environment and no users. You can create a new user by simply inviting an email address with Full access to your project. AWS will send an email to the provided address and you can configure a password after accepting the invitation.
You now have all the required information for the AWS Amplify Theme Editor. Switch back to Figma, configure your username and password and sign in to your account using the plugin.
Theme Export
After you signed in with your credentials, the AWS Amplify Theme Editor shows you a list of all theme data. Based on the concept of Design Tokens and System UI Theme Specification, you can configure everything from colors to fonts and your brand’s styling.
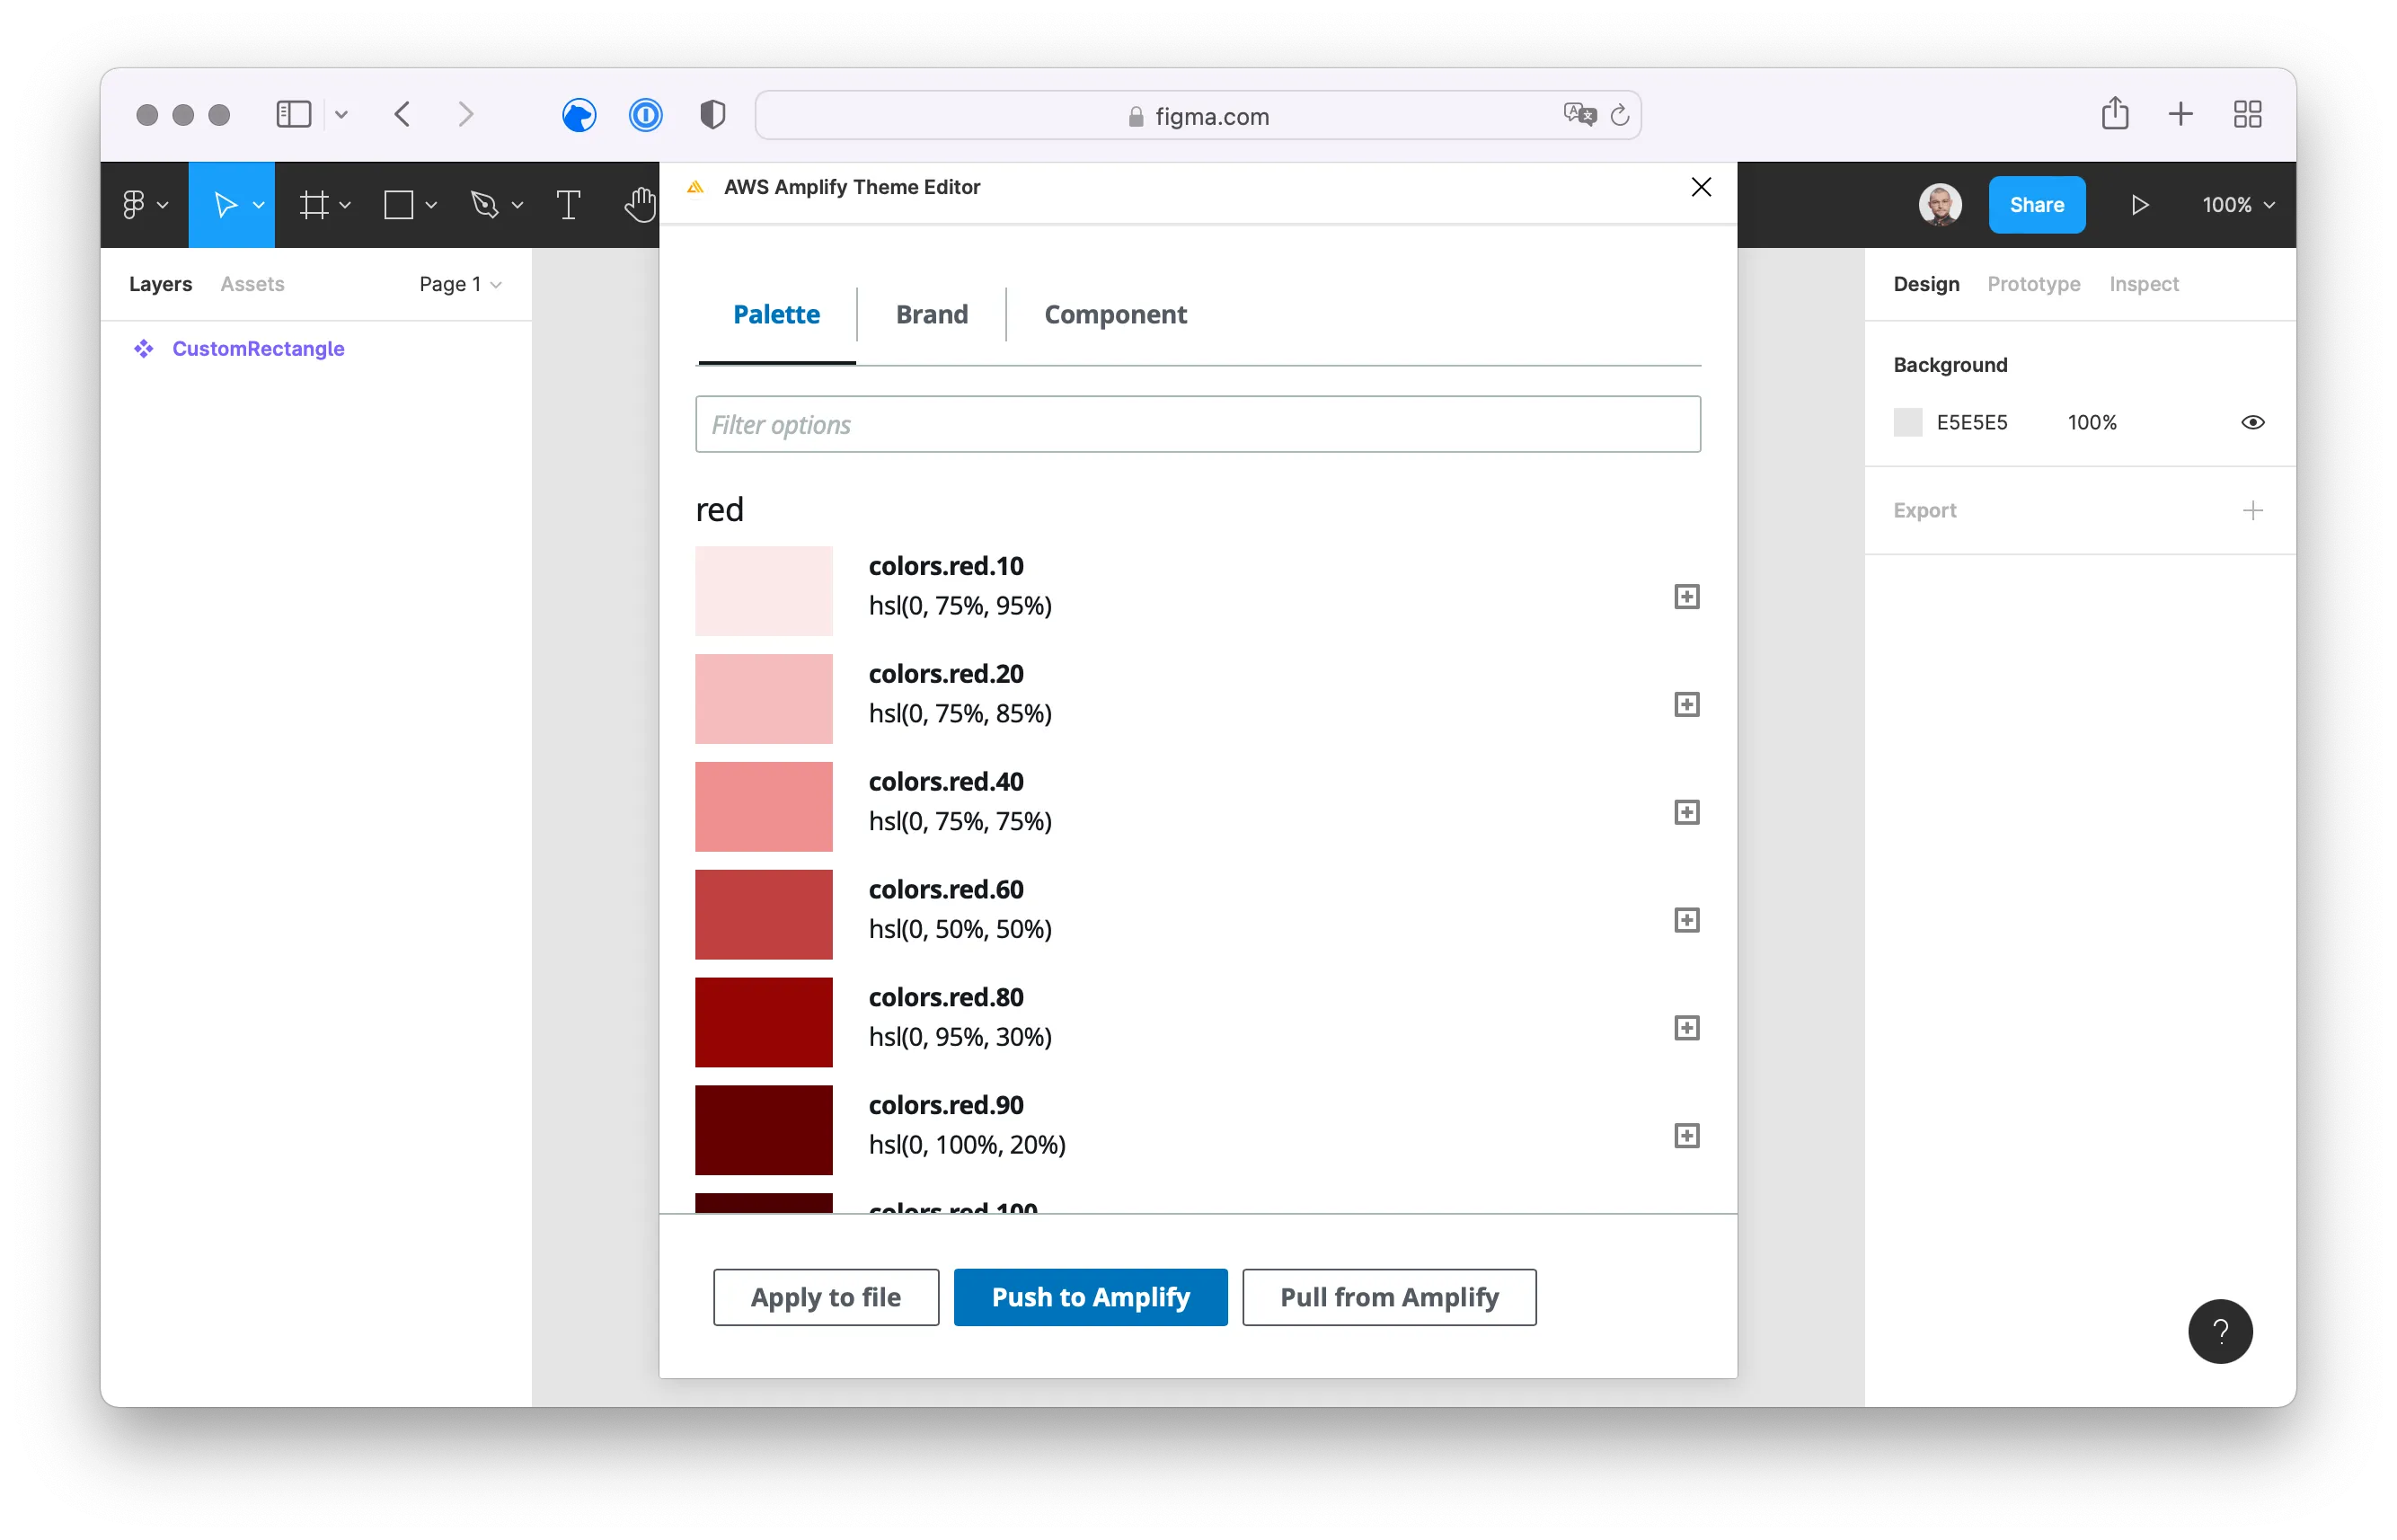
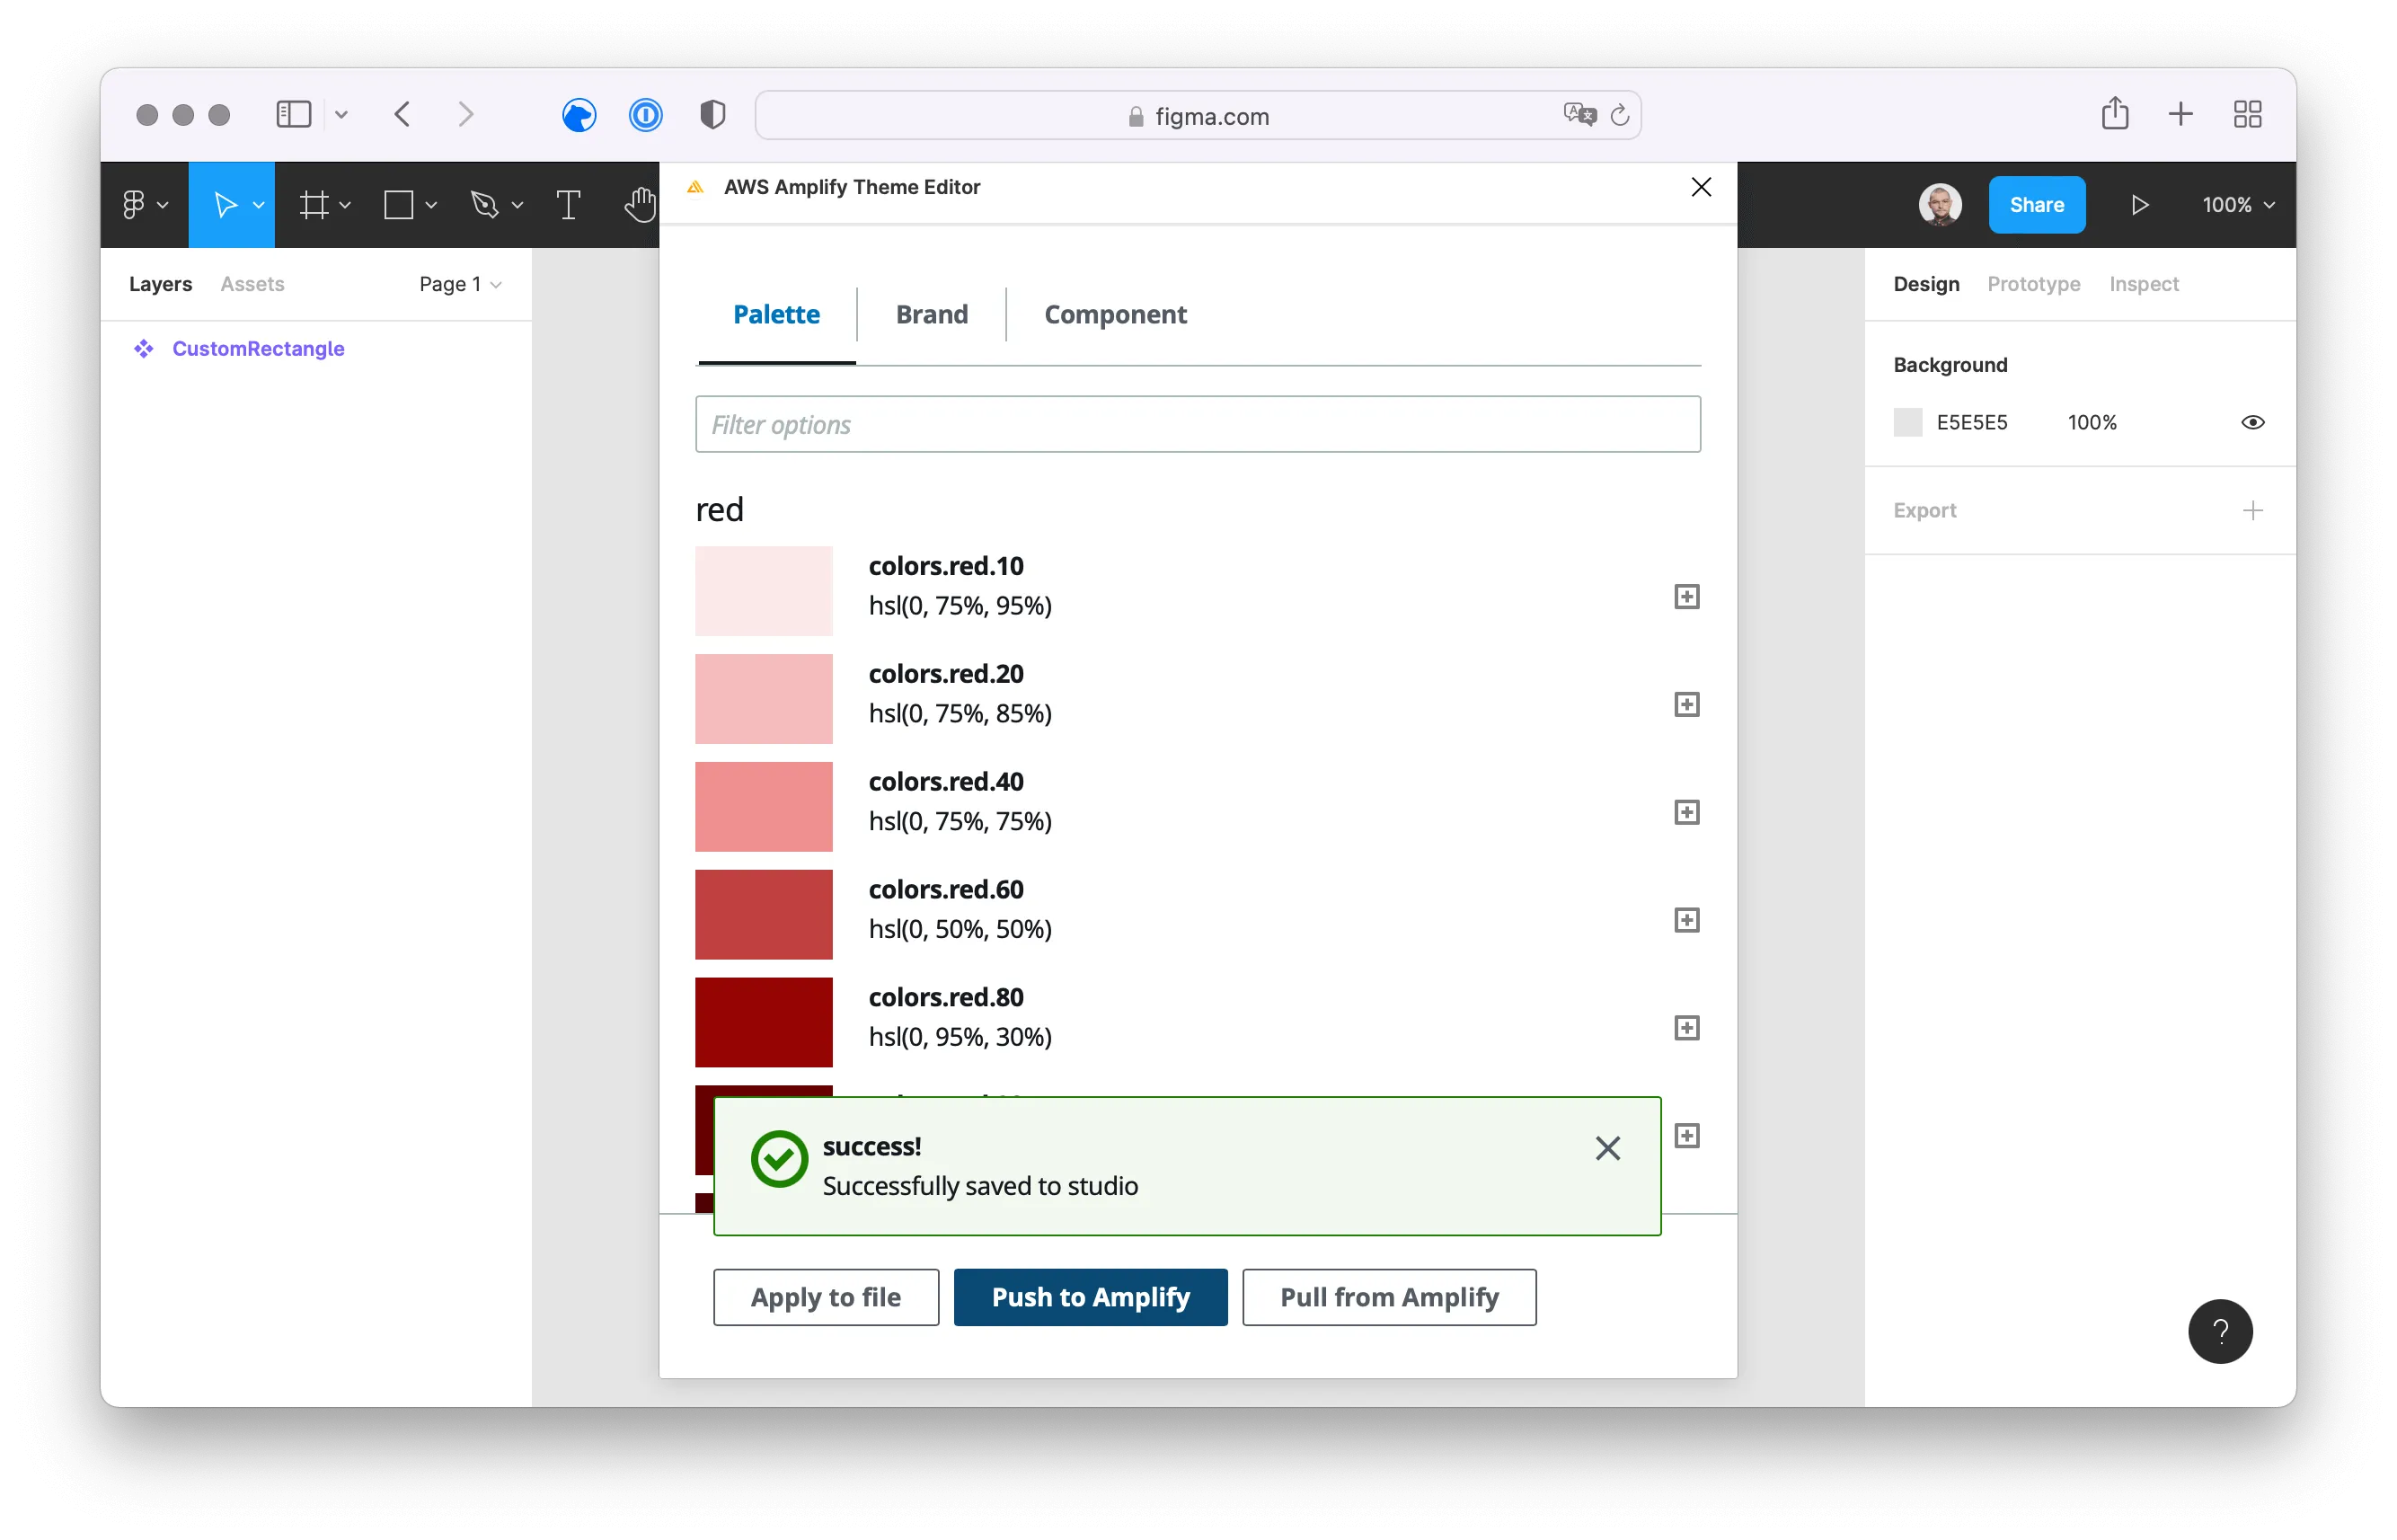
Using the Push to Amplify button, you can submit the data to AWS Amplify Studio.
Download Theme with Amplify CLI
After submitting the data from Figma to AWS Amplify Studio, you can use the AWS Amplify CLI to add the theming configuration to your project. Based on the first guide on how to create React components using Figma and AWS Amplify Studio, this is a default create-react-app using TypeScript.
# Pull the recent changes from AWS Amplify Studio
$ > amplify pull
This will download any updates for your components and additionally create a local file with all theme information in your ui-components folder.
$ > tree src

src
├── […]
└── ui-components
    ├── CustomRectangle.jsx
    ├── CustomRectangle.jsx.d.ts
    ├── index.js
    ├── studioTheme.js
    └── studioTheme.js.d.ts
Theming with Amplify UI and React
To use the theme in your React components, you need to pass the theme to the AmplifyProvider you have used in the index.ts file previously:
/* index.ts */

[...]

import { AmplifyProvider } from "@aws-amplify/ui-react";
import { studioTheme } from './ui-components'

[...]

ReactDOM.render(
  <React.StrictMode>
    <AmplifyProvider theme={studioTheme}>
      <App />
    </AmplifyProvider>
  </React.StrictMode>,
  document.getElementById('root')
);

[...]
In your React component, you can now reference the Design Tokens styles:
/* RandomComponent.tsx */

[...]

import { Text, useTheme } from '@aws-amplify/ui-react';

[...]

function RandomComponent(): JSX.Element {
  const { tokens } = useTheme()

  return (
    <Text color={tokens.colors.font.tertiary}>{children}</Text>
  )
}
This covers all basic steps needed to use theming with Figma and AWS Amplify Studio for your React Application with Amplify UI based on Design Tokens and System UI Theme Specification. Have fun!
Done! 🎉